Archive for ‘Sewing & Fabric’

April 30th, 2013

Pressing Table & Pincushion Caddy

by Julie Hirt

First I’d like to apologize for not getting the Block Rock’n Week 5 posted in time.  I think I’ll be switching to every other Friday now that the weather is getting so nice. We just want to be outside!

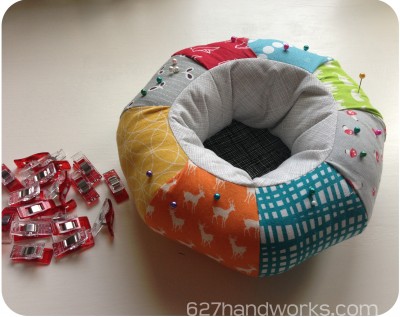
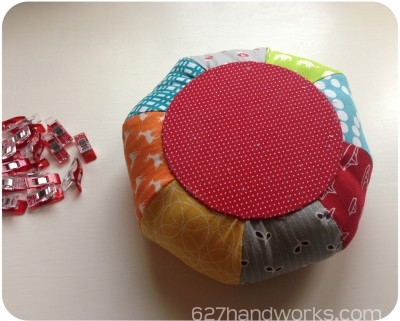
Here is my not-perfect-but-it-will-have-to-do pincushion.

pincushion

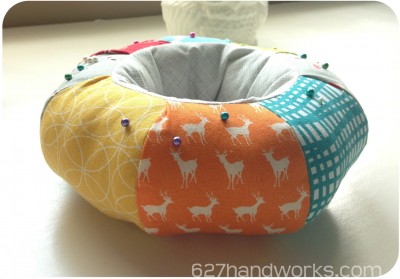
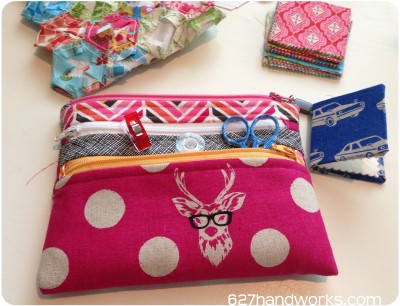
I had spotted pictures of this pincushion  caddy on Flickr and was drawn to it because of the center storage. I’ve been using my Wonder Clips so much more than pins now, but I still need pins. So this is a great way to store them together and then just grab whichever I prefer.

pincushion1

The bottom is nice and flat and the pincushion itself is fairly large.  You can find the pattern in the book Seams to Me by Anna Marie Horner.

pincushion2

My caddy is SO not perfect and has fabric folds and little things that would normally bug the hell out of me. I think I’m okay with it because I really don’t want to make another one!  Plus, I love each of the fabrics.

If you use the Wonder Clips and pins, you should try this caddy – it’s a perfect solution.


Now the Pressing Table:

pressingtable

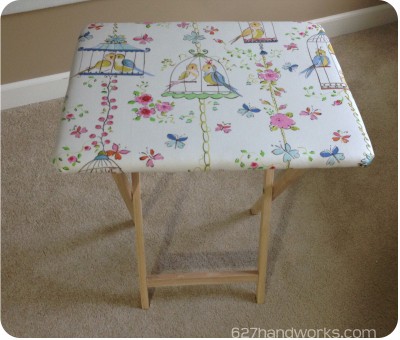
I LOVE THIS.  I’ve been doing so much paper piecing and was getting sick of getting up and down, up and down.  Some blocks have 50+ pieces to iron and it was getting to be a hassle.

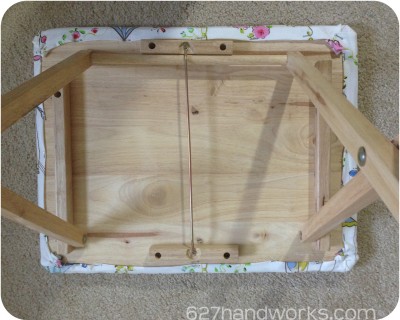
Remembering a blog post from American Quilting I decided to make one.   So happy I did!  It cost less than $10 (Walmart for the table, I had the other materials) and it took less than 15 minutes to make.

pressingtable1

I didn’t use Home Decor weight fabric so I double folded my edges on the underside before stapling. Since the fabric isn’t pulled tightly and I only use it to iron on, I don’t think I’ll have any problems with the staples pulling through.

pressingtable2

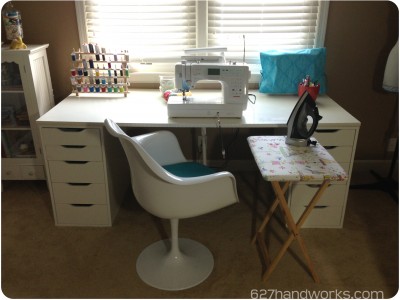
This just made my sewing station super convenient for paper piecing.  Imagine a trash can next to the pressing table and picture me:  Sew, swivel, iron, swivel, cut, swivel, repeat.

If you make a lot of quilt blocks I seriously recommend this.  I have a large cutting and ironing table, but this is great for those little bits.  It also folds for storing!


See you Friday for Block Rock’n Week 5 :)


April 8th, 2013

WIP – Hexy Pillow

by Julie Hirt

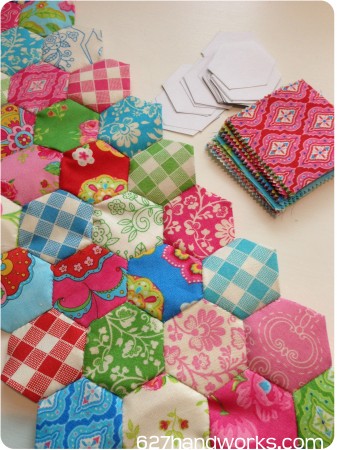
For some reason I feel the urge for English Paper Piecing and decided to chop up a charm pack. I think this is Gypsy Girl from Moda.

hexieproj (2)


I have enough projects I need to be working on right now:

  • Block Rockn’ Blocks needs to be sewn
  • Lucky Stars Block of the Month
  • Sugar Block Club (which I haven’t even started)
  • 4×5 Modern Bee Hive blocks due soon – Eeek!
  • Had planned to make a block a week for The Farmers Wife Pony Club
  • Fabrics are purchased and just waiting to be cut up for a Kaleidoscope quilt

So what am I working on?  A new project.  So much for my “2 projects at a time” resolution.  But aren’t the little hexagons cute?

I have a dozen or so charm packs floating around and wanted to use one, but I didn’t want large hexies.  Playing around in Illustrator I made a template to the size of my liking.  They are perfect sized hexagons for 2.5″ fabrics.  Just take a charm pack and cut it in half, then in half again.  You’ll have 168 squares.  OR use a Moda Candy pack – they are precut to 2.5″ squares. Perfect!

Download the Charm Pack Hexagon PDF Template.  You’ll be able to make 4 hexies per charm.

hexieproj (3)

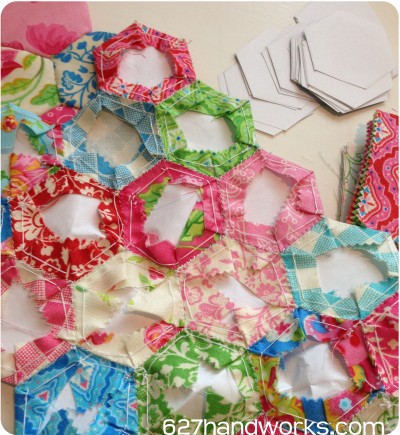
How do you baste and make your EPP’s?  Everything I know I learned off YouTube videos (really), so I don’t even know if this is the correct way.  I like that I don’t have to undo the basting thread – I can just leave it attached since the thread doesn’t pierce through the front.  One less step, whether it’s right or not!

hexieproj (1)

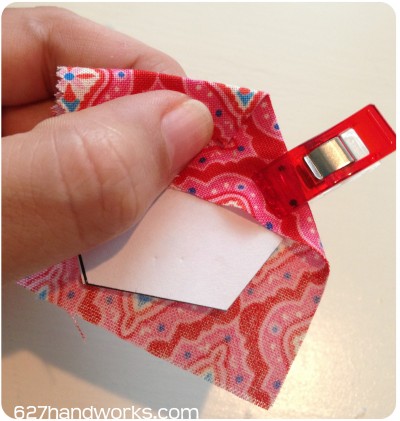
I also found another use for the Clover Wonder Clips.  These things are so awesome.  Rather than pinning my paper to keep it from slipping, I just clip a corner and go.  Saves me a lot of time pinning.  Well, seconds – but it sure seems a lot easier.   AND the clip holds together my papers when I store them.

hexieproj (4)

After I started making a couple of hexagons I realized my Triple Zip Pouch is perfect storage for an English Paper Piecing kit!  I can also throw it in my purse and everything stays fairly organized.

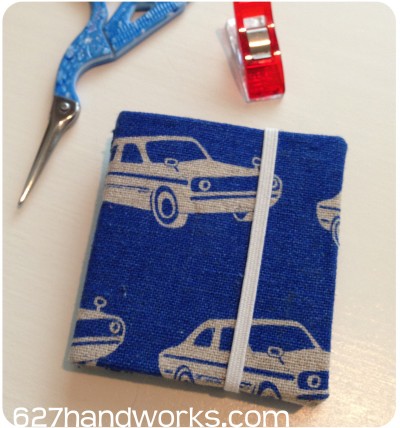
minineedlebook (1)

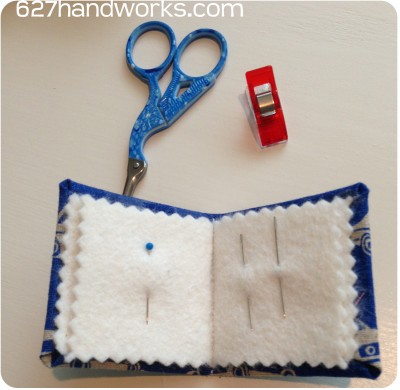
For some reason I have scatterbrain lately.  I didn’t like my current needle book for my EPP kit, it seemed too large and didn’t fit right in my little pouch.  So, I got side tracked again and made a 2″ hard back needle book. It’s perfect for what I need.

minineedlebook (2)

How do you EPP?  Any tips for me?  How in the heck do people make full size quilts like this?  I’m about a quarter of the way done and I worked on it a LOT this weekend.


March 24th, 2013

Oilcloth Lunch Bags

by Julie Hirt

Why did I make these?  Because I needed an excuse to buy some oilcloth.

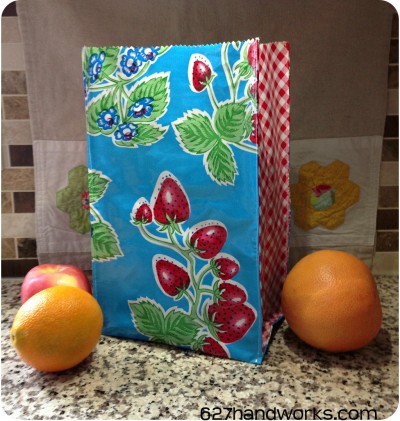
blueoilcloth

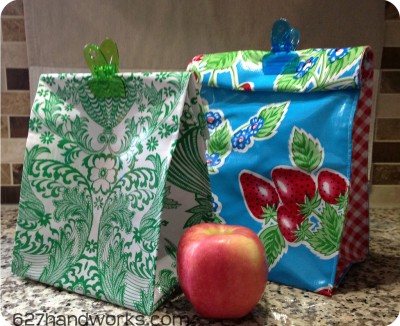
I really didn’t have a use for oilcloth but I was desperate to buy some.  I made the blue and red bag using this pattern. You can choose different prints for the side panels and just use pinking shears to finish off the top.

greenoilcloth

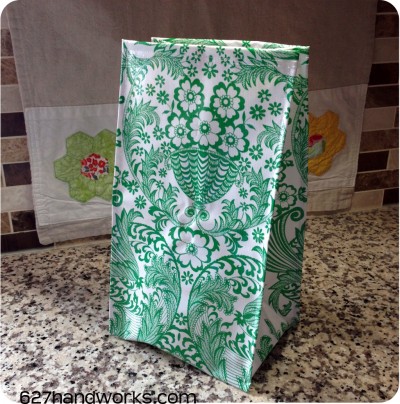
The green bag was made using this pattern. This one is closer to the true size of a paper lunch bag and has a finished top seam.

oilclothbags

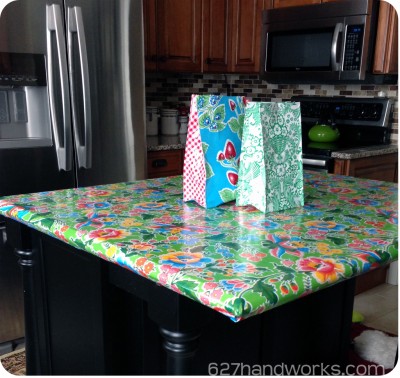
And… here are my oilcloth bags on my oilcloth covered kitchen island. I know, a bit overkill.  I put the cover on our island a few weeks ago because I am *desperate* for spring. I need to see some green!  It’s March 24th and we just got 8 inches of snow. Go away already.

The tabletop was easy to cover – just cut your oilcloth to size with a few inches of overhang, then tape underneath.  I’ve read the painters tape will hold the fabric in place for months with no problem.  The actual top is wood and this is so much easier to clean!  Now I have an excuse to buy more designs so I can change this out.

oilcloth

Off  the top of my head, I think these bags are good to:

  • use as a lunch bag
  • store crochet or small yarn projects
  • organize miscellaneous crafts
  • use as gift bags

Maybe my friend Chelsea at Whatcha Makin’ Now would like one? I owe her this and more after she made me these freakin’ amazing Jell-O Sugar Cookies for my birthday.

Any other ideas for oilcloth?


March 23rd, 2013

Quilted Parisville Pillow

by Julie Hirt

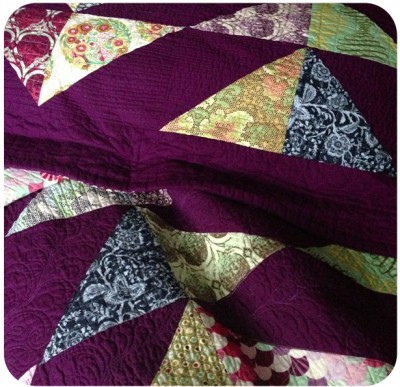
Last night I decided to make some pillow shams to match my big purple quilt that was recently finished.  After making the shams I found a Parisville jelly roll!  Holy crap, I forgot I had that.

tulapillow

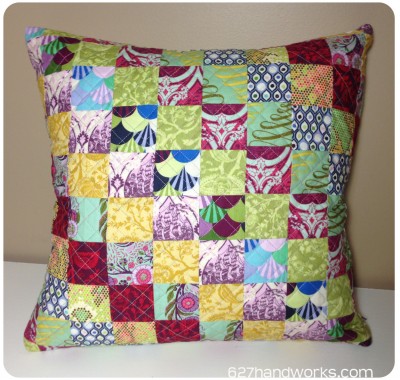
So I decided to make a patchwork pillow to match the bedding.

Recently I was at Tuesday Morning and they some truly hideous pillows on clearance for like $10.  When I realized one was down filling, I snatched it up just for the insert.   It’s a 20″ form and it’s perfect and squishy.  Now that I have 2/3 left of a jelly roll I think I’ll keep hitting up Tuesday Morning for a discounted pillow.   I’ll make an army of them for the bed!

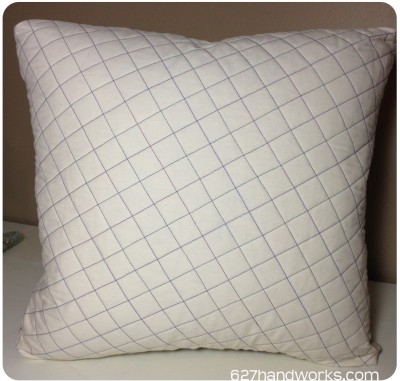
tulapillowback

I stole the Scrappy Trip Along idea and just made one block that was 10 strips wide.  Worked out perfectly for the size.

tulapillowcorner

I did simple quilting  on the front and back. You can’t tell in the picture but every other row the thread changes from navy or purple.

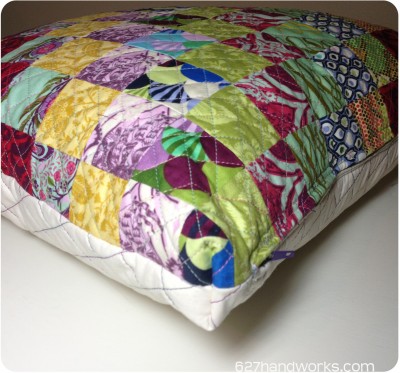
There is a 1″ box on the corners.  For some reason pointy pillows really bug me. Like the corners totally distort the shape or something.

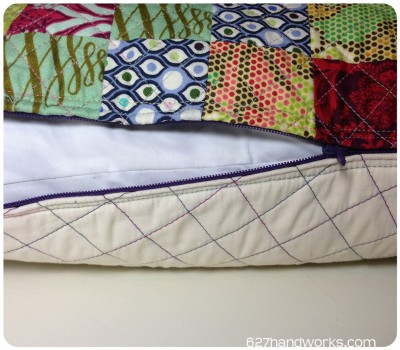
tulapillowside

Thanks to my recently acquired zipper knowledge (Weekender), I was able to add a zipper!  This is a nice change from my standard envelope back. I feel fancy!

Now I’m ready to wash this up and get that crinkly quilted goodness.

The shams – I had a dozen or so left over blocks  from the quilt and wanted to *quickly* make simple shams.  That turned into quilted shams with pieced backs and 2″ flange.   Oy.

I’d like to post more pictures but the lighting in my room is too dark and I can’t take them outside because it’s SNOWING. Again.  Blech.   I posted this on Instagram this morning, so you can kind of see what I did.

sham

It all sort of blends together but the sham is on top of the quilt. Each one has 2 ‘geese’ with borders. I really wish I had thought of making these before I sent the quilt off.  Then they would have those awesome quilted feathers too. Oh well!


March 11th, 2013

Oopsy, what happened?!

by Julie Hirt

Fabric. Lots and lots of glorious fabric. That’s what happened.  Sunday I tricked talked Paul into going to Sarah’s Fabric in Lawrence. Ohmygawdohmygawdohmygawd, that store! I could have been there all damn day.  Those of you familiar with the store know what I’m talking about. It’s like walking into an online fabric palace, but in real life.  You get to see, touch, and most importantly, BUY all the fabric you want.

I decided to get half cuts of everything since it’s for my stash, then went running wild (almost literally) through the store stacking up bolts on the cutting counter. Just lookie at all my goodies!

photo 3

photo 2

photo 5

Just when I thought I was done… I hit the back corner of the store and…. *cue heavenly music*… I spy Echino, linens, lots of imports!  I think my heart skipped a beat.

fabric (5)

You’d think living in Kansas City I’d have some decent fabric stores in the area. I guess they fit the bill for some people, but usually I have to dig around a while to find the fabrics I’m wanting. Especially if it’s a newly released line or anything modern. I can be a bit of a snob about it.

Luckily Lawrence, Kansas (Rock Chalk Jayhawk, KU!) is only a 40 minute drive.  And well worth it.

That trip alone made for an awesome haul, but I had also received my goodies from Fresh Modern Fabric on Saturday. These are 1/4 yard cuts (not fat quarter) to use for a Kaleidescope quilt.

photo 1(1)

Between all of this fabric goodness and finishing up my Weekender Bag, I had a great weekend!  How about you?


March 10th, 2013

Weekender Bag

by Julie Hirt

I’ve joined the ranks of the “Weekender Elite”. YES! *fist pump*  Amy Butler‘s web site that should offer a Certificate of Achievement or something.

I don’t even know where to begin, so let’s start with pictures.  Lots and lots of pictures.

Weekender (10)

I will be changing the zipper pull at some point. Just don’t have anything right now.

Weekender (4)

Quilted side pocket that matches the main panel quilting.

Weekender (1)

Extra D-rings for an optional shoulder strap.

Weekender (2)

PIPING!

Weekender (5)

The pattern didn’t come with interior pockets – what kind of bag doesn’t have those? I added a zipper pocket, large side panels and key fob holder.

Weekender (9)

In love with the Architextures fabric collection.  Carolyn Friedlander is a genius.

Weekender (7)

Zipper pocket – I attached a little strip of selvedge too, it’s from the pocket fabrics.

Weekender (8)

Additional magnetic buttons for the large side pockets.

Weekender (11)

I just love it.  Will I make another? Probably not. At least not until I forget all about that lining.  I was doing so well… the piping wasn’t a problem at all. Not even sewing through all those layers. (another *fist pump*)  I read horror stories about this step so I read up a lot, took precautions and went slooooow.  Not bad at all.

I was so close to being done and I thought, wow – people are such wimps! This bag wasn’t all that bad, just really time consuming. I was already in the beginning celebratory stages, then WHAM! Lining.

The lining pieces were prepped, the inside zipper and little pockets attached and so far, no major problems.   Then the pattern states you piece it together like you did for the exterior.  Piece of cake, right?  WRONG.

The bag did take 14 or 15 hours, but the last 3 were just putting that damn lining together.  What the shit man?  It did NOT line up. I had extra fabric that I didn’t know what to do with.  Like inches of it!  Not enough to fudge or make it work.

The lining called for a 3/4″ seam and I don’t know if that was my problem or what.  After ripping stitches a few times I gave up and thought “F – this!”.  Really, who’s going to see the inside besides me? And you, if you’re reading this.  So don’t look too closely.

One more not-so-teensy thing about the lining. I’ve read so many reviews where people whined about hand stitching the lining and I always thought they were big babies. I don’t love hand stitching but it’s not the devil.  Well, stitching in the lining just flat out sucked. I apologize to all of those people I thought were big babies. You were right.

If you want a bunch of tips and tricks, there are a plethora of them out there on the internets.  I’ll just list some of my additions and everything I want to point out in case my future self is ever crazy enough to make another.


  • The pattern is really well written and overall (not counting the lining) I had no issues.
  • Needles broken – ZERO!  Can you believe it?  I think it’s because I was stitching like a snail.
  • I used Oh, Fransson’s quilting method for the side panels, and all 4 side pockets.  That did take up some time.
  • Added piping to the little side pockets and my interior pocket. I had so much leftover I wasn’t about to waste it.
  • Quilters tape for the piping posed problems for me.  Sticky needle!  I won’t use it again.
  • I actually liked the piping process – it was a first for me. It looks so nice! I’ll make it again, just not with that tape.
  • Interior: Added a key fob holder, zipper pocket and side panel pockets.
  • Exterior: Added D-rings on the side so I can add a shoulder strap if I feel like it.
  • Exterior: Added magnetic button snaps to the large side pockets.
  • Piping  – use this method to creat 5 yards out of one fat quarter. It works!!
  • I remembered to add my little personal label. Teehee. I’m a nerd.
  • I used a 24″ zipper, not a 32″ and I had no problem whatsoever.
  • Cut the fabric for the handles 6″ wide instead of whatever it called for as well as making them a bit longer.
  • You NEED Clover Wonder Clips.

FABRICS:

  • Lizzy House Pearl Bracelet in Cosmonaut – Top, sides and side pockets
  • Carolyn Friedlander Architextures Text in Navy – Main side panels
  • Lizzy House Supernova in Purple – Large side pockets
  • Carolyn Friedlander Architextures Hatch in Plum – lining and exterior pocket linings
  • Robert Kaufman Quilter’s Linen in Midnight – Piping and handles
  • Carolyn Friedlander Architextures Landscape in Blue – Interior Pockets

My bag is far from perfect but I love, Love, LOVE it.  Screw you imperfect lining!  Now I see why people go ape shit bananas for this thing.  It’s like I climbed the Mount Everest of sewing.  Since I’m a quilter, it’s a big frickin deal!

I’ll leave you with one more picture of my bag and the sweet machine I made it with. I’ve never gotten around to blogging about it, but I never could have made this bag on my old machine. NEVER.  It’s a Janome 6600 Memory Craft Pro and it’s a stitchin’ beast.

Weekender (6)

Now I just need to talk my husband into going somewhere for a weekend.


Related Posts Plugin for WordPress, Blogger...