We’re all in this together. After seeing a lot of rainbows and interesting window art on my neighborhood walks, I wanted to join in. I created an image in Illustrator and put it to fabric.
Here are the two images I digitally designed to choose from:
I chose to make the former, hoping once this quarantine ends I can hang my mini without negative associations.
Since this process was a first for me, I wanted to share how it was achieved. If you choose to make one, it’s more of a guideline than a traditional pattern.
My mini measures 32″ square. I printed out the PDF and taped the 12 pages together to make one large ‘pattern’.
HereComesTheSun PDF
InThisTogether PDF
Now that I had it printed I was like… uhh, now what!
- First I traced the MIRRORED image of the letters onto the paper side of Heat n Bond Lite. You can use any double sided interfacing that you’d use for applique.
- Ironed the paper to the wrong side of my fabric, then cut out the letters using my traced images. Set aside.
- Cut out each rainbow curve, individually.
- Traced each curve onto my fabric ADDING a seam allowance on both sides of each curve. (this measurement is up to you, I added a generous 1/4″)
- Starting with the center curve (purple) I pinned the outer purple curve to the inner curve of the blue. Stitched together. Lightly notched the curve and ironed. Repeated all the way up the rainbow.
- Cut out a 32″ piece of white fabric. Placed the rainbow along the bottom and right sides. I pinned it in place and folded the inner curve (purple) raw edge under 1/4″ as well as the seam allowance for the raw edge on the outer (red) curve.
- Stitched the rainbow onto the white background along the inner and outer pinned curves. I don’t know what this process is called as I’ve never really done applique!
- Cut out fabric for the sun leaving a seam allowance along the curve. Pinned in place, tucking the seam allowance underneath. Stitched in place along the curve and edges.
- Removed the heat and bond paper on the letters, placed them were I wanted, and ironed down. I didn’t stitch over these but would recommend it. I knew mine would be heavily quilted and just a wall hanging.
- Quilted and bound.
This is what *I* did but I’m sure there are several methods for achieving something like this. You could even applique all pieces. My intentions when I put it this together was to make something for me and not a ‘pattern’. Then I thought sharing my process may benefit someone.
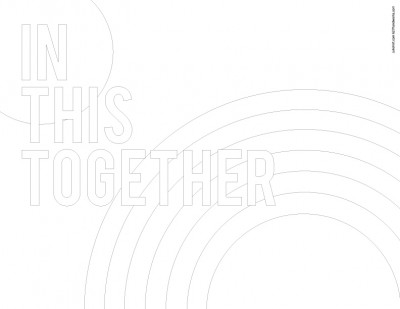
Here are some coloring pages you can print on letter size paper.
HereComesTheSun ColoringPage PDF
InThisTogether ColoringPage PDF
If you make something for your windows or the coloring pages I’d love to see them! Tag me on Instagram @juliehirt.













 Thursday, April 2nd, 2020, 5:50 pm |


Connect