
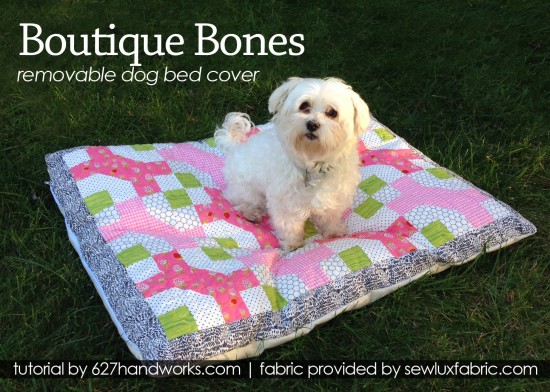


Sew Lux Fabric challenged me to a duel!
Okay, not really. It was a design challenge using 6 fat quarters from their shop. Immediately I knew it was the perfect chance to make a dog bed cover.

I picked some fabrics that I loved, ignoring the fact that Bojangles is a boy. Dogs are color-blind, right?
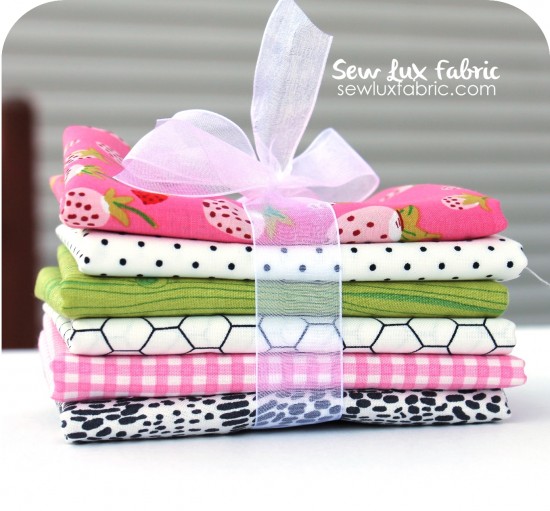 These lovely bundle is available at Sew Lux Fabric.

MATERIALS
- 6 Fat Quarters
- 22″ or 24″ zipper
- 32″ x 40″ piece of batting
- 32″ x 40″ scrap backing fabric for quilting (which will be hidden)
- 30″ x 38″ piece of duck cloth for bottom. (You can really use anything, like flannel, fleece or cotton)
This will make a 28″ x 36″ removable dog bed cover that fits most of the larger sized dog beds. We have 3 different beds that are slightly different sizes and this fits all of them.
If you don’t have dog beds lying around you can easily make a filler bed:
- Take muslin (or an old sheet) and cutting 2 rectangles 29 x 37.
- Place right sides together, sew down 3 sides using a 1″ seam allowance.
- Turn right side out, stuff with stuffing from a couple of old pillows and sew up the 4th side.
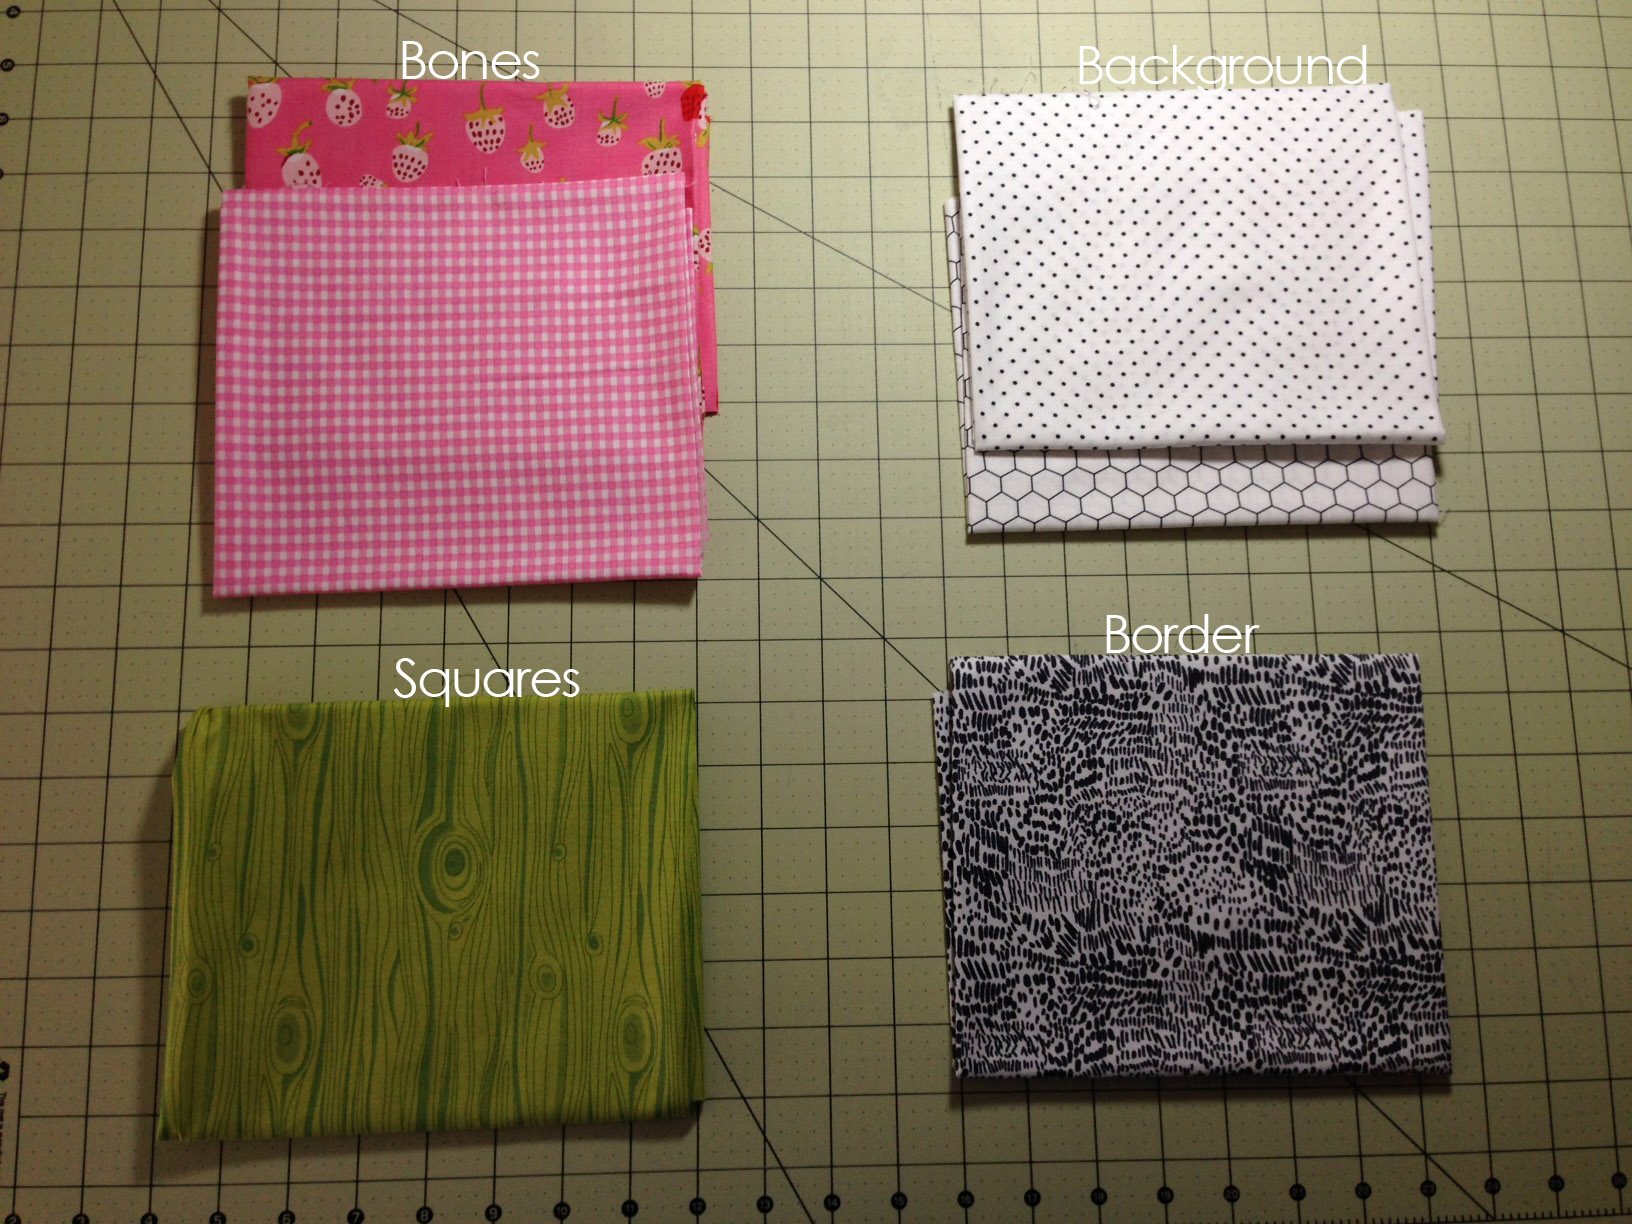
Separate your fabrics into piles. 2 fabrics for ‘bones’, 2 fabrics for background, 1 for the corner squares and 1 for the border.
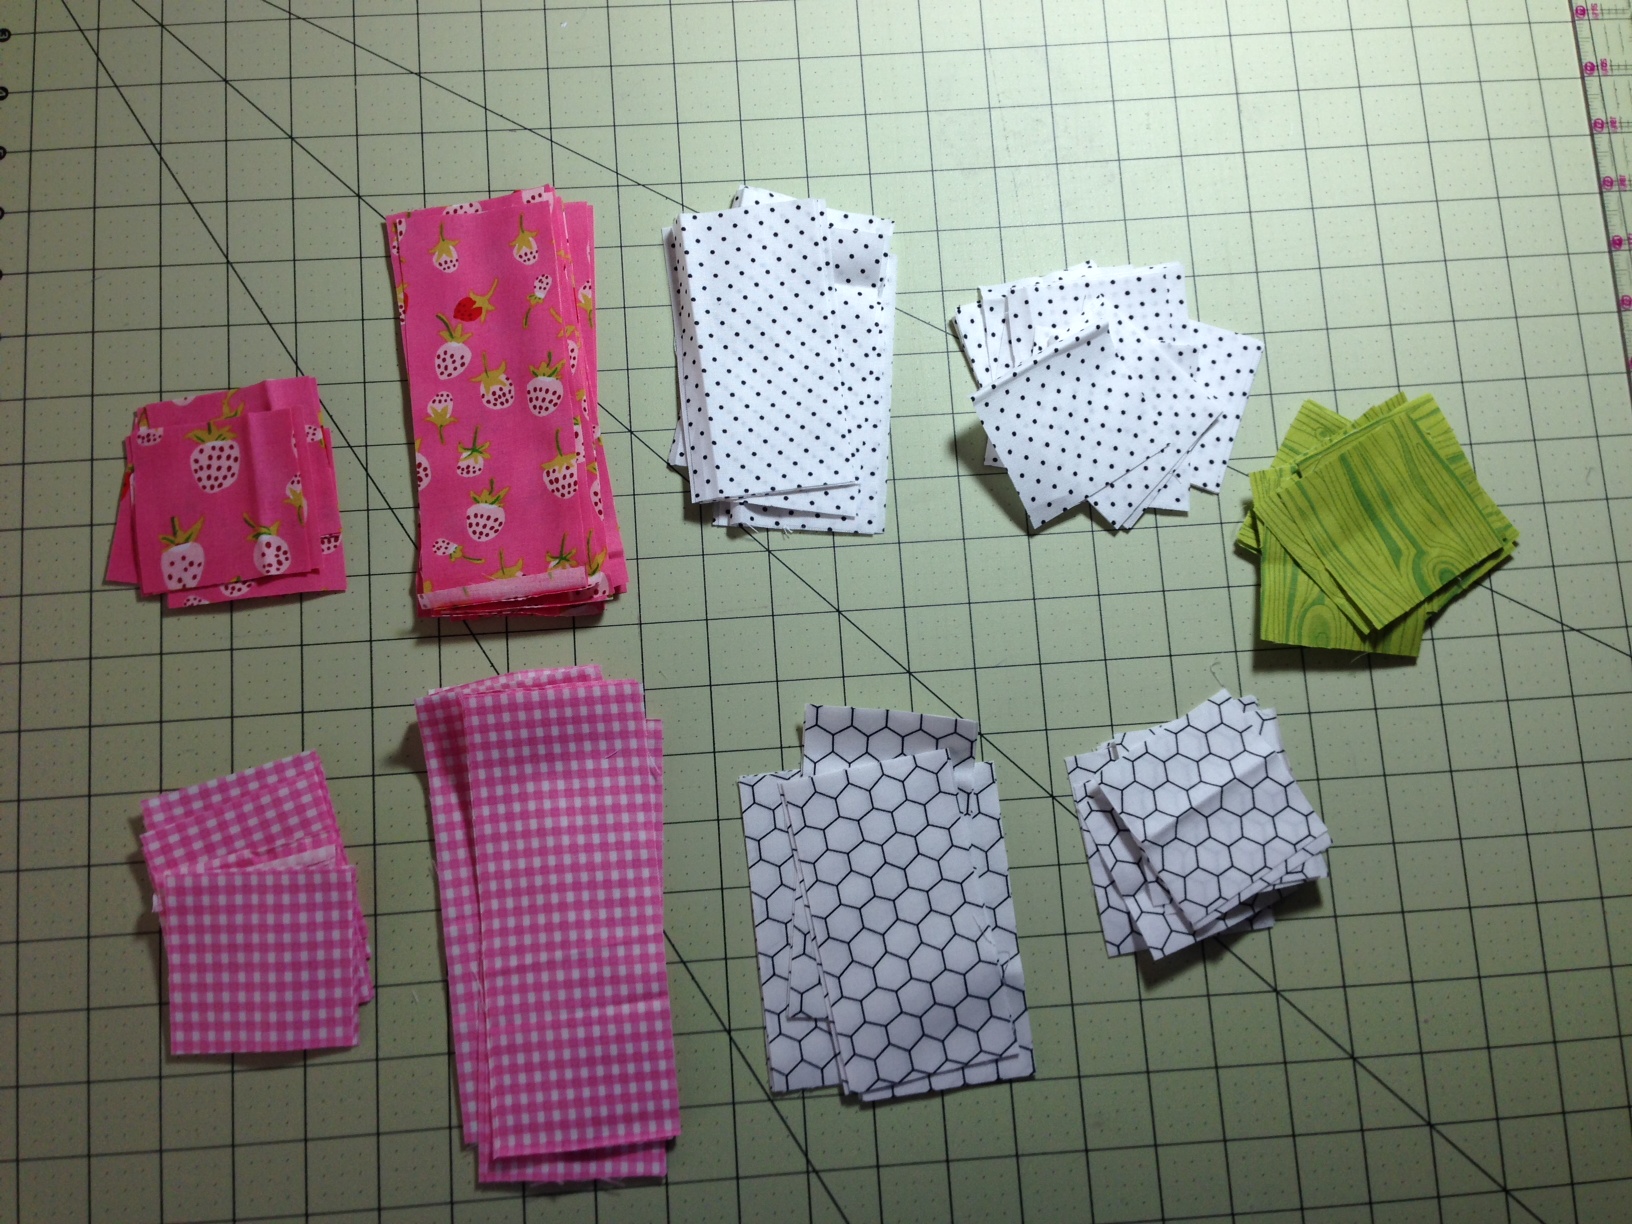
CUTTING
All “strips” are 2.5″
Bones:
- From each fat quarter cut (six) 18″ strips. Take those 6 strips and cut from each:
- (two) 6.5″ strips
- (two) 2.5″ strips
Background:
- From each fat quarter cut (three) 18″ strips. Take those 3 strips and cut from each:
- (four) 4.5″ strips
- From each fat quarter cut (two) 18″ strips. Take those 2 strips and cut from each:
- (seven) 2.5″ squares
Corner Accents:
- Cut (twenty four) 2.5″ squares
Border:
- Your fat quarter MUST be at least 21″ wide. Cut into (six) 21″+ strips. If you have extra length, leave it!

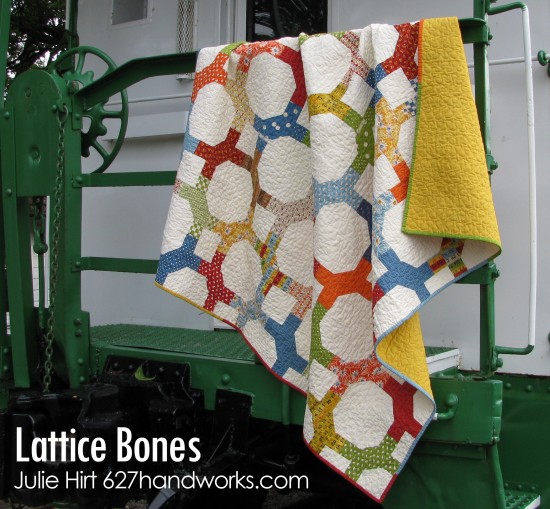
BOUTIQUE BONE BLOCKS
For each block pull:
Bones fabric: (2) 2.5″ squares, (2) 6.5″ strips
Background fabric: (4) 2.5″ squares, (2) 4.5″ strips
Corner fabric: (2) 2.5″ squares
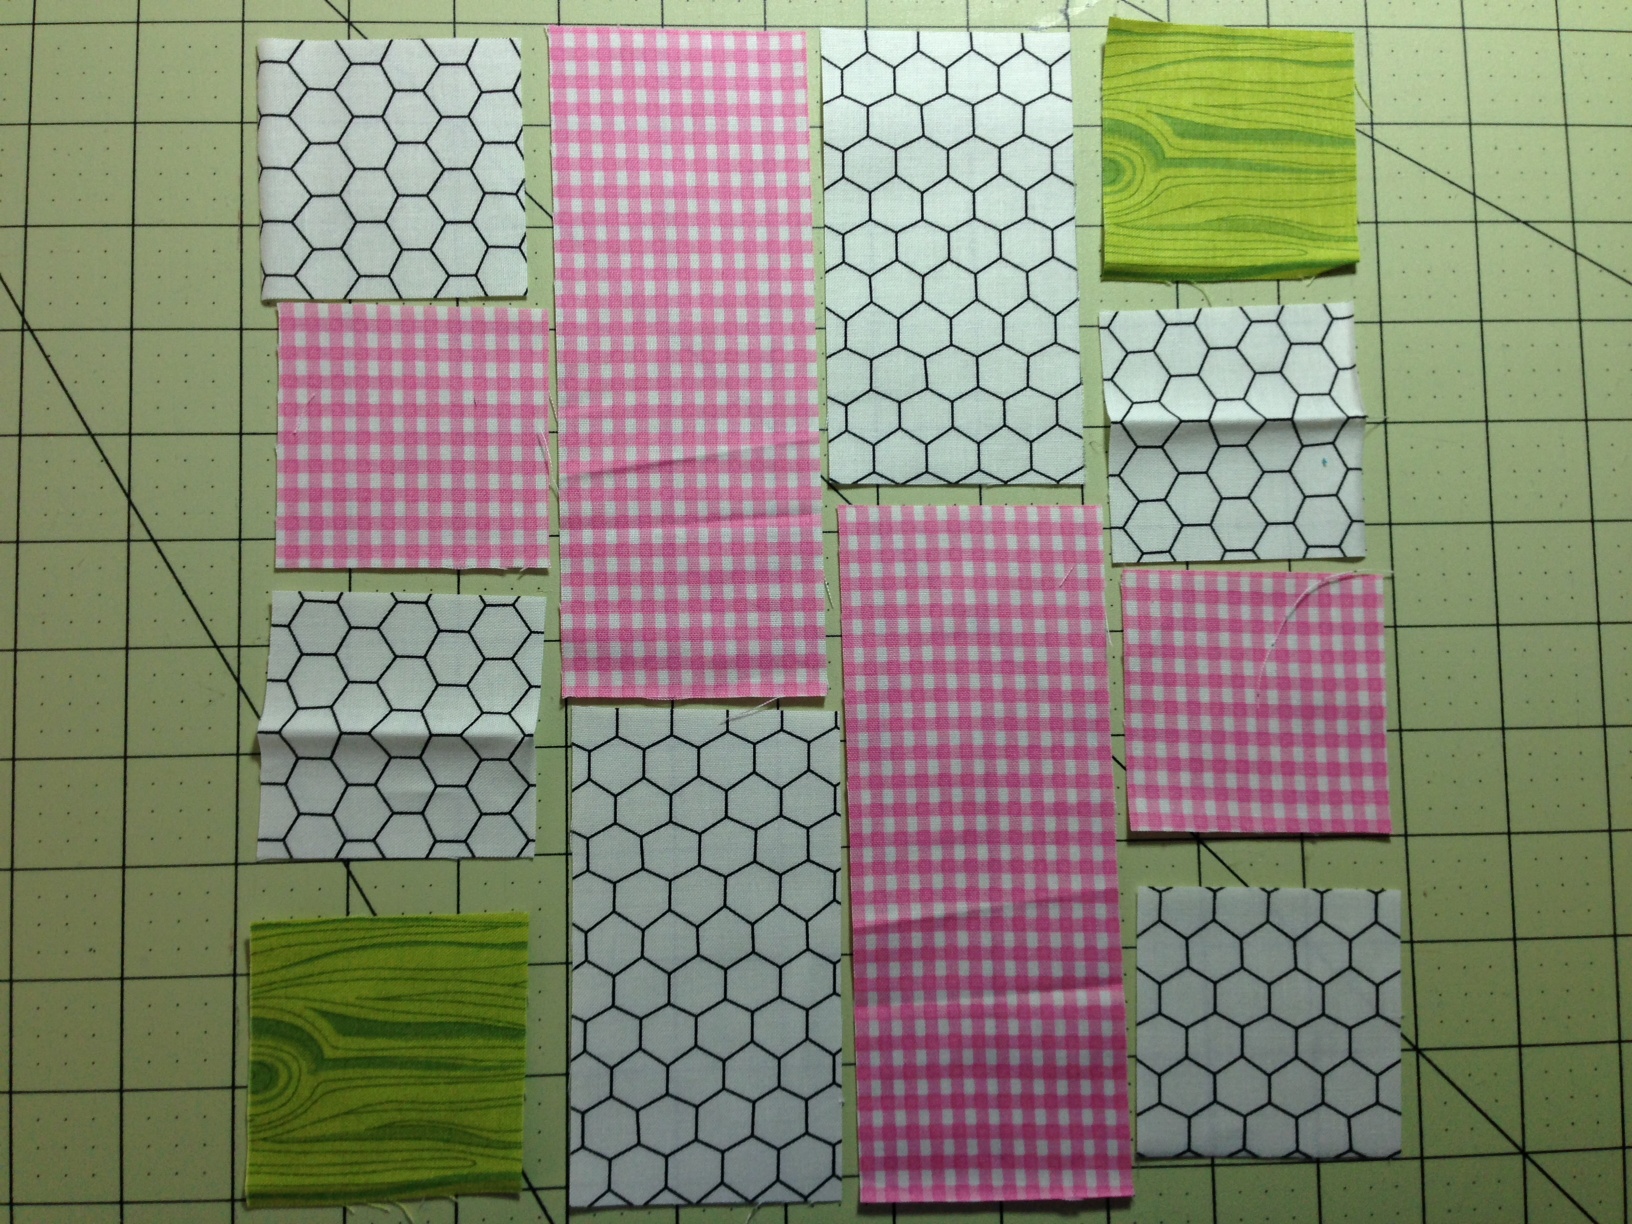
Lay out your fabrics like shown above.
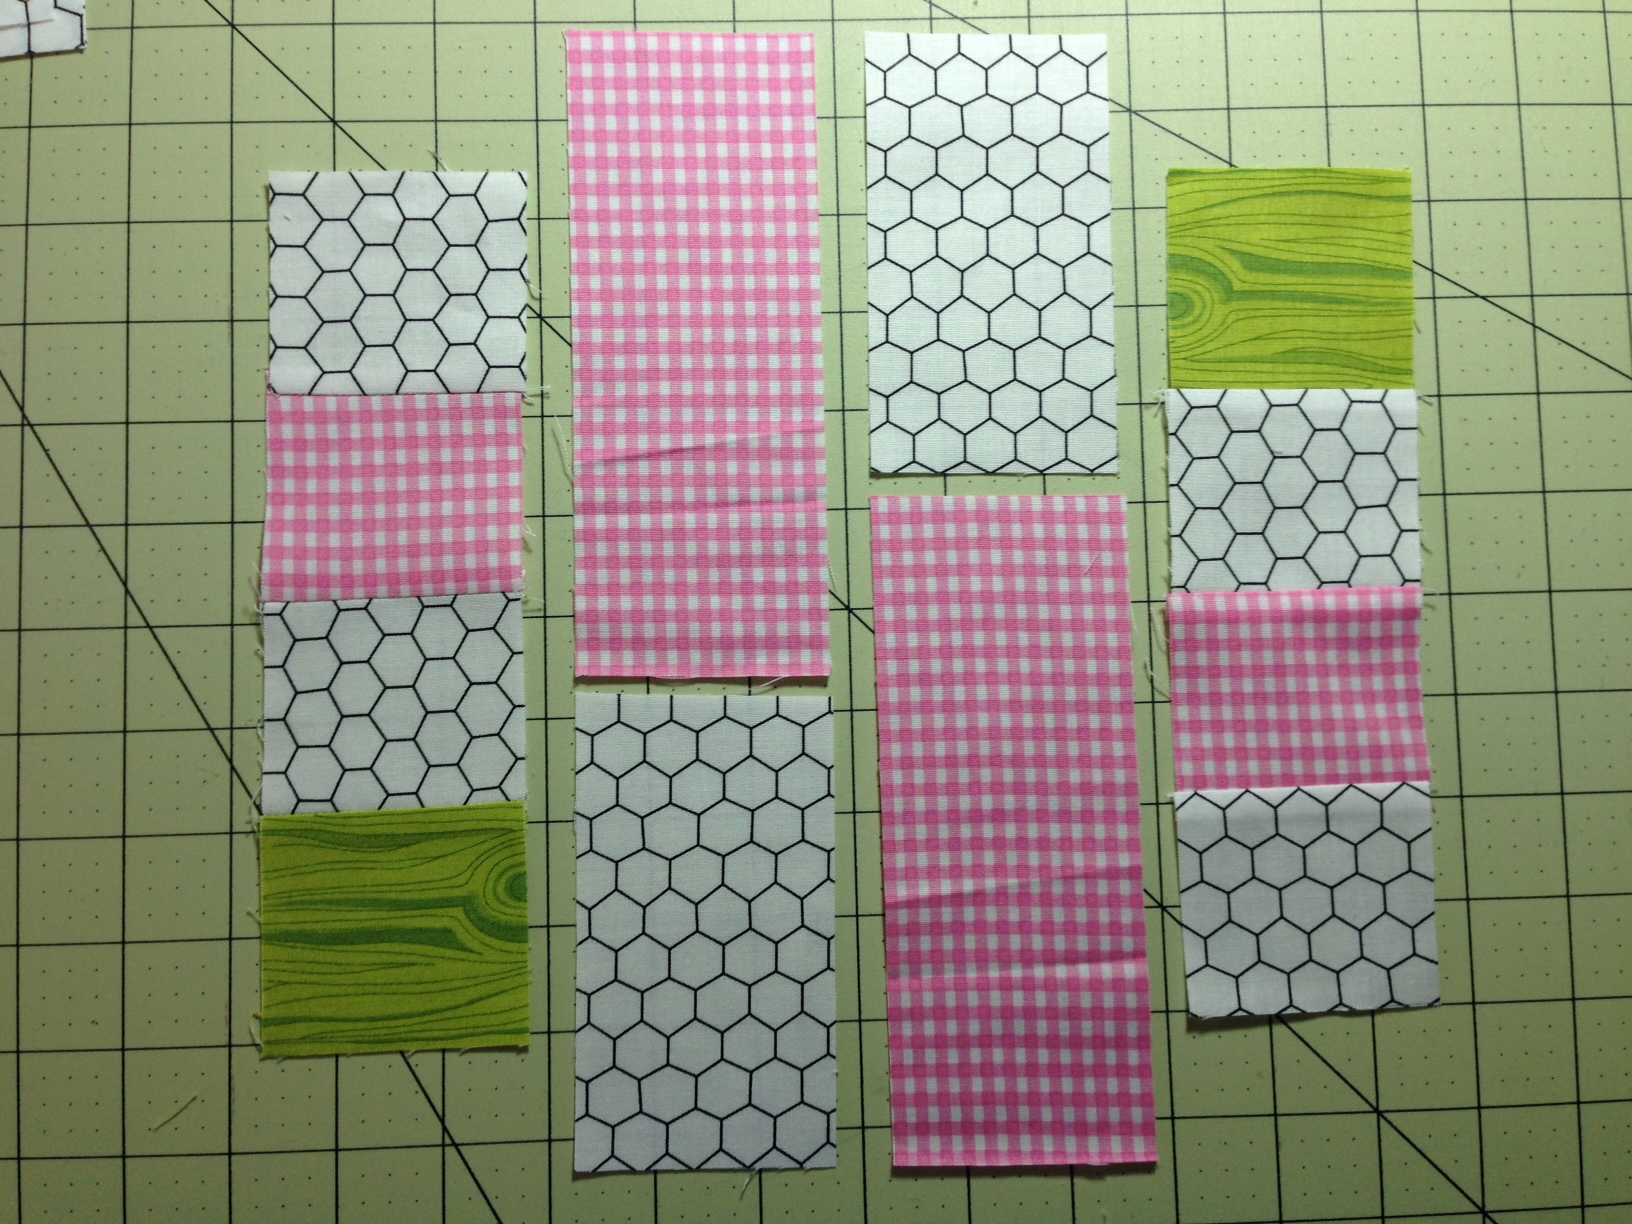
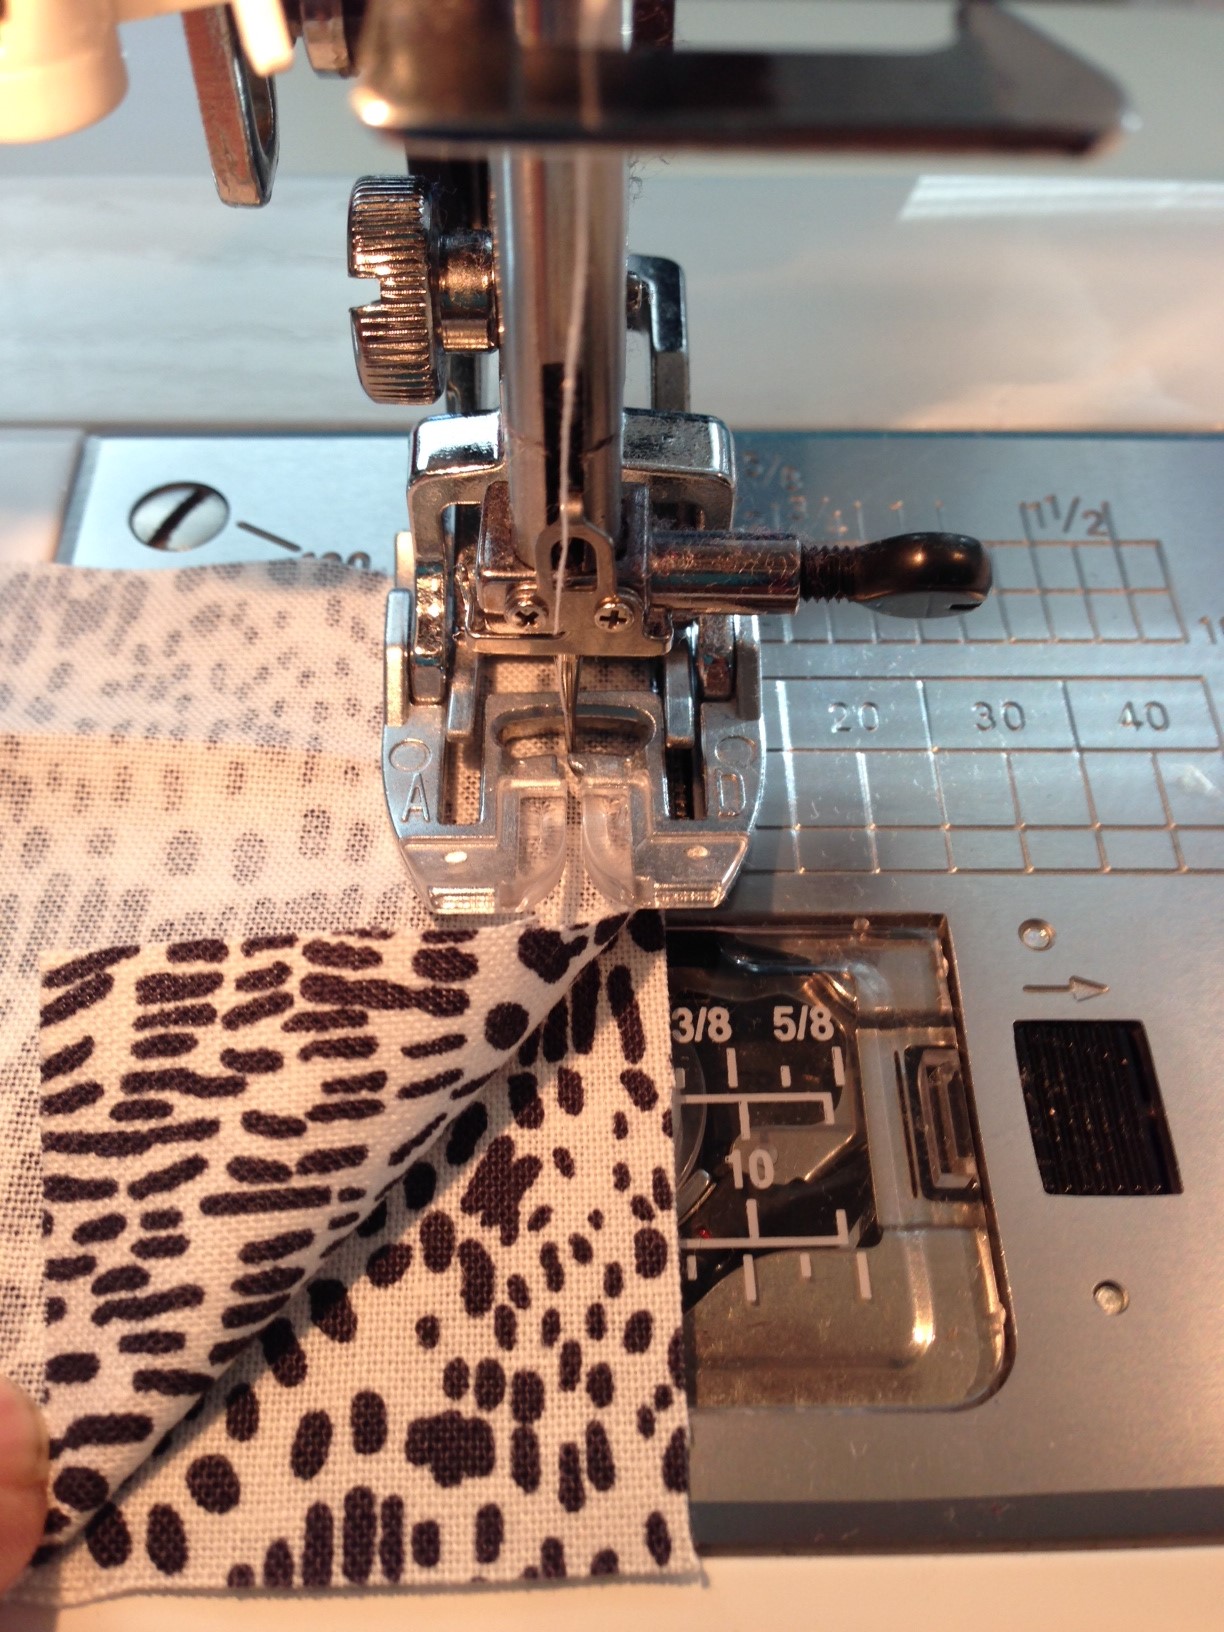
Sew the sides together.

Lay your background fabrics on top of your bone fabrics like shown above. Mark or crease a diagonal line in the same direction as shown. Sew, iron, trim!

It should now resemble this.

Sew the strips together and you have a “boutique bone” block.

Create a total of 12 Boutique Bone blocks and sew them together into three rows of four. Then sew the rows together forming one large rectangle.
BORDER
This is a tight fit so sew accordingly. Attach your strips end to end using a 1/4″ seam allowance so you have one long border piece. Iron open.
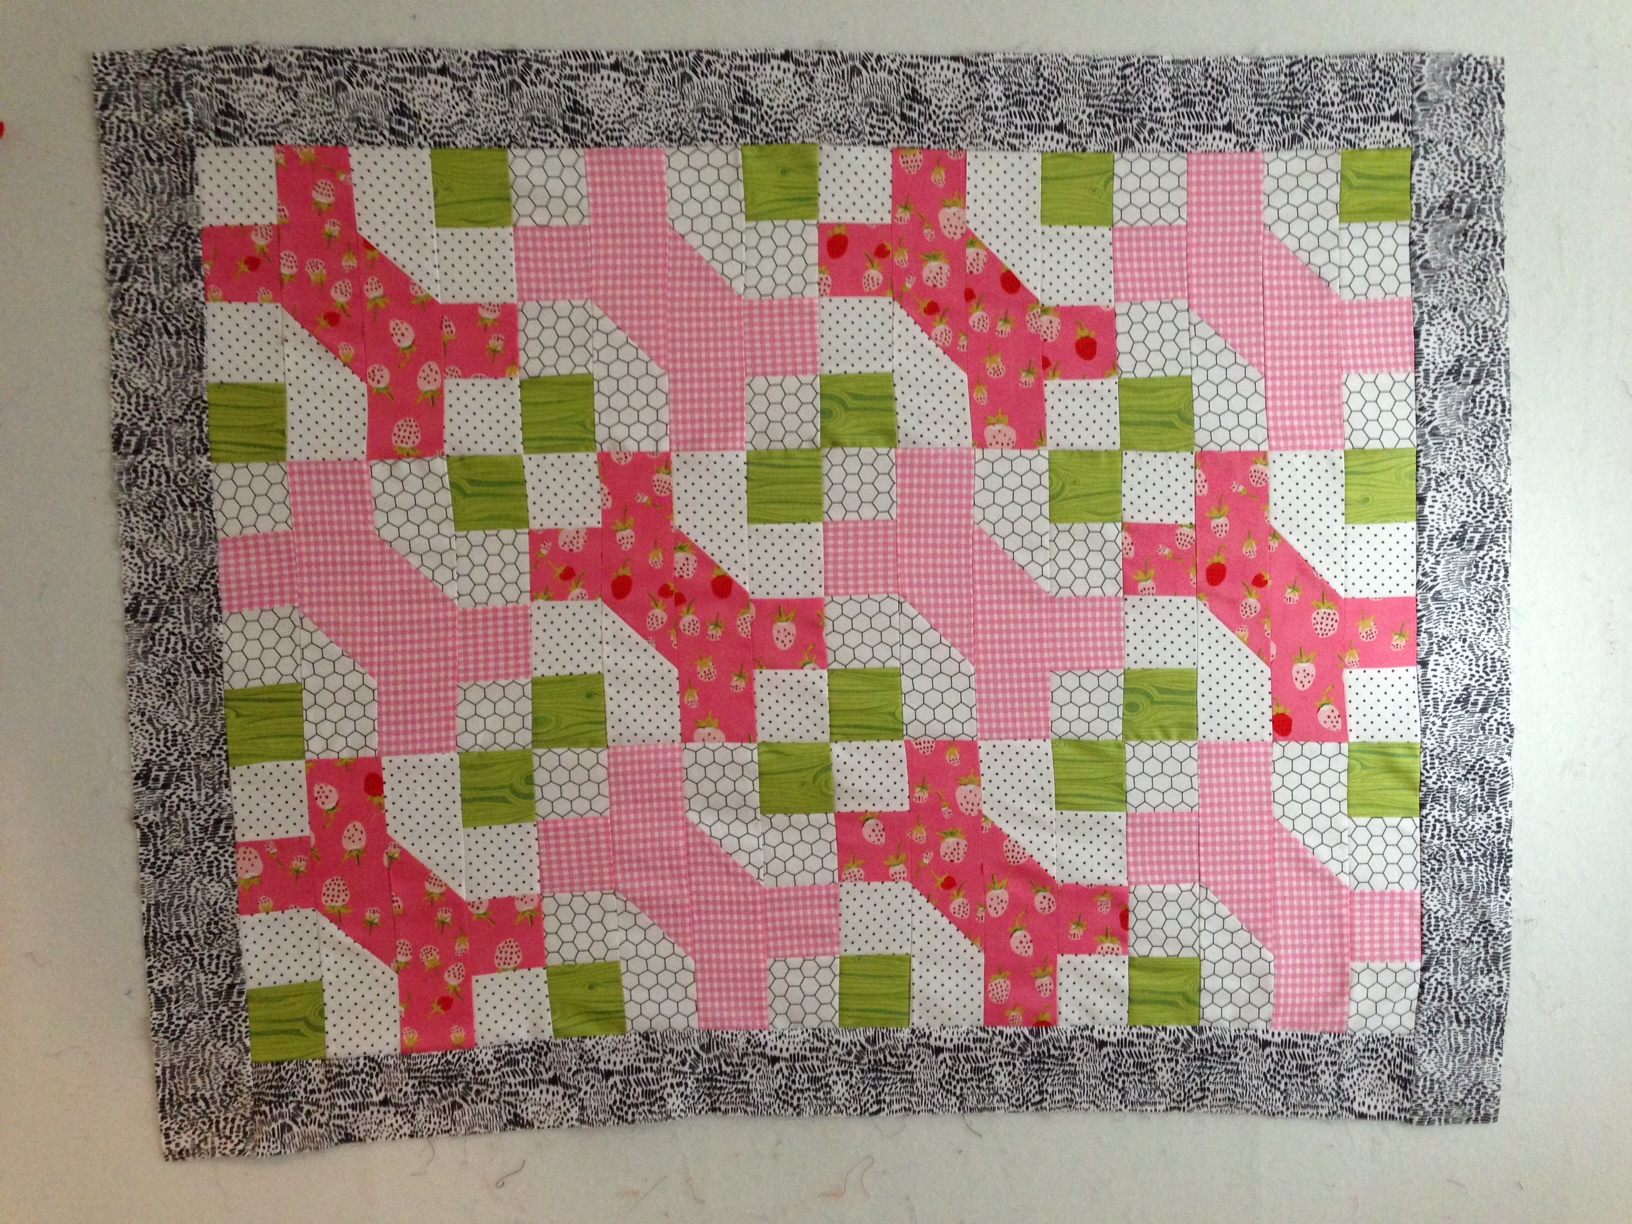
This will be a close fit, so don’t waste the border fabric by leaving a lot of overhang!
- Place your border onto a side (right sides together). Line up with top edge and sew down. Cut the border fabric even with main block when you reach the end.
- Now place your border (right sides together) on the opposite side. Line it up with the top edge and sew down. Cut the border fabric even with main block when you reach the end.
- Repeat for the other 2 sides.
QUILT
I forgot to take a picture!
- Sandwich your fabrics: scrap backing fabric (facing down), batting, bones (right side up).
- Quilt however you’d like.
- Trim to the border.
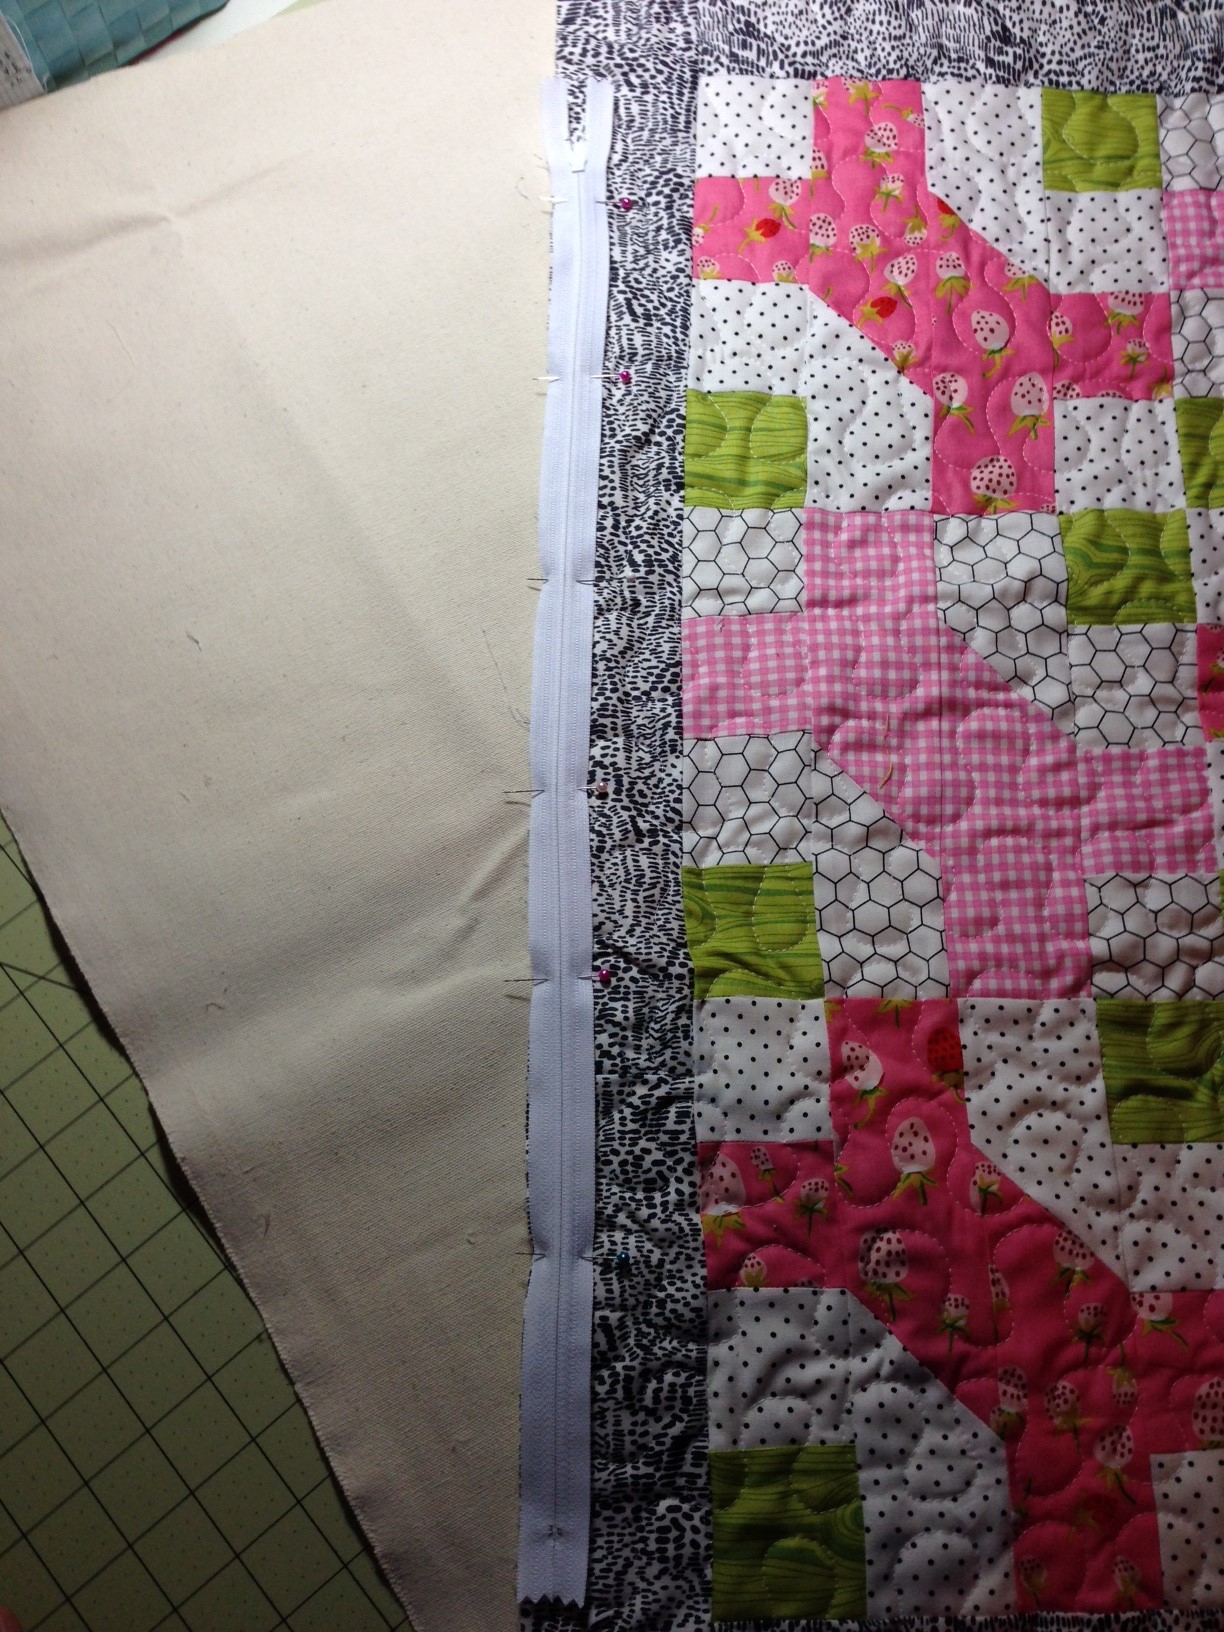
ZIPPER
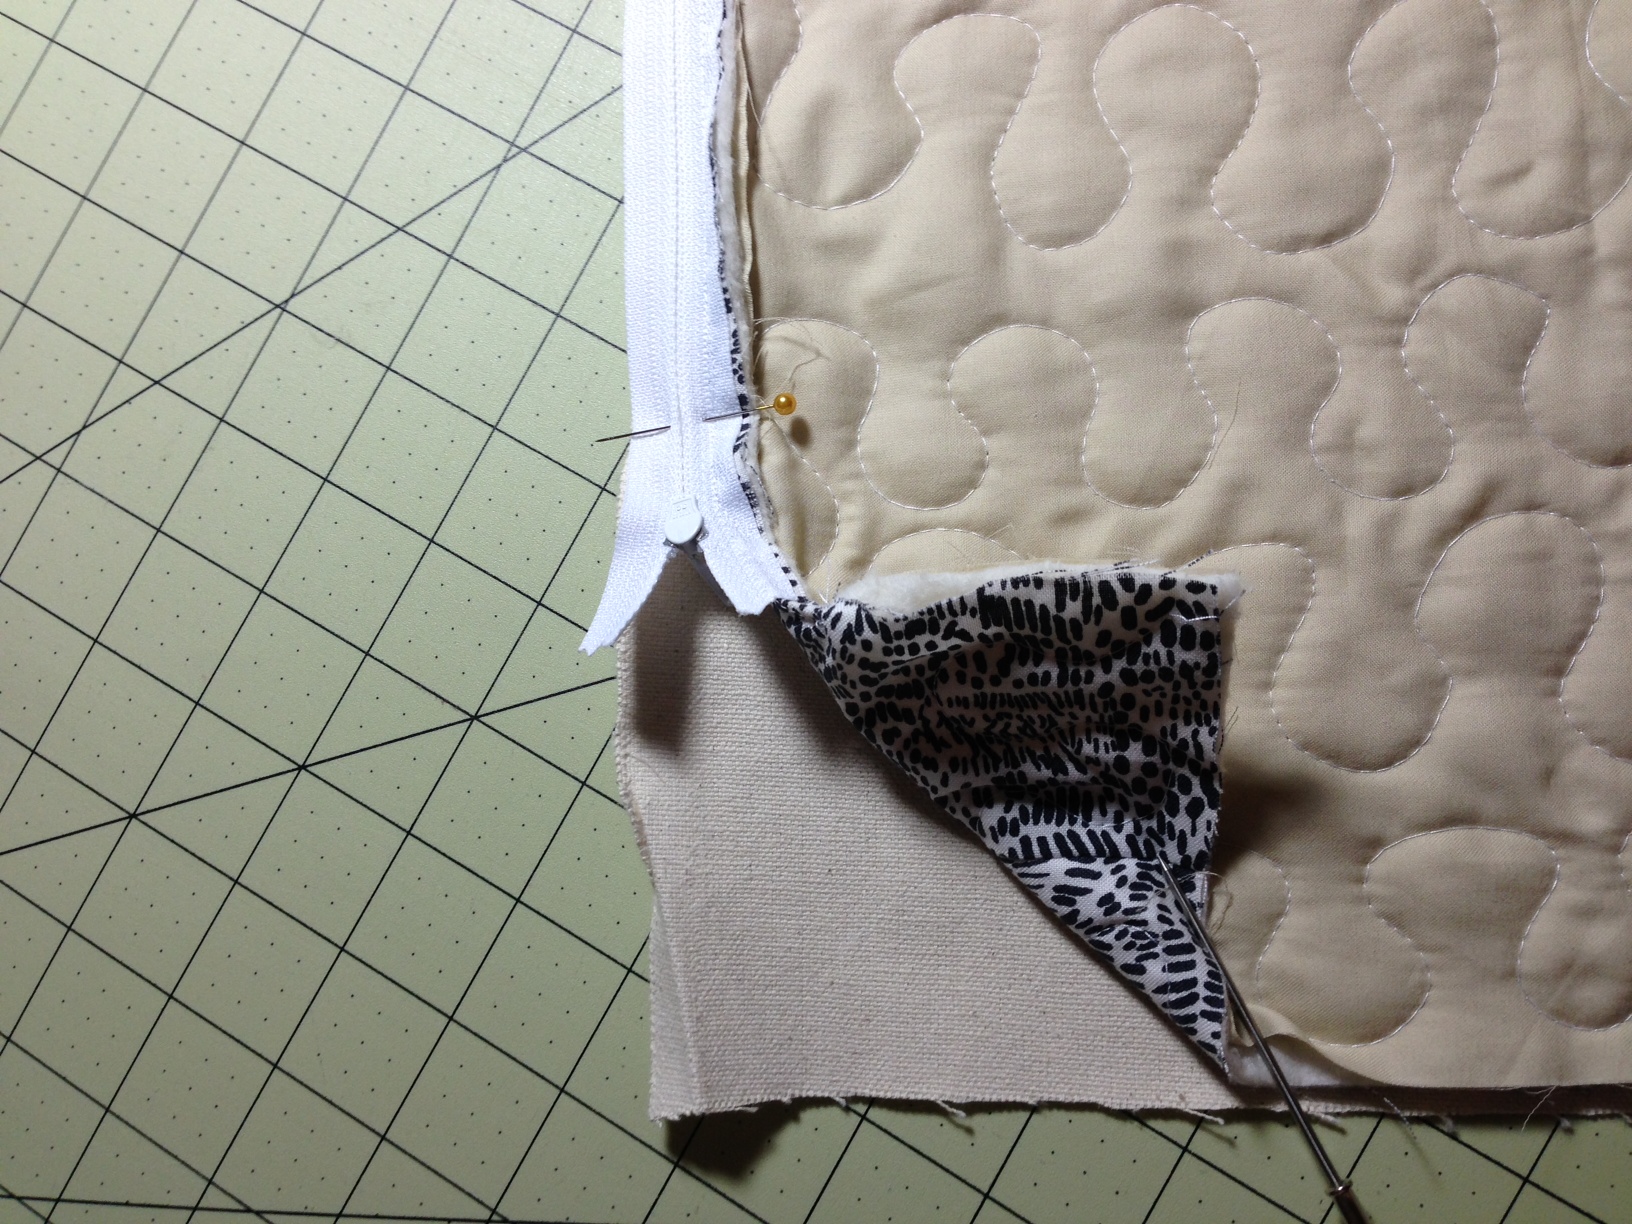
Place your zipper right side down along the short edge of your quilted bones (see above).

Pin in place and stitch down using a zipper foot.
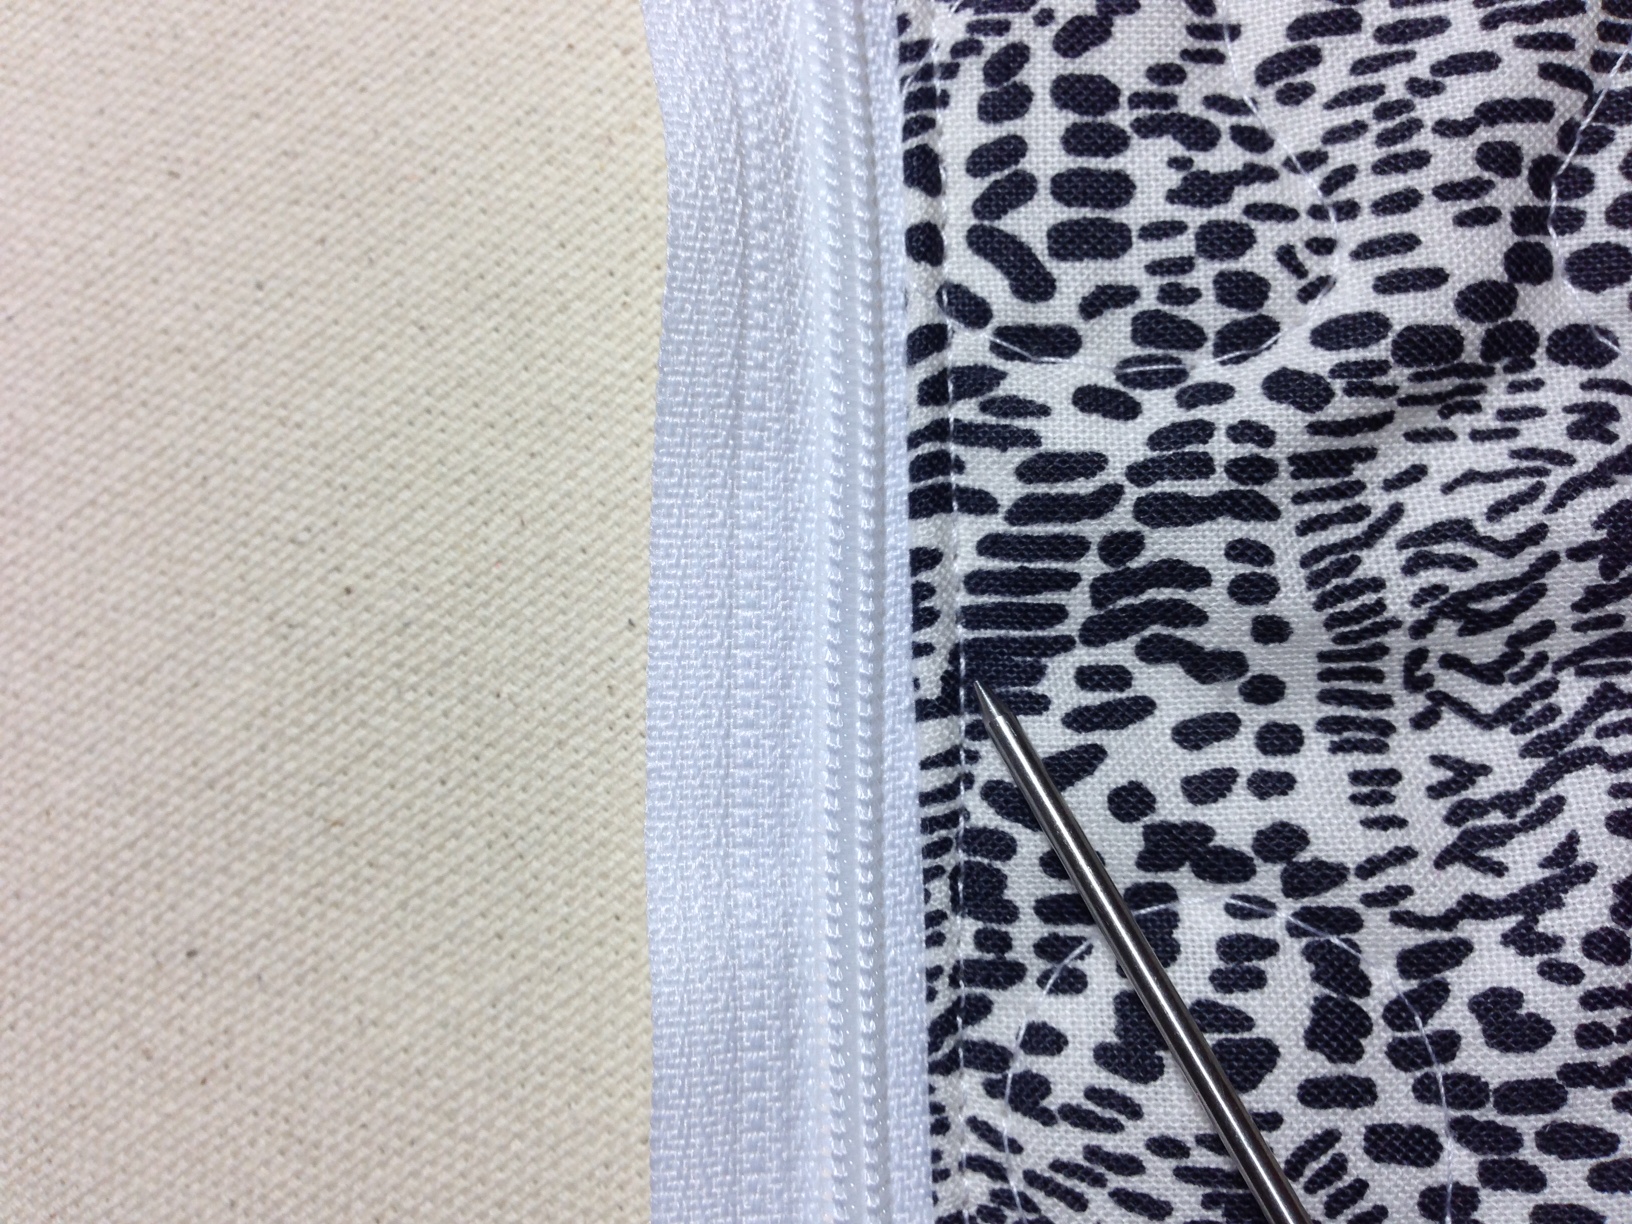
Now open it up and top stitch, securing your fabric and zipper.
Place your bones (facing down) onto your duck cloth (or other fabric, right side up). Pin the zipper in place like above.
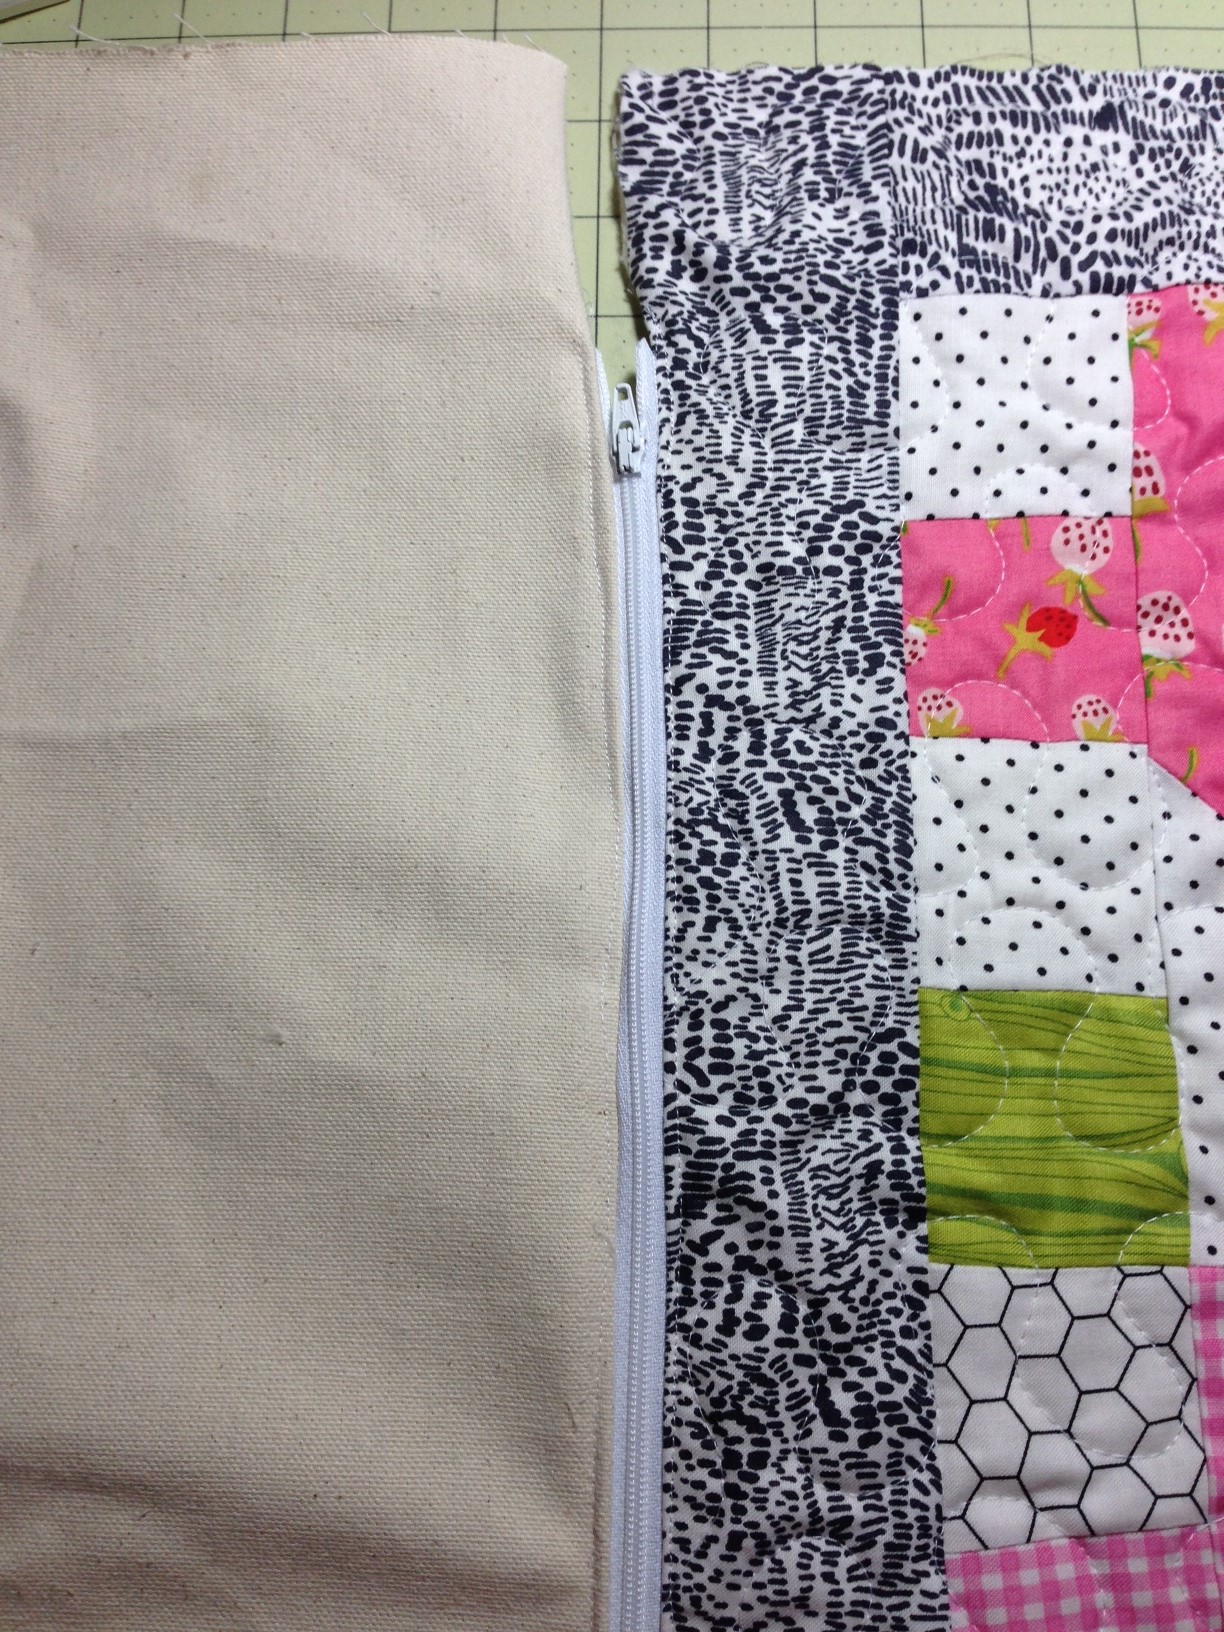
Sew with a zipper foot and top stitch in place.
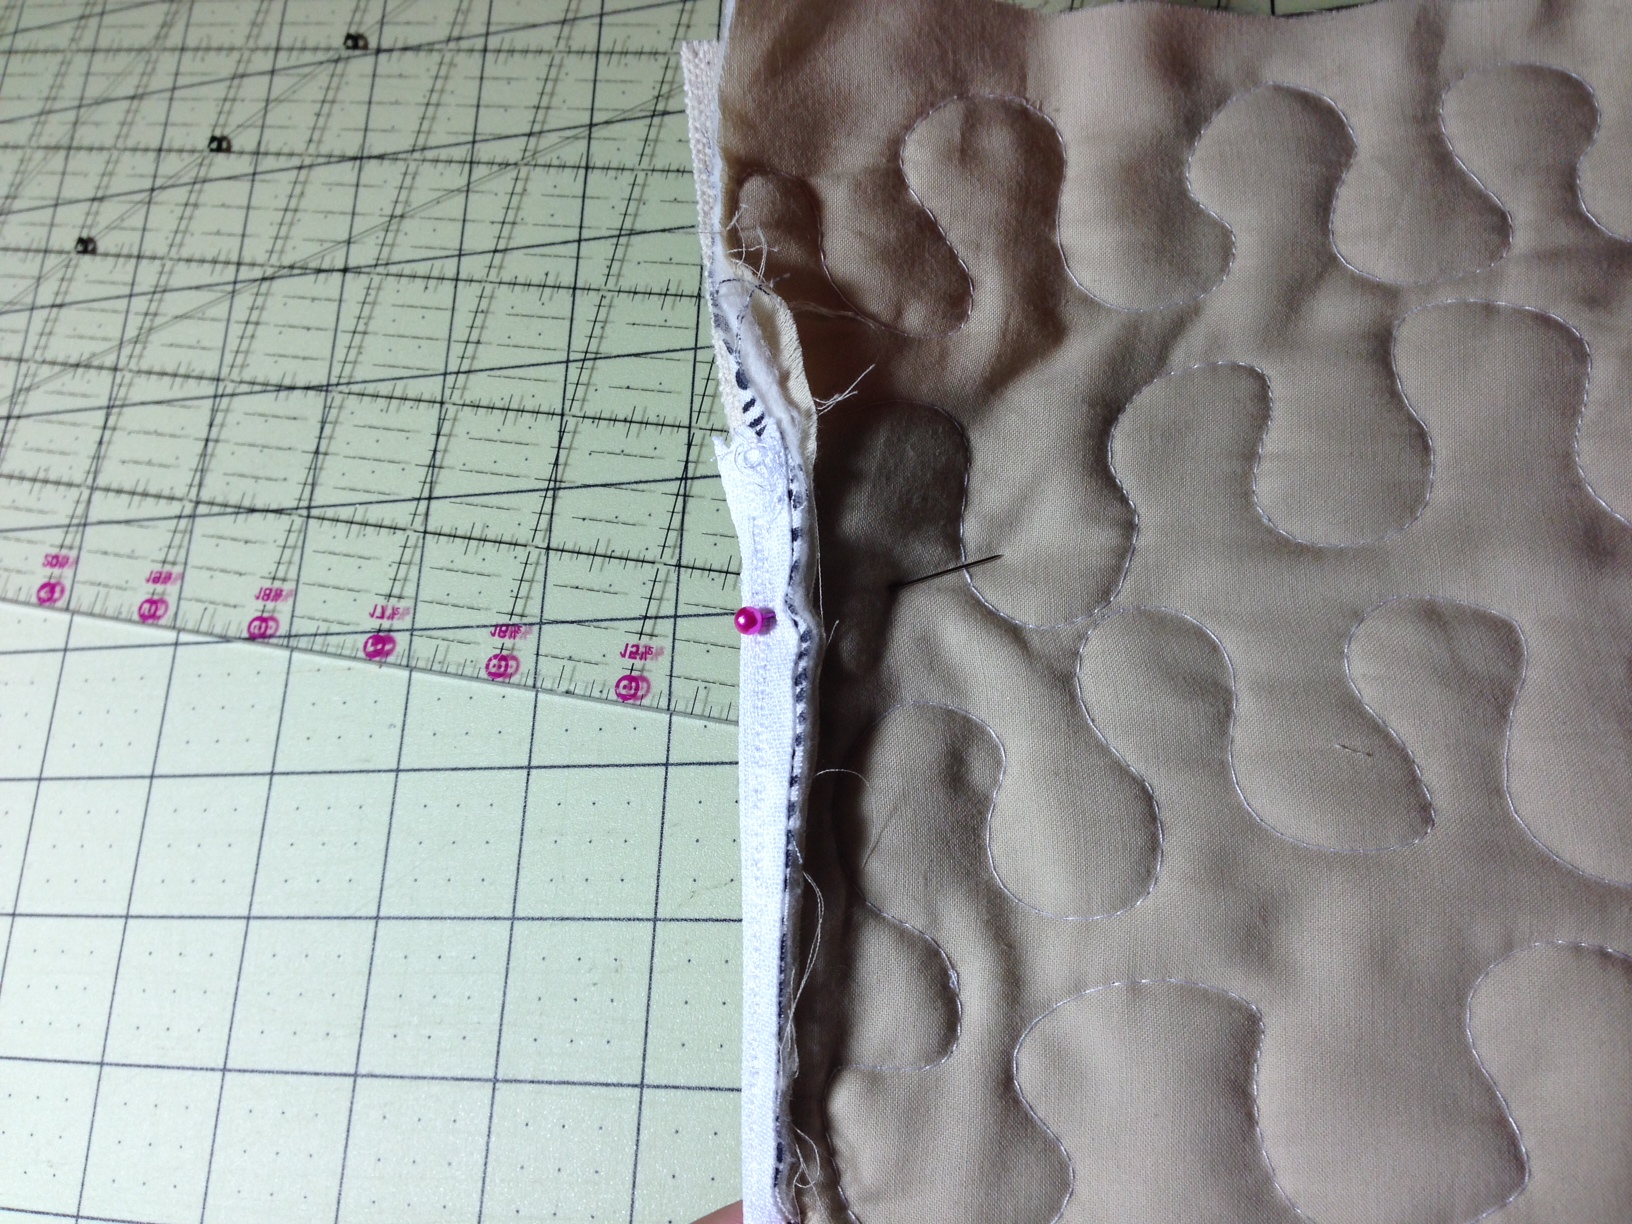
Place your top and bottom right sides together, pin all the way around.
When you get to the zipper UNZIP IT! Kind of pull the zipper to the outside of the sandwich and pin in place.
Sew along the edges using a 1/2″ seam alowance. Sew about 1/2″ into each side where the zipper is. Be sure to secure with back stitches.

Turn it right side out through the zipper hole.
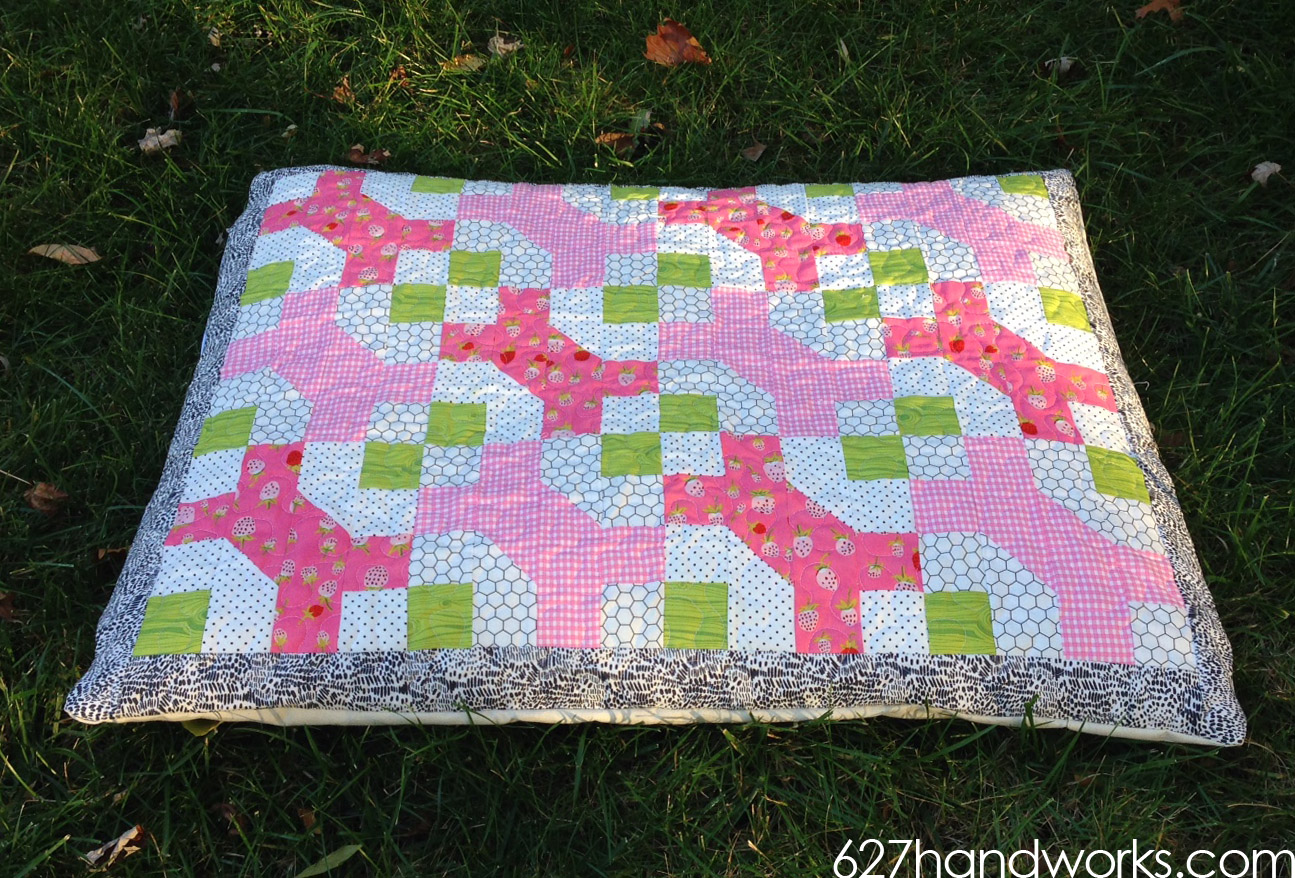
Hope you enjoyed this. If you make one, be sure to share it with me! Thanks again to Sew Lux Fabric.
![]()


Connect