Archive for January, 2013

January 31st, 2013

Scrappy Trip Around the World

by Julie Hirt

This quilt block is called a Scrappy Trip Around the World. Also known in my world as Rippin Stitches.

photo 1

You know the old saying, “If your friend jumped off a cliff, would you?”  My smart teenage mouth usually replied with, “probably”.  Well… I’ve been seeing TONS of the Scrappy Trip Around the World blocks on Instragram, Twitter and the Blogworld.  So I’ve jumped the cliff and joined in.

Tutorial is at Quiltville.  It’s genius. Really.

You can make your blocks all matchy-matchy with jelly rolls, use coordinating fabrics, or go crazy with assorted scraps. I’ve decided on the latter having never made a scrap quilt.  I’m really excited about it!  I tried to keep out some of the plaids and darks. I knew I hoarded scraps for a reason.

There is also a Scrappy Trip Along Flickr group and the Instagram hashtag is #scrappytripalong . photo 2

I’ve cut up 180 strips, so I’ll have enough for thirty 12″ blocks. At the rate I’m going (4 the first day, 5 last night) it probably won’t take long at all. I’m already loving it!  Happy Scrappy Trippin.


January 30th, 2013

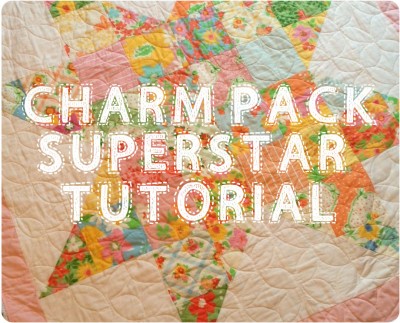
Charm Pack Superstar Quilt

by Julie Hirt


First, I apologize for the picture. It’s the only one I have with me and it was taken with my phone. As soon as I have time I’ll upload some more pics.

If this has been done with charm packs before I haven’t seen it, but I’m sure it’s out there!  I have a pretty large stash of charm packs and pulled one out and starting playing with layouts. Before I knew it I realized I could make a giant star quilt block using 40 charms.

charmpack

This Superstar Quilt is easy and sews up fast.  Would be great for a quick baby shower gift. Or put 4 or more together for a bigger quilt.

Materials:
Charm Pack (40 5″ squares)
24 white 5″ squares
4 white 9.5″ squares

Optional 3″ Border:
1/4″ yard border fabric cut into four 3″ strips


Place 16 white squares and 16 charms right sides together.

Sew corner to corner. Cut 1/4″ away from the seam on one side.  These will become your “points”.


Layout your pattern so you are happy with the color placement.

layout

Sew into blocks:

blocks

Sew the blocks into rows:

rows

Sew the rows together and… voila!  SUPERSTAR

And I can’t help it, but in my head I say “superstar” like Molly Shannon’s SNL character Mary Catherine Gallagher. Forgive me.

Oh, and don’t you just LOVE those fabrics?  It’s the only little bit of Dream On fabric by Urban Chicks for Moda that I had.  I was saving it for something special.


.

January 28th, 2013

Carnival Time Quilt Block Pattern

by Julie Hirt

Recently I came across an old quilt block that was originally published in the Kansas City Star. It was titled Carnival Time and had hand drawn pieces.  Let’s just say I got most of it worked out ok, except the center spoke.  There was NO making that thing match up, let alone sew it on. (You can see the original on the last page of the Pattern PDF.

I decided to try and come up with a cleaner version, WITH a seam allowance, and it works pretty well.  For me.  It’s still teensy bit wonky, but that may be because I’m not the greatest block maker. Piecer?

Carnival Time would probably be a great quilt block to paper piece, but… I like it quick and dirty. Paper piecing is just too much time and effort. And, I confess, I still haven’t *quite* got it figured out.

Untitled-2_08


The above PDF includes my version of the pattern (minus that crazily scary center spoke), a bit of block construction info and the original KC Star copy.

The center spoke would be fairly easy to add back in if you just sewed a little color to the corner of the center triangles first.  If you have any suggestions, please let me know!


January 26th, 2013

Baby Boy Quilt

by Julie Hirt

I heart this quilt!  Made for my friend Alyssa, her baby shower is next weekend. I finally used up some of my favorite fabrics that I’ve been hoarding.

Came up with the design myself – at first I just wanted a simple charm look, then decided to add a couple of stars.  Just used a light gray for the background, dark gray for the border and teeny tiny gray polka dot pattern for the backing. This was the last quilt I machine quilted on my old machine (which I’ve kept for the free arm).


grayboyquilt quilting


This little quilt tag is on the back – it’s roughly 4″ x 4″. quilttag


And I went shopping at a local fabric store today and picked up some fun colors for a Carnival quilt block I have in mind.  LOVE these prints together! And they were on sale for $1 each when you bought 10 or more fat quarters. Score!

fabric

January 20th, 2013

Gettin’ crafty up in here, up in here

by Julie Hirt

Slowly but surely making my craft / sewing room the place I want to be 100% of the time.  No other room in the house has all the colors I love, they are a bit girly.

First we have another Craigslist find.  It’s previous home was in the same area and I got it for a steal!  Little glass doors, cutesy drawers and only needed some minor cleaning.  It’s perfect for holding my fabric pre-cuts.

cabinet


My husband installed this lamp for me this week over my crochet/reading chair. I forgot to take a “before” picture but it was white and drab.  So I just recovered the lampshade with some fabric and voila!  Love. ilovelamp


This stool and I have our issues.  It was originally in my husbands garage workshop area and I kept borrowing it when I was working on crafts. Eventually I just claimed it as mine. It really needs a new paint job but I figured putting a cushy little top on with oilcloth fabric would help tremendously. And it does.

stool

Tissue pouf?  Flower?  Ceiling hangy?  Whatever these are called I just wanted to make one to see if I could. I can and it’s up. Not sure for how long but it does make it a little festive  in here.

tissueflower

Last, but not least, is my marker board.  I took an old16x24 painting and turned it into this.  I can change out the fabric whenever I want!  Right now it’s holding some Nicey Jane and it comes in super handy.  Recently acquired a new sewing machine (whole ‘nother post) and it holds some great little reminders for me.

whiteboard


January 19th, 2013

T-Shirt Yarn Crochet Pouf

by Julie Hirt

I’ve made a lot of changes to my craft room and finished projects, so I’m hoping to get around to posting a few updates.

Recently I’ve seen a lot of pictures of crochet poufs that I’ve loved (Pinterest).  I’m not paying a few hundred dollars for one either!   So here is my version of a crochet pouf I made a couple of weeks ago out of t-shirt yarn. I’m very happy with how it turned out and how quick it was to make.

I used this tutorial for creating the yarn. Can you believe this used FIFTEEN shirts! Originally, I had planned on using my husbands old undershirts and ran out.  After a quick trip to the Salvation Army and $.50 a shirt, I decided I may need to find a few more uses for t-shirt yarn. Maybe some baskets to hold my WIP?

It’s pretty sturdy and when you sit on it, it doesn’t have a ton of give so it’s super comfy. It’s stuffed with 2 old comforters. You can’t tell in the picture but it’s about 2 feet wide by 8″ tall. I didn’t use a pattern, I just double crocheted a basic crochet circle until it was big enough.  Then I DC a bunch of rounds until I was satisfied with the height.  Then decreased the circle and left a hole big enough to stuff!

crochetpouf

It sits in front of this AWESOME Craigslist find.  This chair is amazing. A girl had a lot of cute items listed and no longer had room for them after moving in with her fiance. Her loss! She had recently had it recovered and it’s down stuffed and oh-so-comfy, as you can tell by the 3 little squirts who have claimed it as their own.

crochetpouf2

If you can crochet and like the look of the poufs, I’d recommend making one!

Related Posts Plugin for WordPress, Blogger...