Archive for ‘Crochet’

January 7th, 2015

Opal Owl Quilt + First Finish of 2015

by Julie Hirt

It’s snowy, freezing cold and overall bad weather here.  But I am desperate to share my Opal Owl quilt so I apologize for the shoddy pics. I’ll get better pics once the weather clears up.

IMG_1293

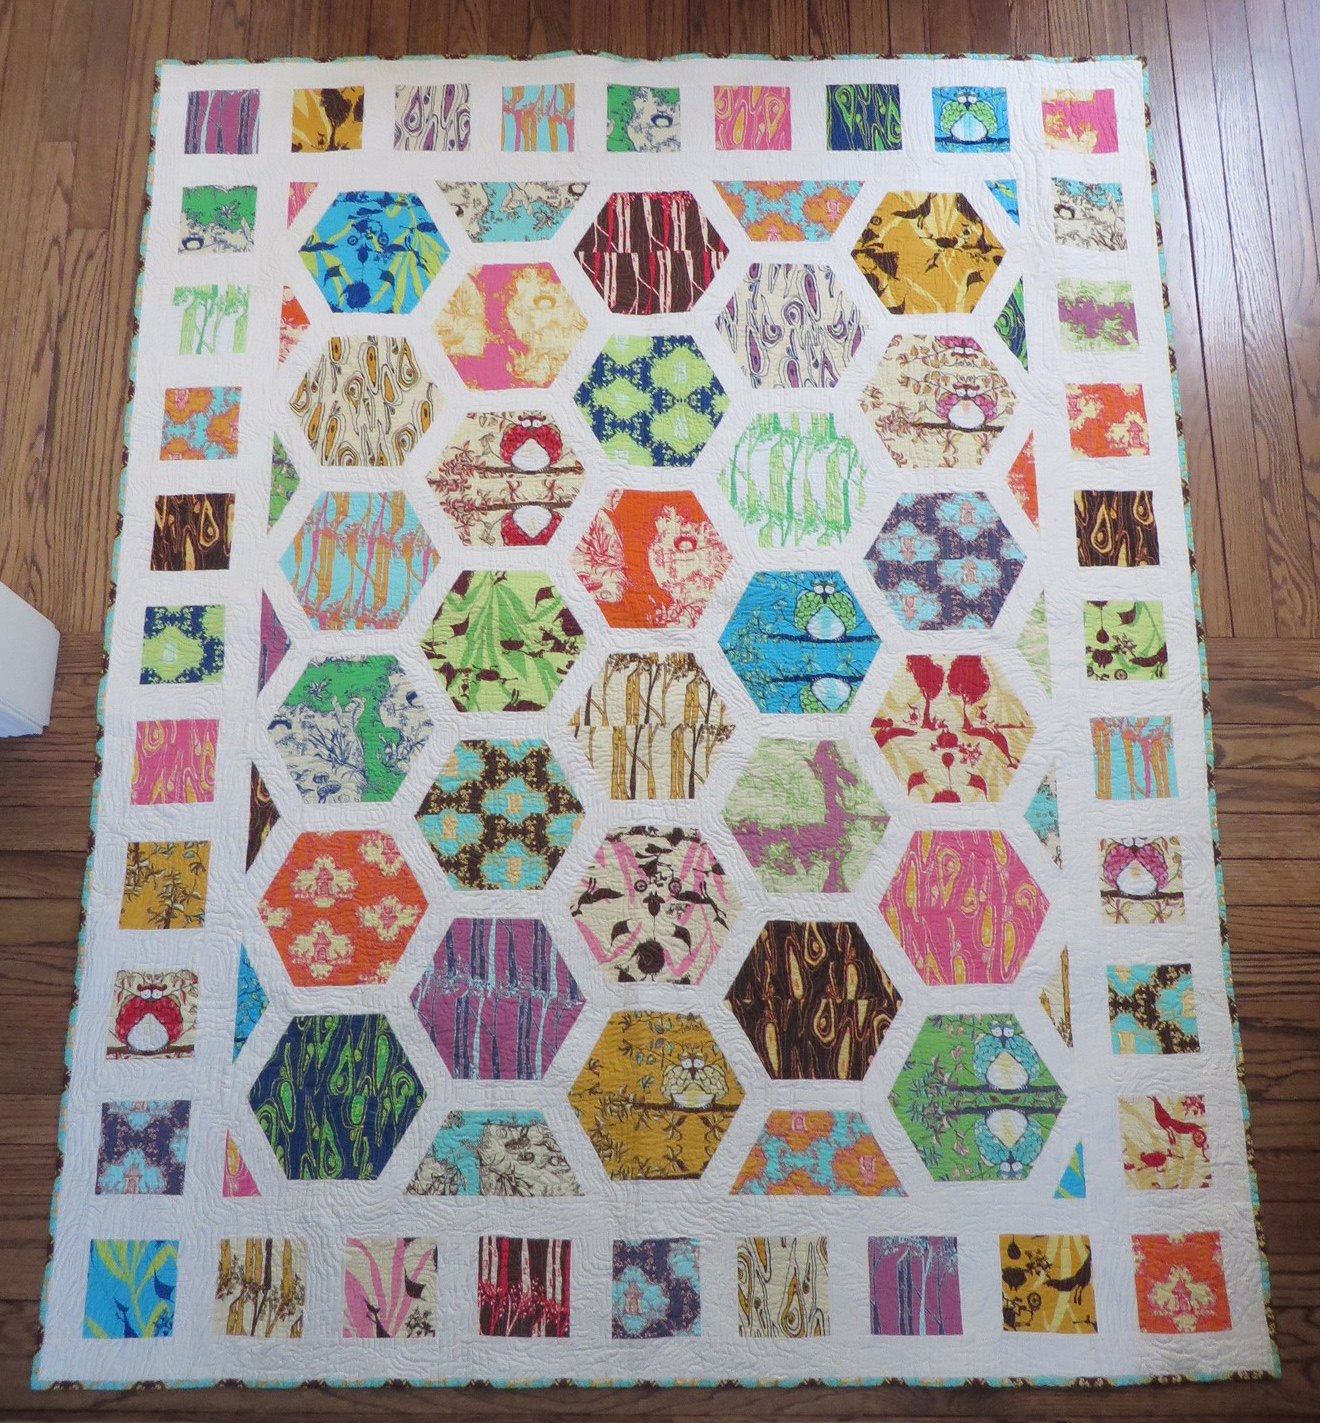
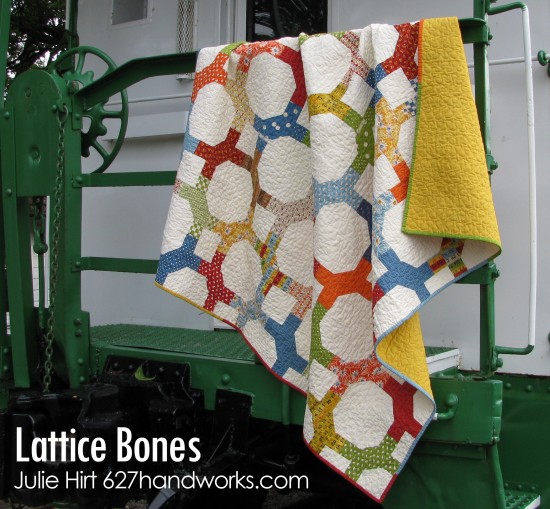
This is my 2nd quilt to go on the long arm and I tried a wood grain pattern.  The spacing is around 3/8″ and smaller.   After a quick wash the texture is AMAZING.

IMG_1297

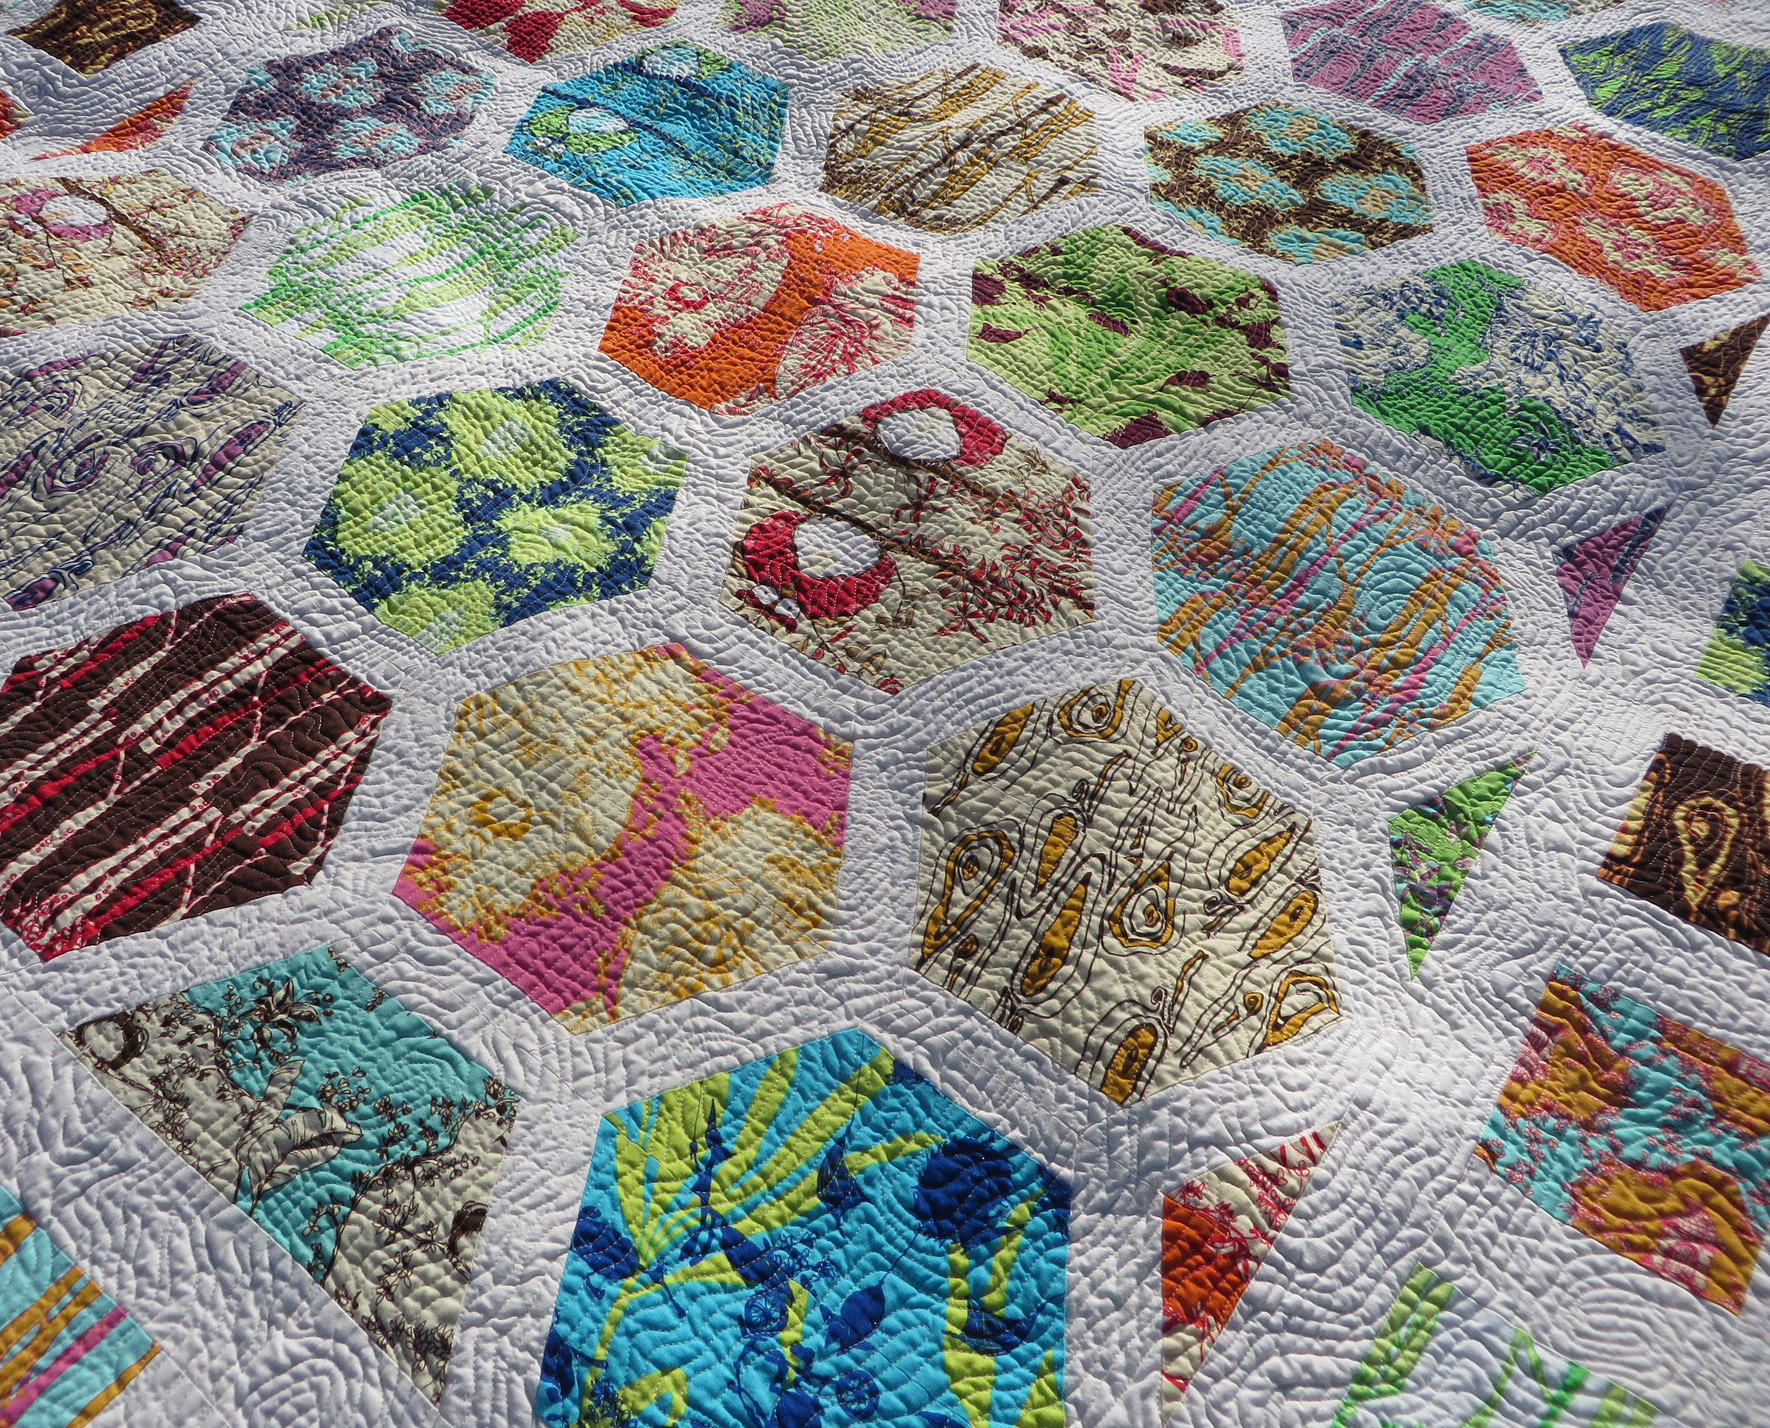
Click on the pic above for full size. DO IT!  Look at the crinkles. *sigh* I could just lay around with this for days.

IMG_1294

The finished quilt measures 70″ x 80″ so it would work for a twin size bed.

As much as I love the quilting, the fabrics and pattern, I don’t know if I’ll keep it.  Maybe sell it?  Not sure yet because there are some serious man hours in this.  The piecing took a surprising amount of time.

You can the pattern for free at Moda Bake Shop.

IMG_1298

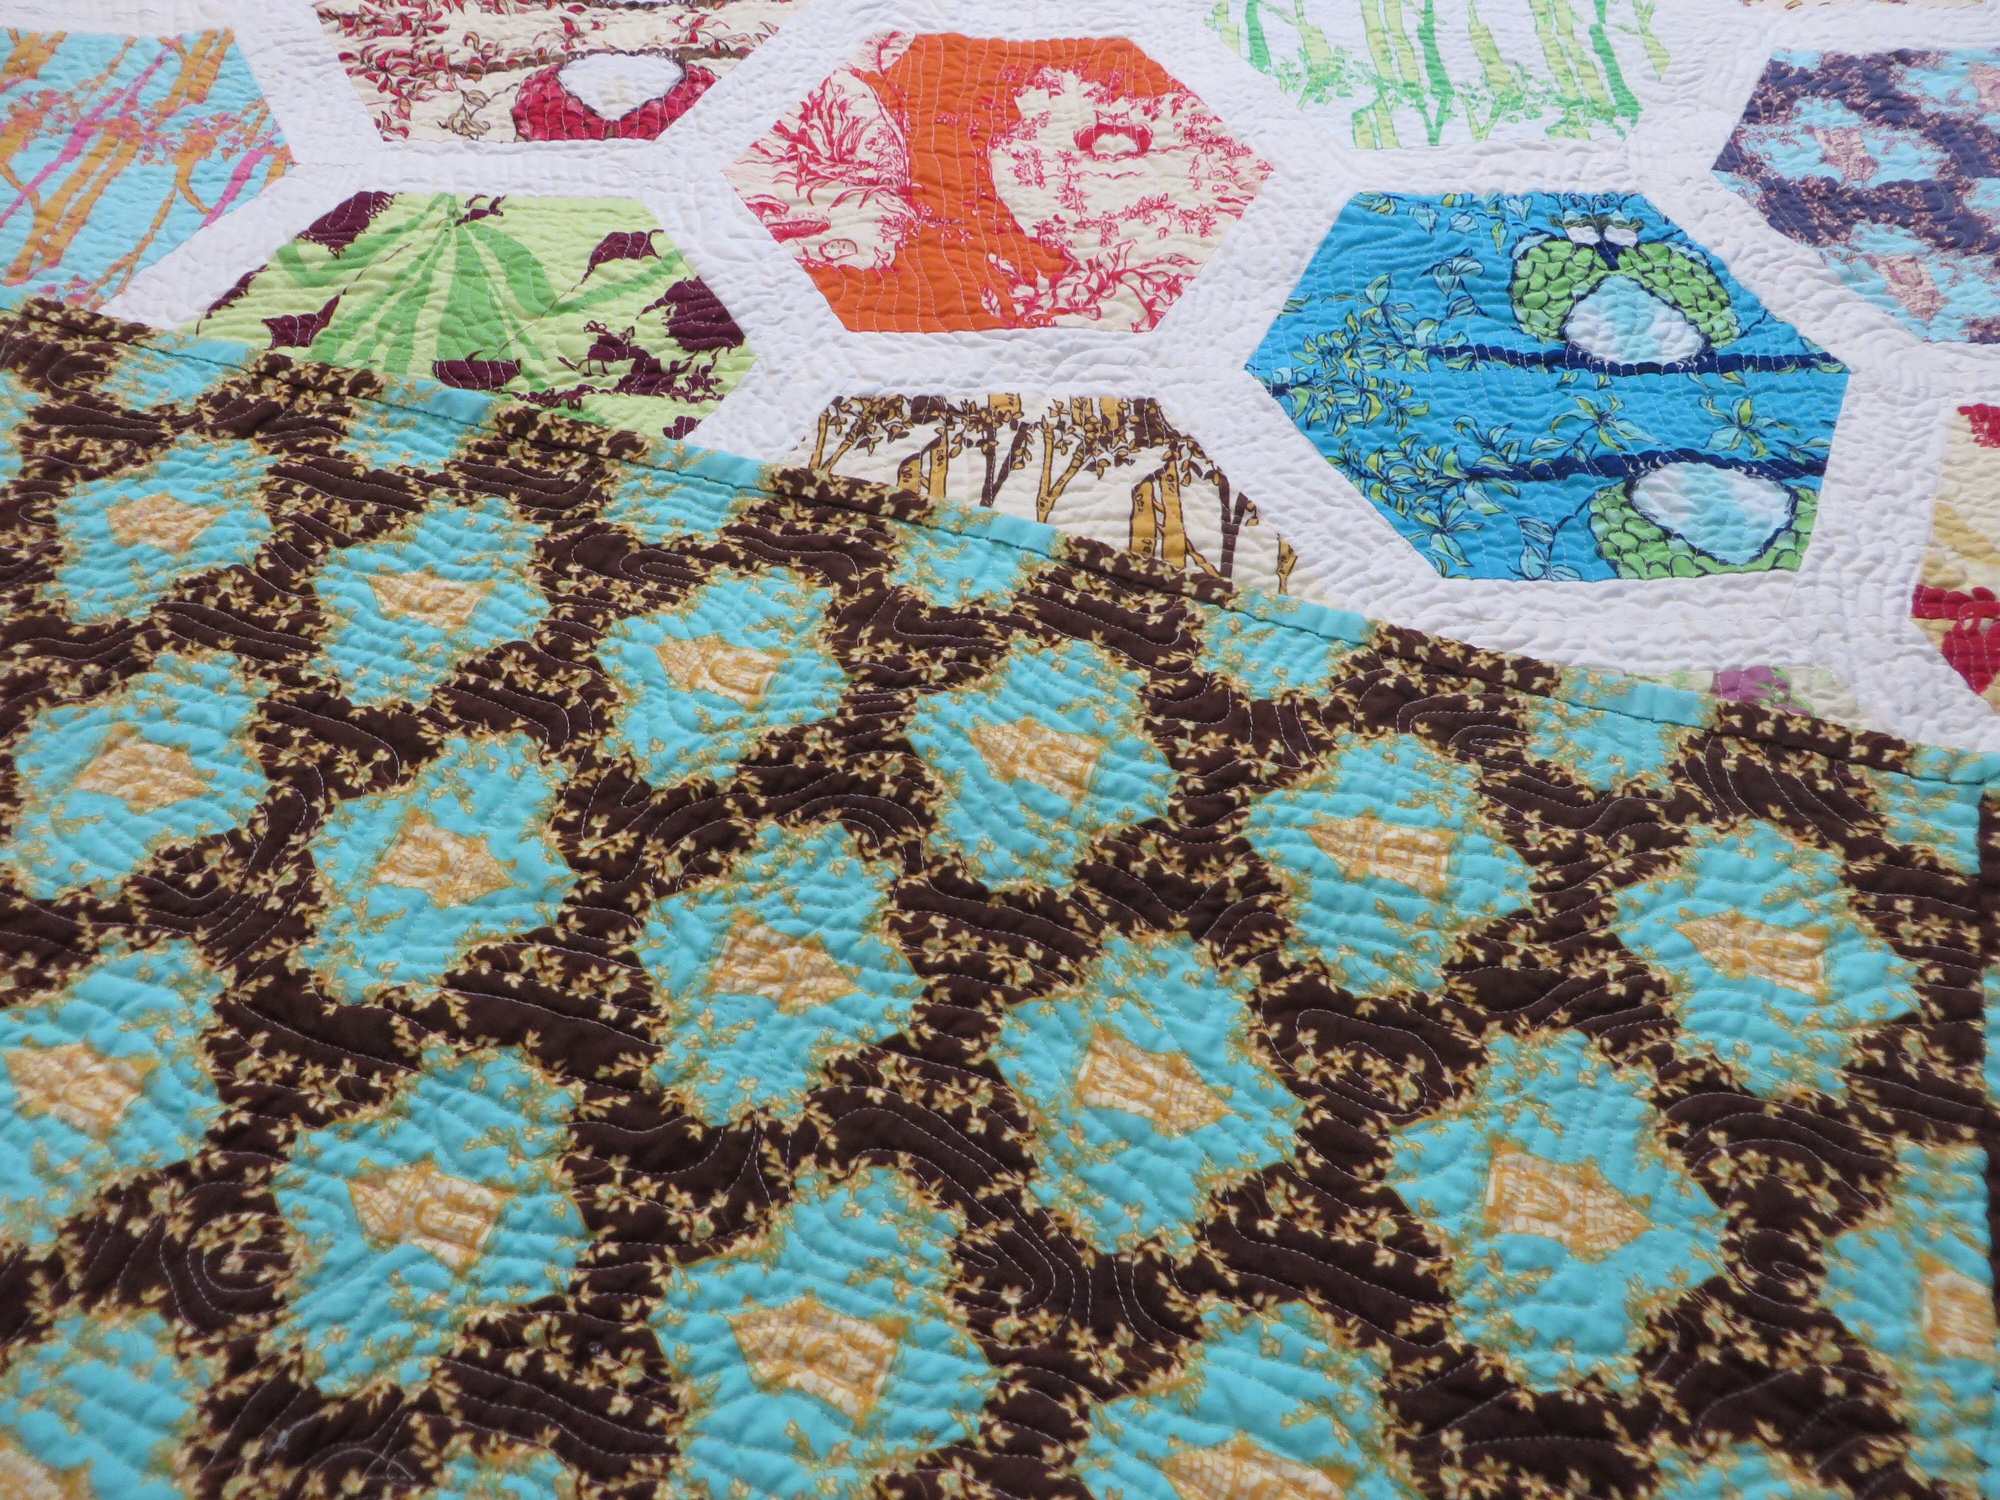
This summer I was at a local quilt shop and they had 5 yards of the backing fabric on clearance!  I couldn’t believe my luck as I think the Opal Owl line is hard to come by. That’s when I bit the bullet and cut into the bundle.


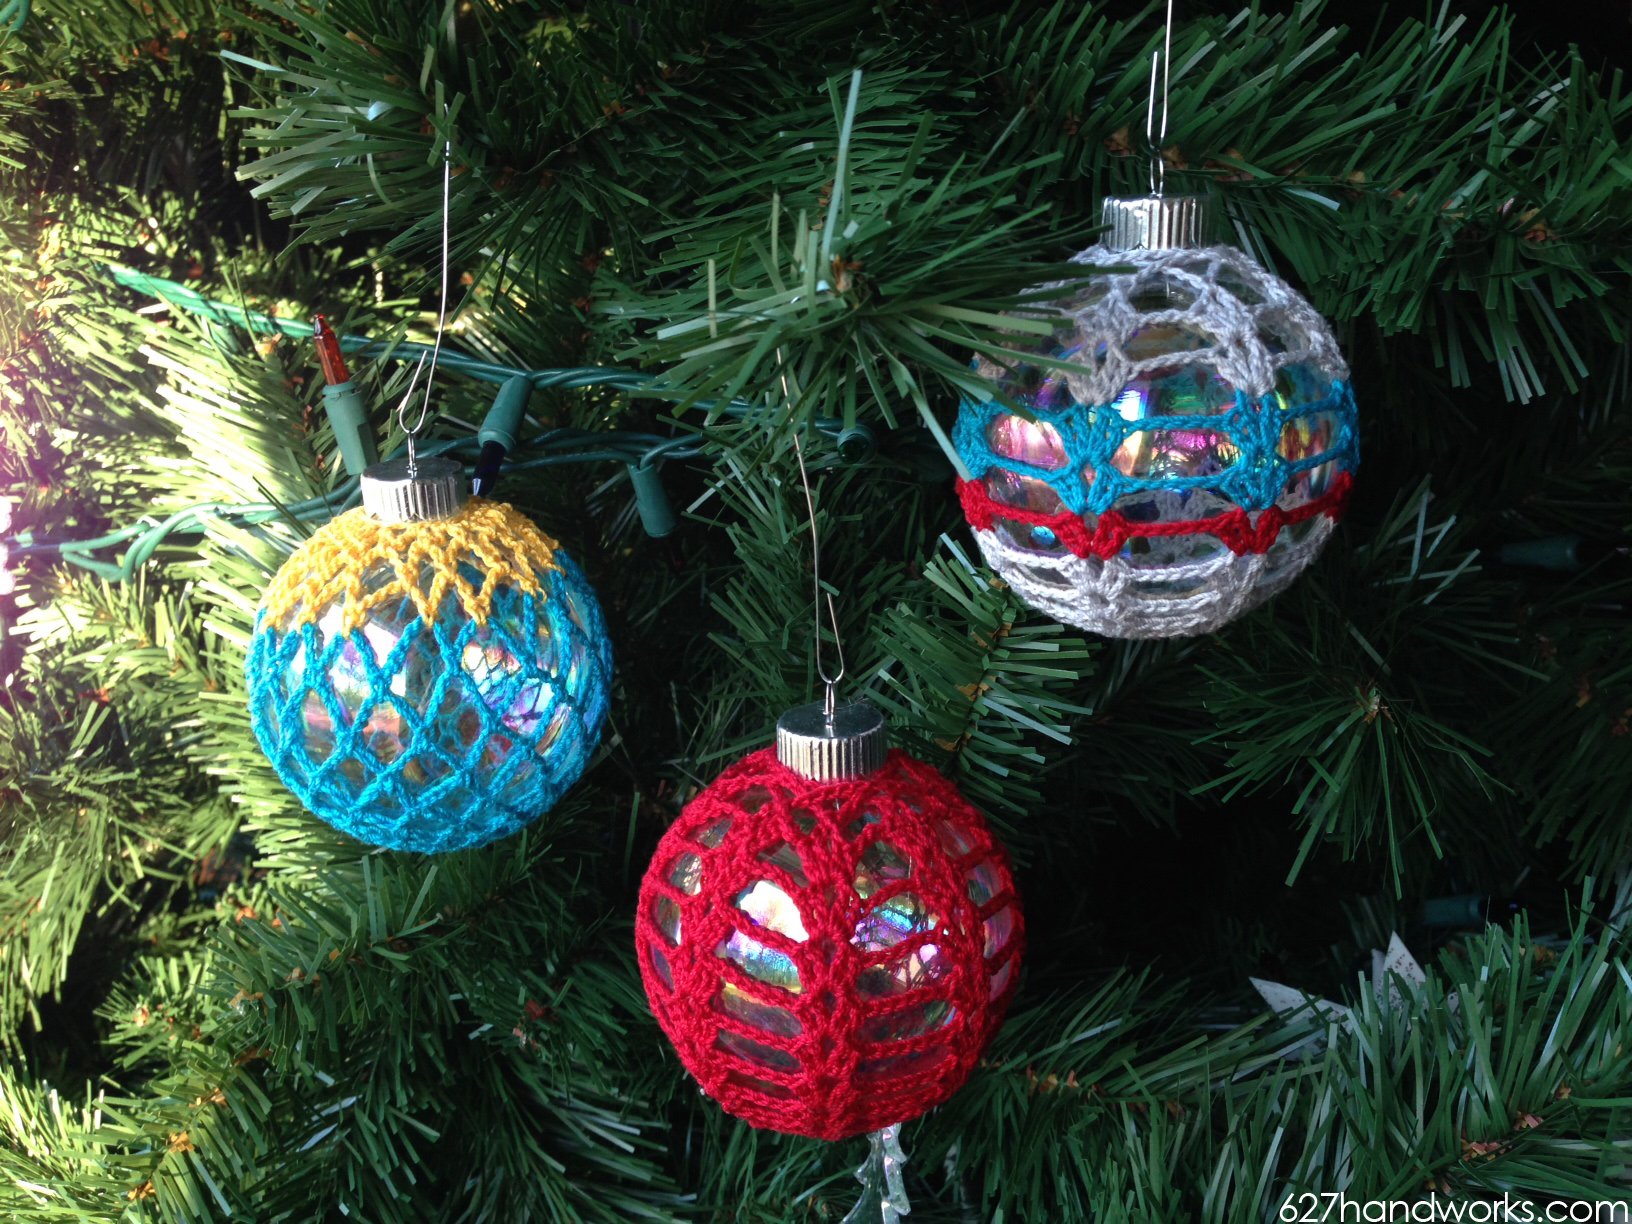
Oh! Want to see my official “First Finish of 2015”?

IMG_1254

My arrowhead stitch cowl. It was destined to be a scarf but I ran out of yarn and I wanted to get it off my list.  I was sick New Years Eve so I sat at home and finished it shortly after midnight.

I started the scarf this fall and it got lost in the shuffle of other projects. This is my first tunisian crochet project and I really like that it has a knitted feel, because I suck at actual knitting.  The yarn is a self striping wool blend called Sheepish.

Also got around to quilting this mini .  You can find the free Paper Piecing pattern HERE.   Gave machine binding another chance… again, I don’t know if it’s for me. It’s quick and looks okay but there’s something about hand stitching that does it for me.

IMG_1290

Just basic straight lines but it’s another WIP to cross off my list.

In my last post I mentioned I have to cross off at least half of my To-Make and To-Quilt lists before I can add a new project.  I’m well on my way with these three.


siggy

December 11th, 2013

Crochet Ornaments & Cluster Pattern

by Julie Hirt

Guess what I’ve been making during TV time?   Crochet Christmas ornaments!

crochet ornaments 627handworks (2)

My parents had some old ornaments with crochet around satin balls and I wanted to make some for myself using bright colors.

crochet ornaments 627handworks (1)

The pink ornament is made from a free pattern by Crochet Geek and it’s nice because you can also follow via video.

The aqua and yellow mesh looking ornament  is also a free pattern by Crochet Geek with a video tutorial. I didn’t add the flower but it’s my favorite base pattern.

Depending on the size of your balls (hahaha) you may need to add a few rows.  Or change it up by changing needle or thread sizes.

crochet ornaments 627handworks (4)

The pattern below is for this gray, aqua and red ornament. I also made it in solid red (above).

crochet ornaments 627handworks (5)

Bottom of the ornament.

crochet ornaments 627handworks (6)

Top of the ornament – you can see how the last row forms a star pattern.


crochetclusterornamentpattern

CROCHET CLUSTER ORNAMENT PATTERN:

Materials
Size 10 Aunt Lydia’s Cotton Crochet Thread
Steel Crochet Hook Size 6, 1.80 MM
2 5/8″ ornaments. Mine are clear glass that came in a pack of 12 from  Hobby Lobby.

Special Stitches
Beginning Cluster:  ch3, dc, ch2, 2dc in the same stitch
Cluster:  2dc, ch2, 2dc in the same stitch

Row 1
Ch6 and join with a slip stitch.  Ch3 (counts as first dc), dc 15 times in the center ring.
Join with a slip stitch at the top of ch3.  (total of 16)

Row 2
Ch6 (this counts as a ch3 and a dc)
*Skip a stitch, dc, ch3. Repeat from * around.
Join with a slip stitch in the 3rd chain  (total of 8 loops)

Row 3
Slip stitch into the first loop.
Beginning Cluster, ch1, * Cluster into each loop, ch1.
Repeat from * around.  Join with a slip stitch into top of ch3.

Row 4
Slip stitch into the ch2 space of cluster.
Beginning Cluster, ch2, * Cluster into ch2 space of clusters from the previous row, ch2.
Repeat from * around.  Join with a slip stitch into top of ch3.

Row 5
Slip stitch into the ch2 space of cluster.
Beginning Cluster, ch3, *Cluster into ch2 space of clusters from the previous row, ch3.
Repeat from * around.  Join with a slip stitch into top of ch3.

Row 6
Slip stitch into the ch2 space of cluster.
Beginning Cluster, ch4, * Cluster into ch2 space of clusters from the previous row, ch4.
Repeat from * around.  Join with a slip stitch into top of ch3.

Rows 7-8-9
Slip stitch into the ch2 space of cluster.
Beginning Cluster, ch5, * Cluster into ch2 space of clusters from the previous row, ch5.
Repeat from * around.  Join with a slip stitch into top of ch3.

Row 10
Slip stitch into the ch2 space of cluster.
Beginning Cluster, ch4, * Cluster into ch2 space of clusters from the previous row, ch4.
Repeat from * around.  Join with a slip stitch into top of ch3.

Row 11
Slip stitch into the ch2 space of cluster.
Beginning Cluster, ch3, * Cluster into ch2 space of clusters from the previous row, ch3.
Repeat from * around.  Join with a slip stitch into top of ch3.

** Insert Ornament **

Row 12
This will feel a little weird and may be a bit tight,  just stretch your work and it will fit nicely.
*Chain 12, sc into the ch2 space of the 3rd cluster over. Repeat from * until you are back at the first cluster.  Tie off.


Let me know if you have any questions.

Download PDF Copy of Crochet Cluster Ornament Pattern

julie

February 18th, 2013

Crochet Edged Superstar Quilt

by Julie Hirt

WARNING – Picture heavy post!

star3

For some reason I just had no desire to finish this thing up.  I got this idea in my head that I really wanted to crochet a border for a quilt.  When we were on vacation in Florida the home we stayed in had a beautiful quilt with a crocheted edging, so I just had to make one.

star5


I’ll tell you what, trying to figure it out frustrated me to death.  First I bought an awl, then after playing with scraps realized my fingers would fall off before I punched all the way around a quilt (3 layers, ya know!).  I knew I didn’t want to blanket stitch all the way around. So I kept playing around with scraps and finally came up with something I was happy with, and wasn’t totally time consuming.

star6

star8

Recently I posted my pattern for my Superstar quilt and wanted to try something for the quilting. Following Oh, Fransson’s orange peel tutorial, I found it was relatively easy.  Now, don’t look too closely!  It was definitely a practice but I really like how it turned out.  Off kilter circles and all.

star2   star4

This quilt had a series of firsts for me:

  • Coming up with a pattern for the star with a single charm pack
  • FMQ the orange peel
  • Round quilt corners (just traced a cup and cut!)
  • Mitered corners on the border
  • Crochet border / binding

The crochet quilt edging definitely did not save time from traditional binding, but I love the look of it and it’s worth the effort.  Although, I’m not sure I’ll try it on a large quilt!  star7

To make the crochet edging I assembled the quilt a little differently.

  • I made a sandwich by stacking batting, backing (pretty side up) and quilt top (pretty side down). Sewed 1/4″ all  the way around leaving a 6″ gap for turning.
  • After turning I hand stitched the gap closed.
  • Then I stitched 1/4″ all the way around (after finishing, I realize this step can be omitted).
  • Then I pulled out my overcast M foot – pretty handy! I don’t really make clothing and such so I’ve never used it. Over-lock stitch all the way around the border.  (This is why the last step was unnecessary) This creates a nice little zig zag with thread overlaying the outer edge. I suggest using  a matching thread.

Now the tricky part.  Pull out a small metal crochet hook (I used 3.25mm) and thin yarn. Red Heart Baby Sheen was a nice size for me, it’s a fine yarn.

Between each overlock stitch there is a thread on the outside of the quilt, on the very edge.  Put your hook between under that thread and single crochet.  At first it seems really strange until you get going. I noticed where the thread makes a “V” on the blanket is directly below where I wanted my crochet hook.  This step takes a little time but you can do it.

After Single Crocheting (sc) all the way around, pick your design!  I chose a simple scallop pattern:  *5 DC, skip a stitch, slip stitch, skip a stitch and repeat from *.  When you get to the end you may have an extra stitch or two but just slip stitch to your beginning DC and tie off.

star10

star9

I just love the texture this created. If you know of a better method for adding a crochet border, let me know!  I did NOT want to blanket stitch all the way around, it just looks kind of messy to me.

January 19th, 2013

T-Shirt Yarn Crochet Pouf

by Julie Hirt

I’ve made a lot of changes to my craft room and finished projects, so I’m hoping to get around to posting a few updates.

Recently I’ve seen a lot of pictures of crochet poufs that I’ve loved (Pinterest).  I’m not paying a few hundred dollars for one either!   So here is my version of a crochet pouf I made a couple of weeks ago out of t-shirt yarn. I’m very happy with how it turned out and how quick it was to make.

I used this tutorial for creating the yarn. Can you believe this used FIFTEEN shirts! Originally, I had planned on using my husbands old undershirts and ran out.  After a quick trip to the Salvation Army and $.50 a shirt, I decided I may need to find a few more uses for t-shirt yarn. Maybe some baskets to hold my WIP?

It’s pretty sturdy and when you sit on it, it doesn’t have a ton of give so it’s super comfy. It’s stuffed with 2 old comforters. You can’t tell in the picture but it’s about 2 feet wide by 8″ tall. I didn’t use a pattern, I just double crocheted a basic crochet circle until it was big enough.  Then I DC a bunch of rounds until I was satisfied with the height.  Then decreased the circle and left a hole big enough to stuff!

crochetpouf

It sits in front of this AWESOME Craigslist find.  This chair is amazing. A girl had a lot of cute items listed and no longer had room for them after moving in with her fiance. Her loss! She had recently had it recovered and it’s down stuffed and oh-so-comfy, as you can tell by the 3 little squirts who have claimed it as their own.

crochetpouf2

If you can crochet and like the look of the poufs, I’d recommend making one!

February 8th, 2011

Woolly Goodness

by Julie Hirt

It’s been a while since I’ve blogged about any projects, but I haven’t had any projects.  Booo.  We had a small house fire and that has turned into a almost 6 months of living in a rental.  ALL of my sewing and craft supplies are locked up in storage.  It made for a pretty boring winter on the craft front.

A few months ago I couldn’t take it anymore and bought a few crochet hooks.  I made a couple of scarves and a quick, triple-thick afghan.  Since my camera is also in storage I haven’t been able to take any pictures of those projects.

I wanted to get photos of this yarn before I started my project, so  I brought them to work with me and borrowed an office camera.  I’m in love with the colors and feel of this yarn!  It’s an assortment from the Cascade 220 Superwash line. I never knew 100% wool could be so soft.  I did splurge a little but I figured it will be my project for many, many weeks.  Quite possibly, months.  There is also a softer orange color that I’ll be picking up from my local Yarn Shop this week.

These pretty balls of goodness will (hopefully) be transformed into a ripple blanket using Attic24’s Neat Ripple Pattern.

Side note:  I think my dad loves the quilt I made for him.  I cannot WAIT to get back to sewing – knowing I have quilts partially made for the girls is driving me crazy.   Want to get those finished up so I can start a quilt for my mom.

August 22nd, 2010

Cluster Bag

by Julie Hirt

I didn’t really feel like sewing much this week but I did work on this.  Just wanted to crochet something quick and not get started on a big project.

I was inspired by A Pensive Adagio‘s pink tote.  The pattern can be found here.

To be honest I had some problems with it. I made the first round of clusters incorrect because the how-to isn’t at the beginning (it was a whole sentence down. How dare they!). Unfortunately I’m not one to read ahead – I just jump in.  This time I jumped in the wrong way. Luckily it wasn’t that much to pull out.  Then I ended up with 44 clusters rather than 40…  and for the handle I made a little adjustment.  Other than my own mistakes which made the pattern more difficult, I think it’s a good project.  I’d like to double the size next time and maybe work in a different type of handle. I’m not sure how much weight these will hold but it certainly looks cute.

It’s not something I’ll carry it around, I just enjoy making things so I’ll probably give it to my niece or one of the girls.   The flowers I added are pretty simple:  Chain 2 and join. 10 sc in the loop.  In the first sc you will *sc, 2 dc and ss. ss in the next sc.  Repeat 4 times from *.  You’ll end up with 5 petals.  The red flower I had 12 sc’s in the loop and ended up with 6 petals.

Related Posts Plugin for WordPress, Blogger...