December 11th, 2013

Crochet Ornaments & Cluster Pattern

by Julie Hirt

Guess what I’ve been making during TV time?   Crochet Christmas ornaments!

crochet ornaments 627handworks (2)

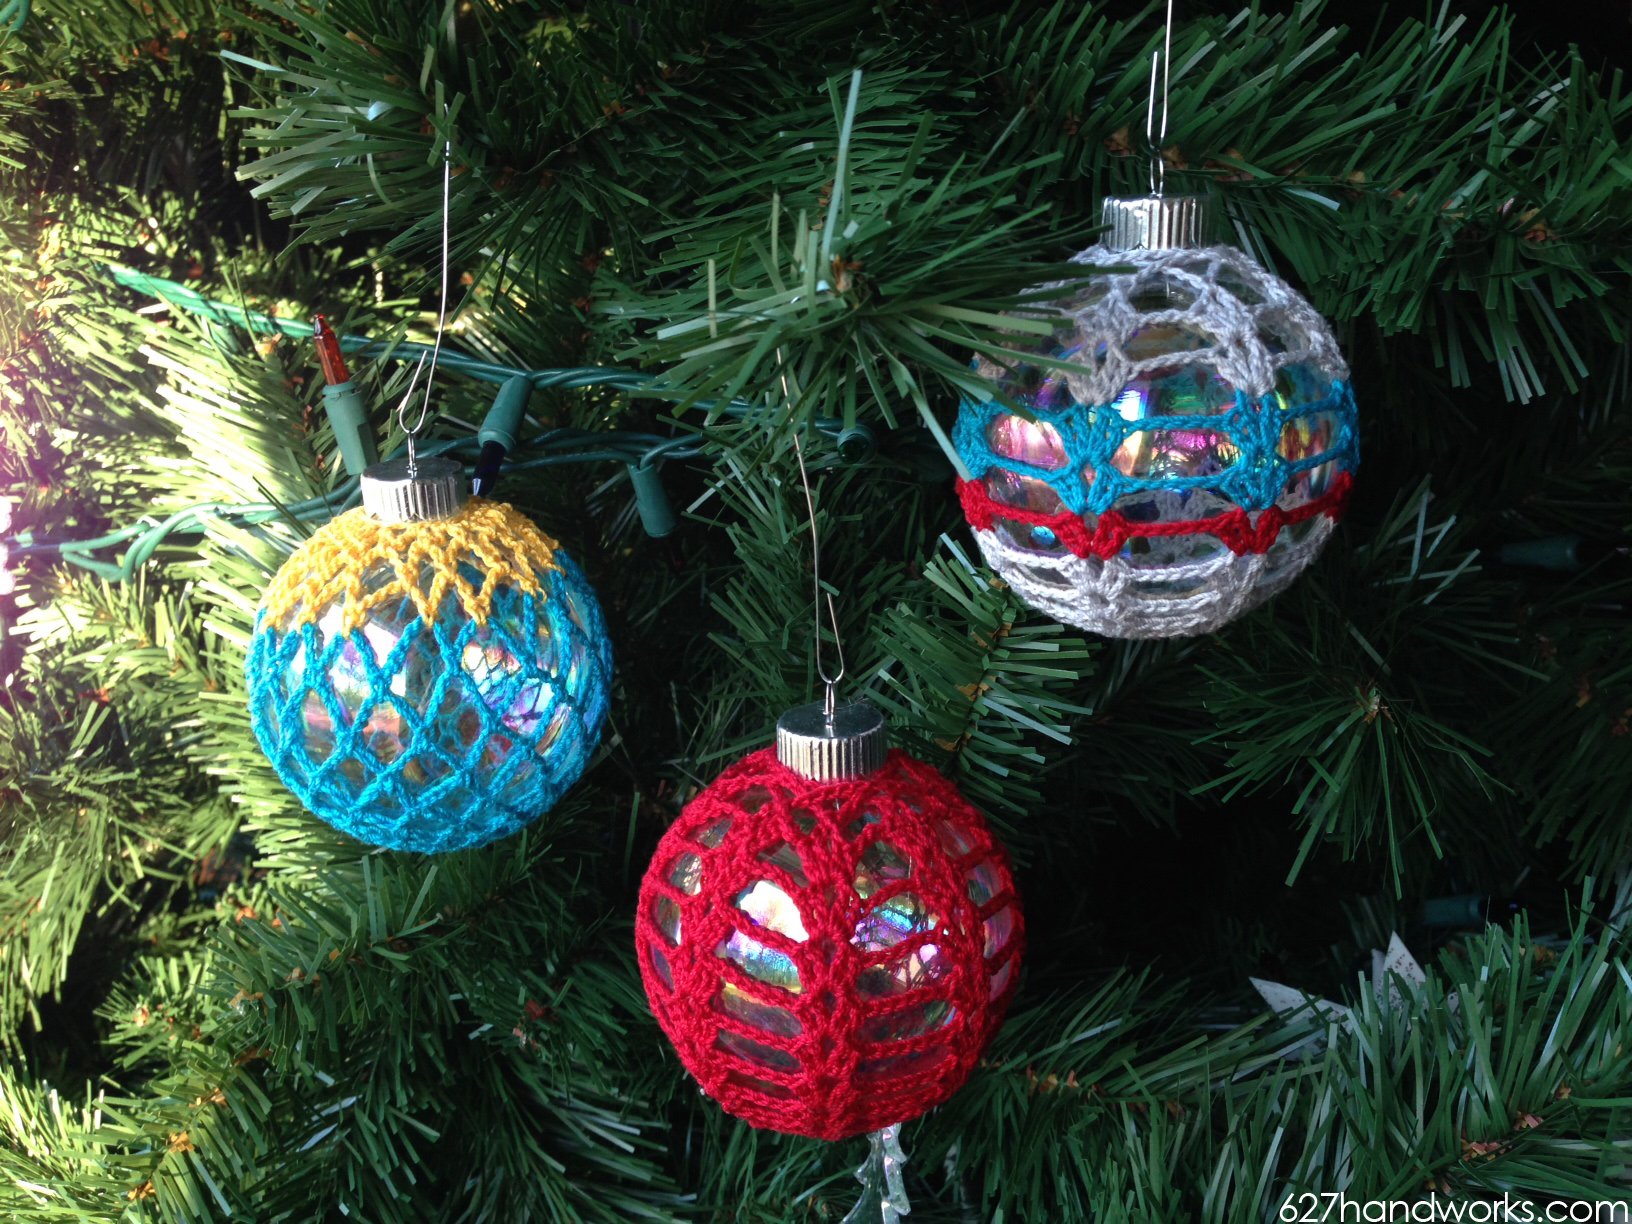
My parents had some old ornaments with crochet around satin balls and I wanted to make some for myself using bright colors.

crochet ornaments 627handworks (1)

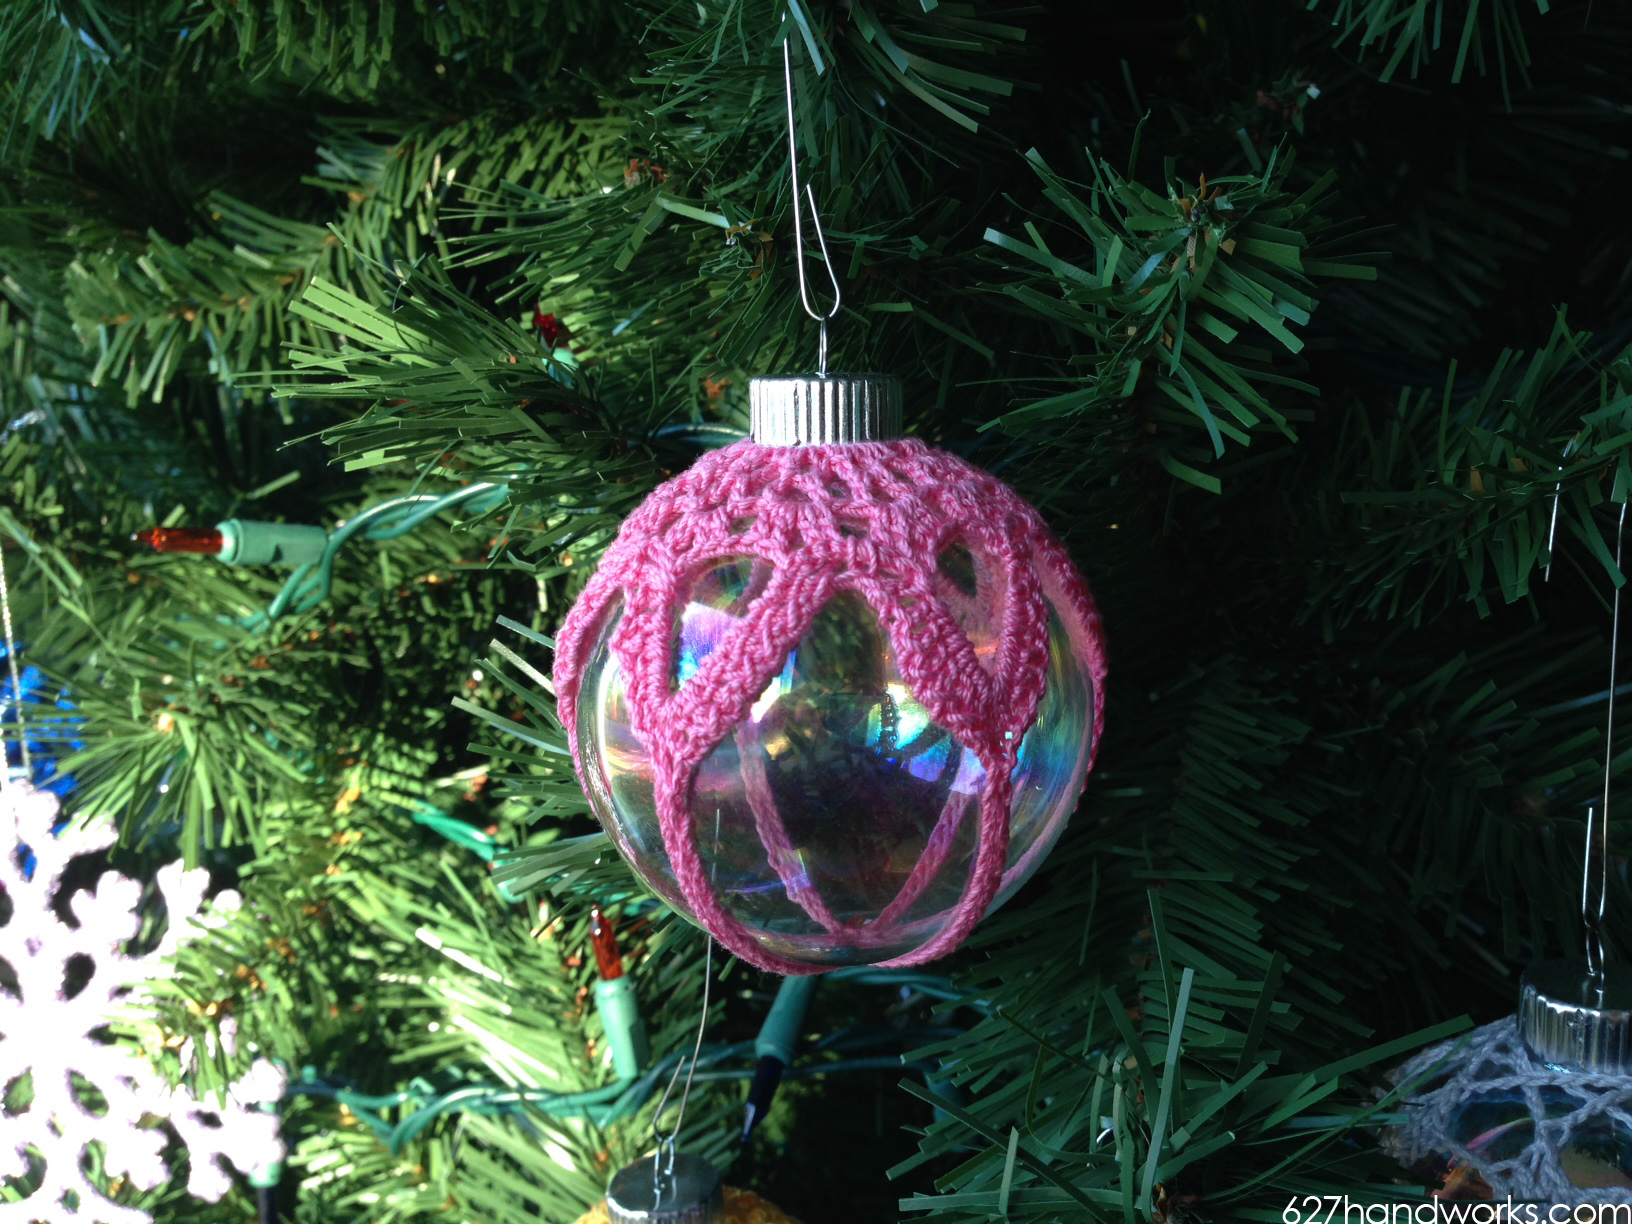
The pink ornament is made from a free pattern by Crochet Geek and it’s nice because you can also follow via video.

The aqua and yellow mesh looking ornament  is also a free pattern by Crochet Geek with a video tutorial. I didn’t add the flower but it’s my favorite base pattern.

Depending on the size of your balls (hahaha) you may need to add a few rows.  Or change it up by changing needle or thread sizes.

crochet ornaments 627handworks (4)

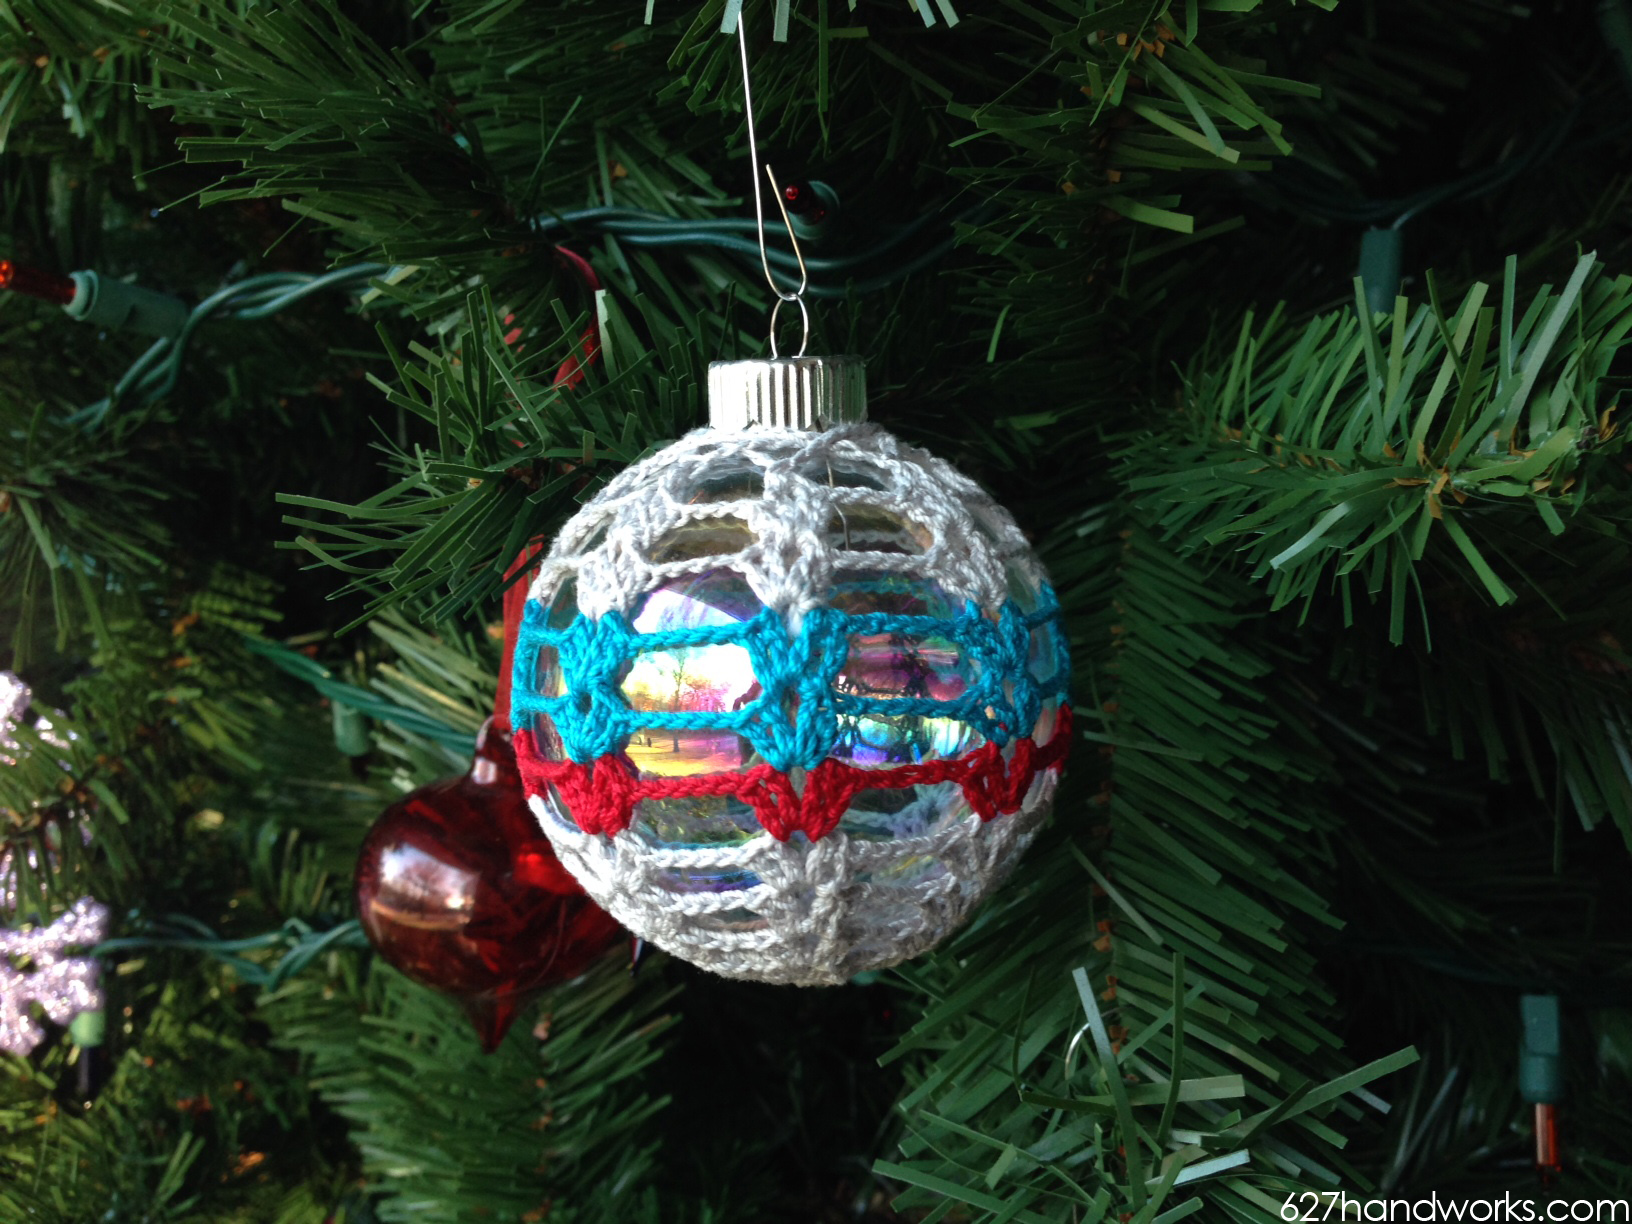
The pattern below is for this gray, aqua and red ornament. I also made it in solid red (above).

crochet ornaments 627handworks (5)

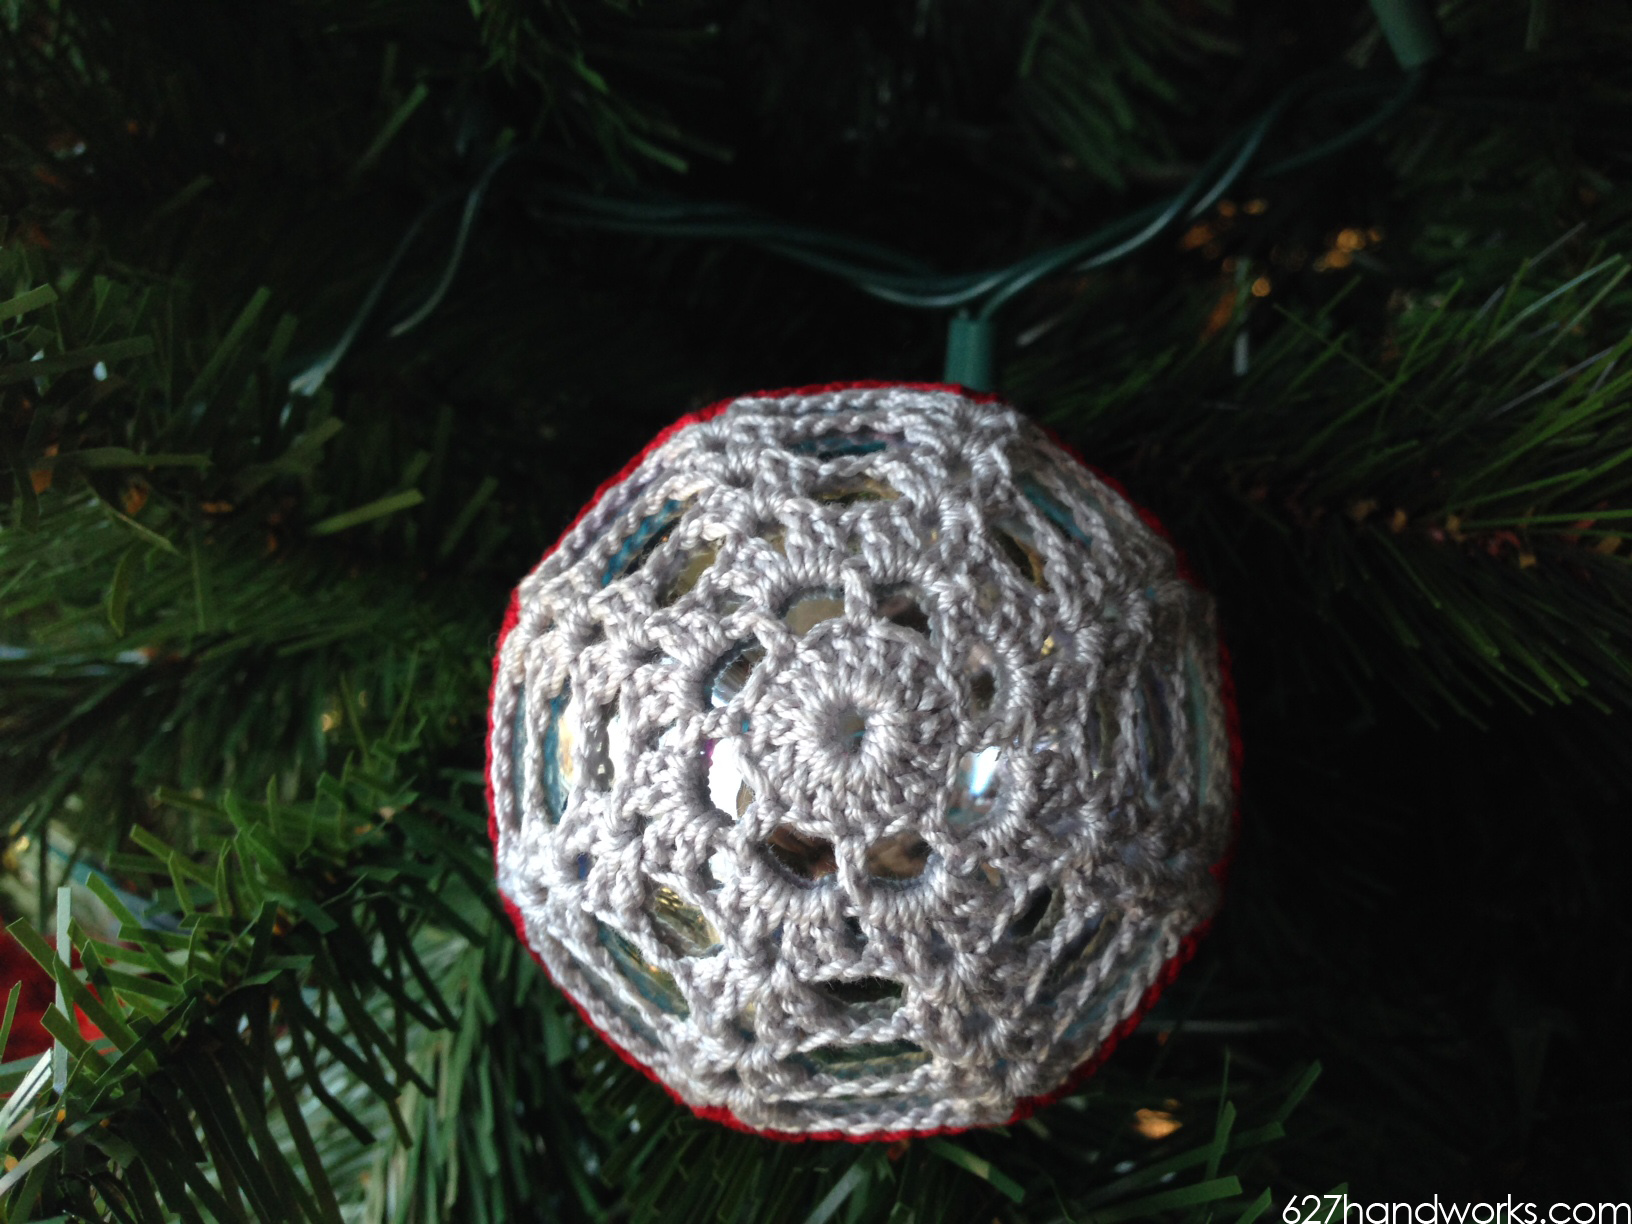
Bottom of the ornament.

crochet ornaments 627handworks (6)

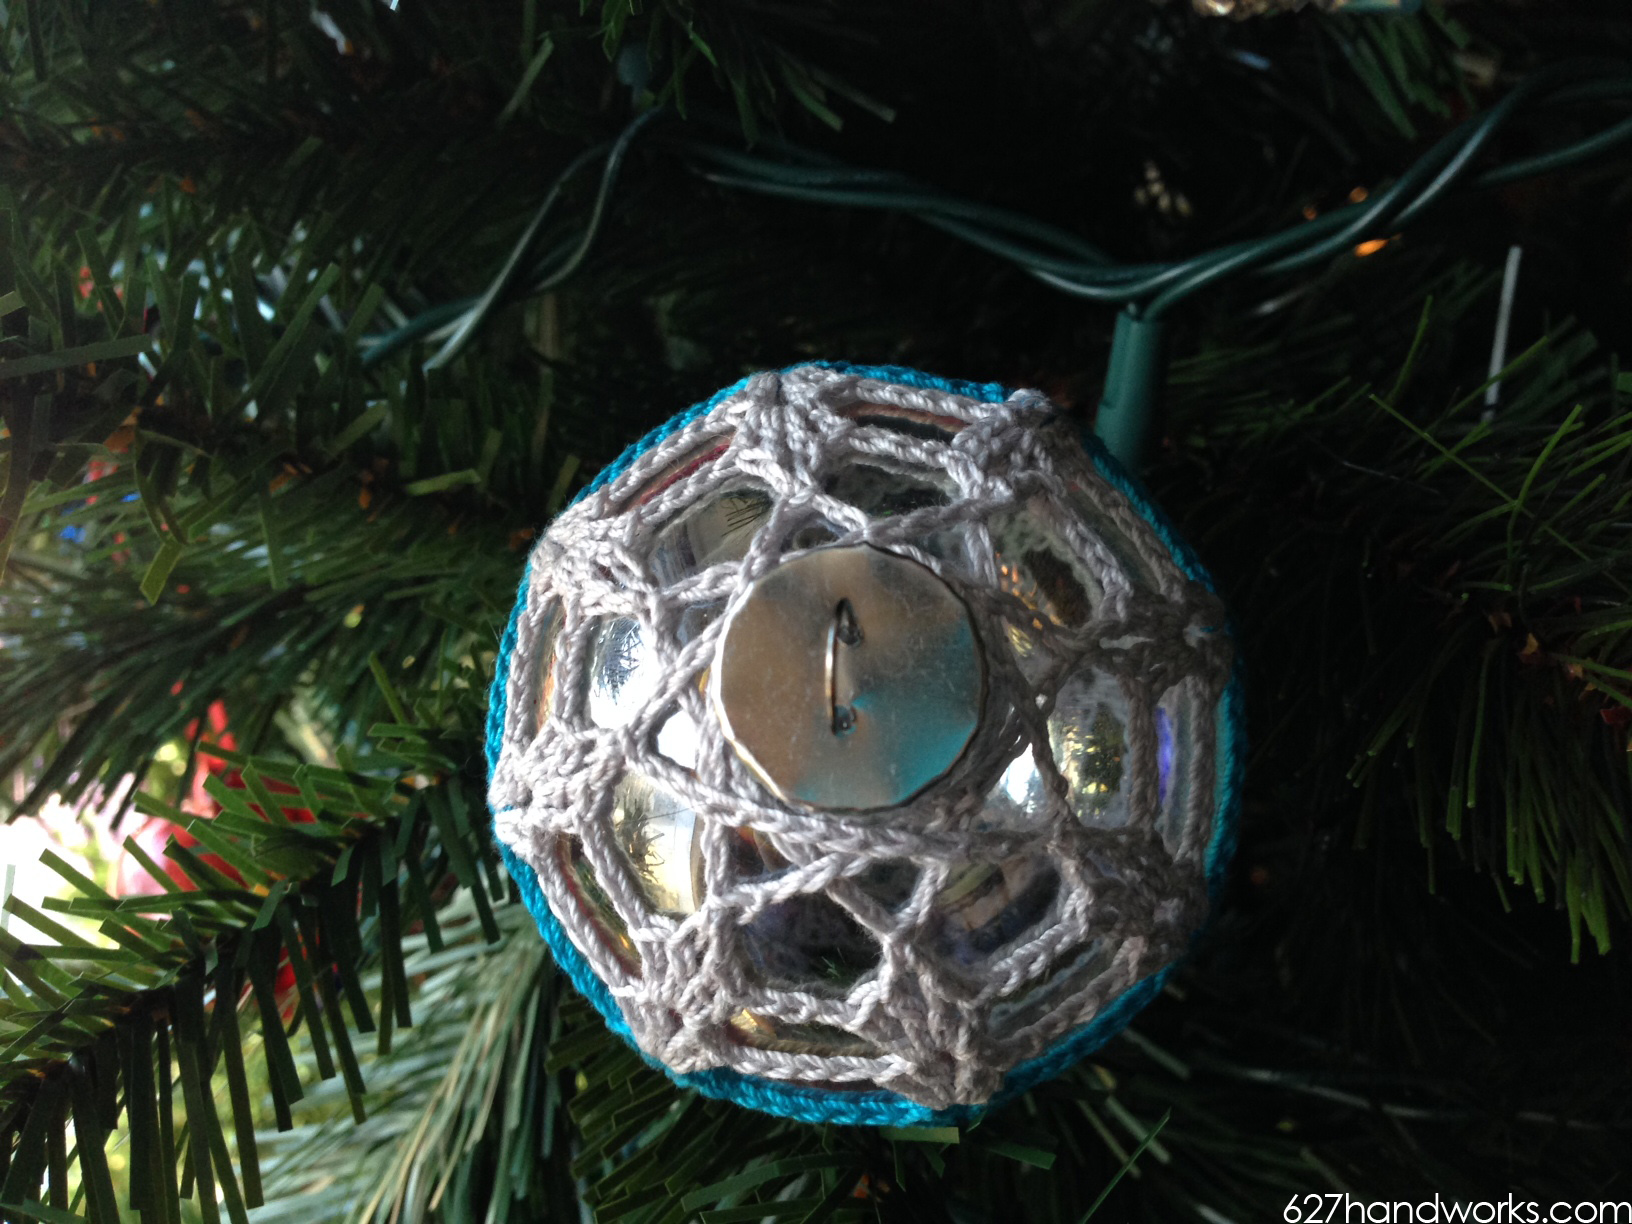
Top of the ornament – you can see how the last row forms a star pattern.


crochetclusterornamentpattern

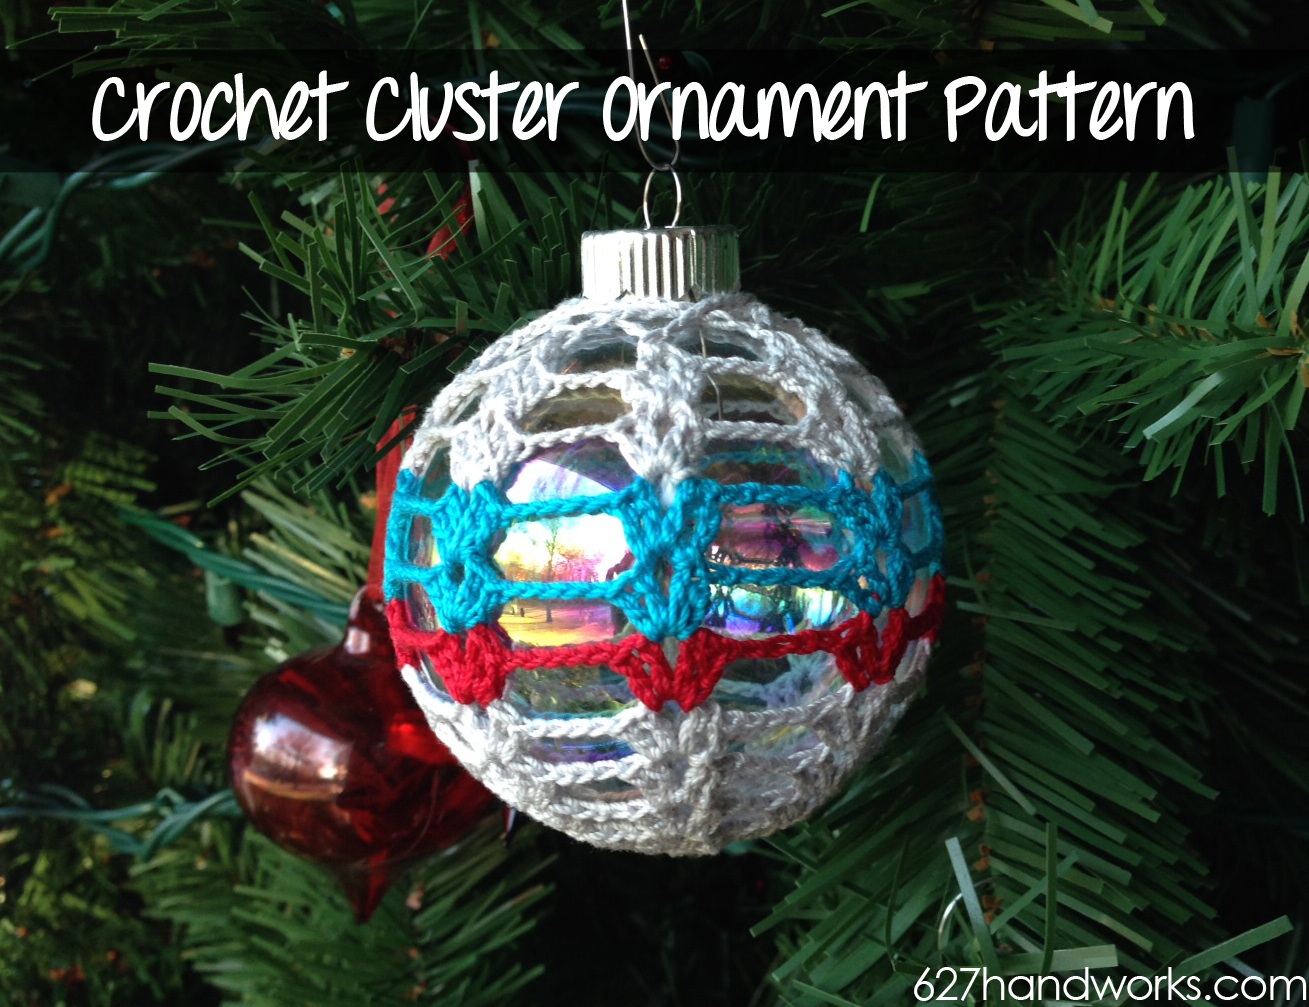
CROCHET CLUSTER ORNAMENT PATTERN:

Materials
Size 10 Aunt Lydia’s Cotton Crochet Thread
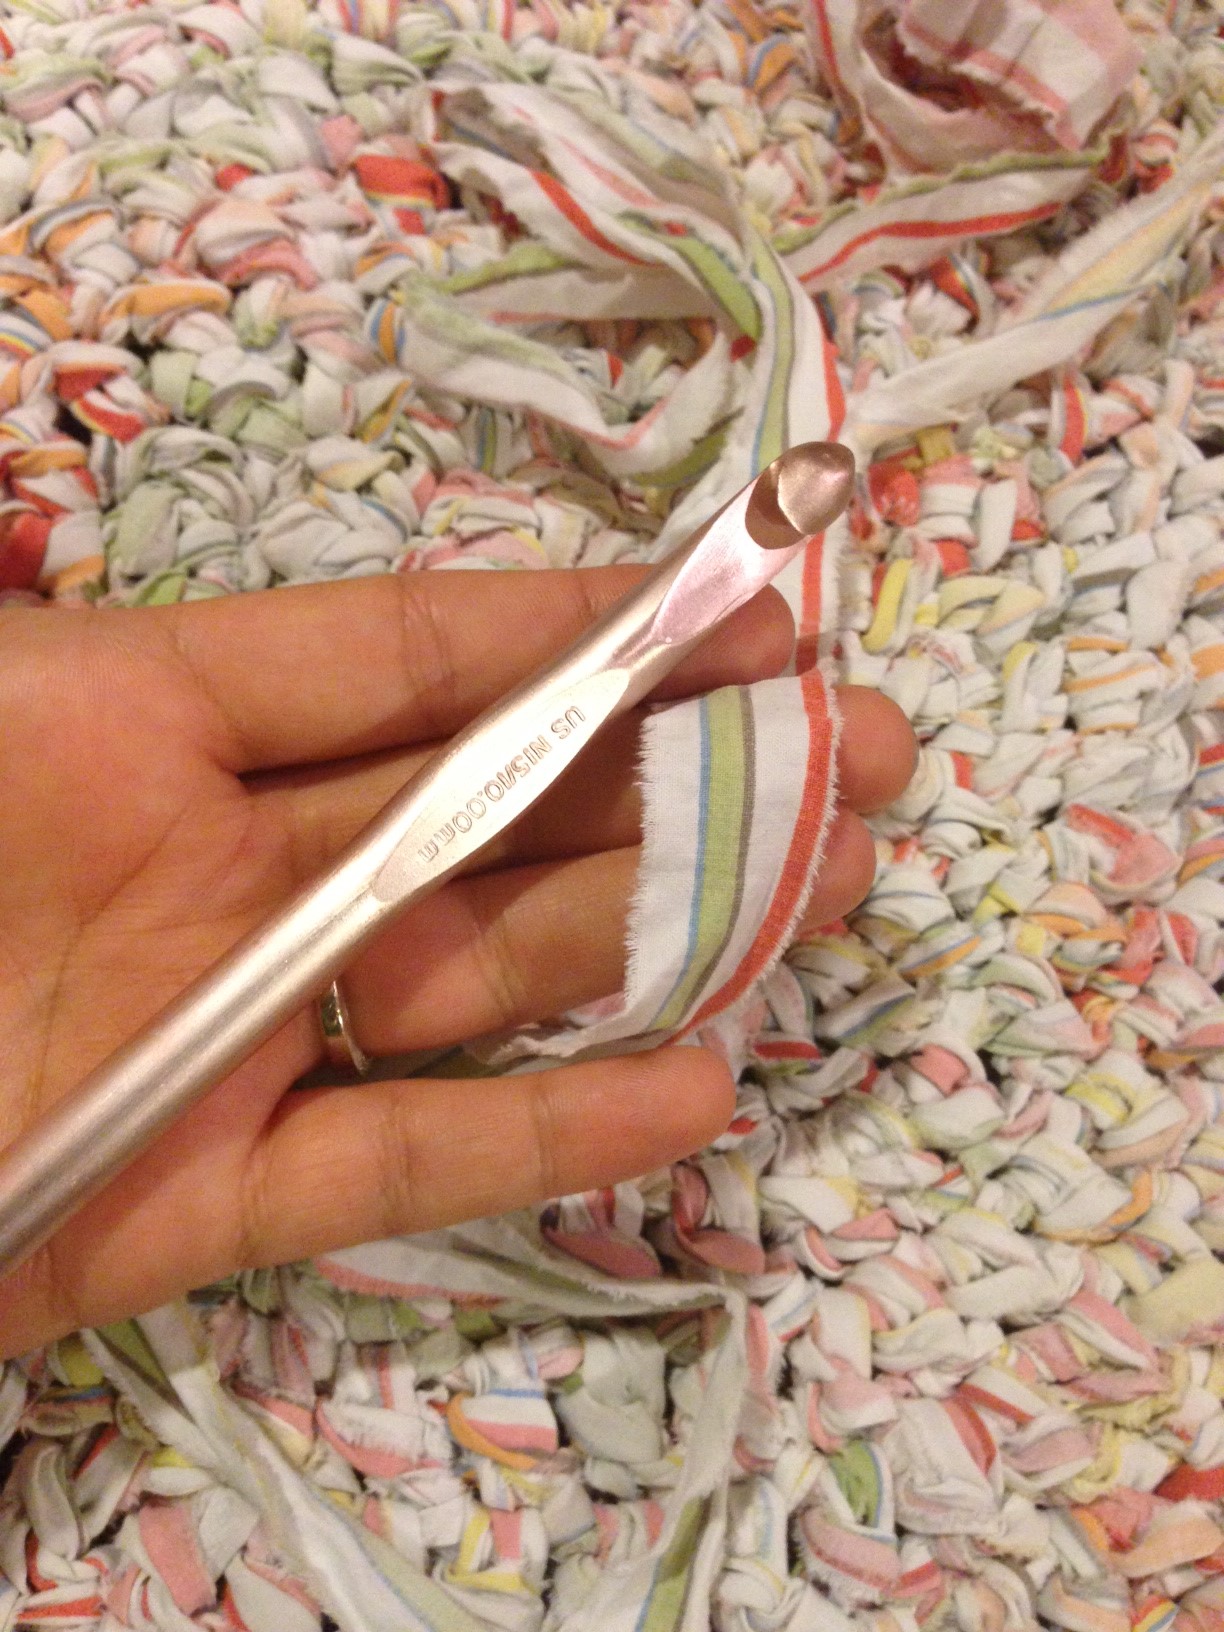
Steel Crochet Hook Size 6, 1.80 MM
2 5/8″ ornaments. Mine are clear glass that came in a pack of 12 from  Hobby Lobby.

Special Stitches
Beginning Cluster:  ch3, dc, ch2, 2dc in the same stitch
Cluster:  2dc, ch2, 2dc in the same stitch

Row 1
Ch6 and join with a slip stitch.  Ch3 (counts as first dc), dc 15 times in the center ring.
Join with a slip stitch at the top of ch3.  (total of 16)

Row 2
Ch6 (this counts as a ch3 and a dc)
*Skip a stitch, dc, ch3. Repeat from * around.
Join with a slip stitch in the 3rd chain  (total of 8 loops)

Row 3
Slip stitch into the first loop.
Beginning Cluster, ch1, * Cluster into each loop, ch1.
Repeat from * around.  Join with a slip stitch into top of ch3.

Row 4
Slip stitch into the ch2 space of cluster.
Beginning Cluster, ch2, * Cluster into ch2 space of clusters from the previous row, ch2.
Repeat from * around.  Join with a slip stitch into top of ch3.

Row 5
Slip stitch into the ch2 space of cluster.
Beginning Cluster, ch3, *Cluster into ch2 space of clusters from the previous row, ch3.
Repeat from * around.  Join with a slip stitch into top of ch3.

Row 6
Slip stitch into the ch2 space of cluster.
Beginning Cluster, ch4, * Cluster into ch2 space of clusters from the previous row, ch4.
Repeat from * around.  Join with a slip stitch into top of ch3.

Rows 7-8-9
Slip stitch into the ch2 space of cluster.
Beginning Cluster, ch5, * Cluster into ch2 space of clusters from the previous row, ch5.
Repeat from * around.  Join with a slip stitch into top of ch3.

Row 10
Slip stitch into the ch2 space of cluster.
Beginning Cluster, ch4, * Cluster into ch2 space of clusters from the previous row, ch4.
Repeat from * around.  Join with a slip stitch into top of ch3.

Row 11
Slip stitch into the ch2 space of cluster.
Beginning Cluster, ch3, * Cluster into ch2 space of clusters from the previous row, ch3.
Repeat from * around.  Join with a slip stitch into top of ch3.

** Insert Ornament **

Row 12
This will feel a little weird and may be a bit tight,  just stretch your work and it will fit nicely.
*Chain 12, sc into the ch2 space of the 3rd cluster over. Repeat from * until you are back at the first cluster.  Tie off.


Let me know if you have any questions.

Download PDF Copy of Crochet Cluster Ornament Pattern

julie

Tags:
Share
December 9th, 2013

Countdown to Christmas Advent Calendar

by Julie Hirt

Yikes!  I almost didn’t get this made in time.  Finished it up this weekend and I’ll be delivering it to my niece and nephews this evening.

Countown to Christmasn 627handworks (1)

The pockets are stuffed with little goodies.  I used a Riley Blake charm pack for the pockets and some bright solids for the interior.

Countown to Christmasn 627handworks (2)

I tried something different for the quilting by using different colors of threads.  It’s okay, not sure I would it would be worth it on a printed fabric.

Countown to Christmasn 627handworks (3)

Since I waited so long to finish this up I purchased backing and binding fabric at Joann’s.  It goes pretty well with the Riley Blake fabrics.

Machine binded for the first time (I always hand sew it on the back) and it’s pretty terrible. ha!  Definitely need to practice.

Janice at Better of Thread hosted a Quilt-Along.  I’m just sorry I didn’t get mine finished in time for the party!

julie

Share
November 22nd, 2013

Tutorial: “Boutique Bones” Removable Dog Bed Cover

by Julie Hirt

Sew Lux Fabric challenged me to a duel!

Okay, not really.  It was a design challenge using 6 fat quarters from their shop.  Immediately I knew it was the perfect chance to make a dog bed cover.

Boutique Bones 627handworks

I picked some fabrics that I loved, ignoring the fact that Bojangles is a boy. Dogs are color-blind, right?

dcnov13-3.gif These lovely bundle is available at Sew Lux Fabric.

MATERIALS

  • 6 Fat Quarters
  • 22″ or 24″ zipper
  • 32″ x 40″ piece of batting
  • 32″ x 40″ scrap backing fabric for quilting (which will be hidden)
  • 30″ x 38″ piece of duck cloth for bottom.  (You can really use anything, like flannel, fleece or cotton)

This will make a 28″ x 36″ removable dog bed cover that fits most of the larger sized dog beds. We have 3 different beds that are slightly different sizes and this fits all of them.

If you don’t have dog beds lying around you can easily make a filler bed:

  • Take muslin (or an old sheet) and cutting 2 rectangles 29 x 37.
  • Place right sides together, sew down 3 sides using a 1″ seam allowance.
  • Turn right side out, stuff with stuffing from a couple of old pillows and sew up the 4th side.

Boutique Bones 627handworks (2)

Separate your fabrics into piles.  2 fabrics for ‘bones’, 2 fabrics for background, 1 for the corner squares and 1 for the border.

Boutique Bones 627handworks (4)


CUTTING

All “strips” are 2.5″

Bones:

  • From each fat quarter cut (six) 18″ strips. Take those 6 strips and cut from each:
    • (two) 6.5″ strips
    • (two) 2.5″ strips

Background:

  • From each fat quarter cut (three) 18″ strips. Take those 3 strips and cut from each:
    • (four) 4.5″ strips
  • From each fat quarter cut (two) 18″ strips. Take those 2 strips and cut from each:
    • (seven) 2.5″ squares

Corner Accents:

  • Cut (twenty four) 2.5″ squares

Border:

  • Your fat quarter MUST be at least 21″ wide.   Cut into (six) 21″+  strips.  If you have extra length, leave it!


Boutique Bones 627handworks (6)


BOUTIQUE BONE BLOCKS

For each block pull:

Bones fabric:  (2) 2.5″ squares, (2) 6.5″ strips

Background fabric:  (4) 2.5″ squares, (2) 4.5″ strips

Corner fabric: (2) 2.5″ squares

Boutique Bones 627handworks (10)


Lay out your fabrics like shown above.

Boutique Bones 627handworks (11)


Sew the sides together.

Boutique Bones 627handworks (12)


Lay your background fabrics on top of your bone fabrics like shown above.  Mark or crease a diagonal line in the same direction as shown.  Sew, iron, trim!

Boutique Bones 627handworks (13)


It should now resemble this.

Boutique Bones 627handworks (15)


Sew the strips together and you have a “boutique bone” block.

Boutique Bones 627handworks (17)


Create a total of 12 Boutique Bone blocks and sew them together into three rows of four.  Then sew the rows together forming one large rectangle.

Boutique Bones 627handworks (19)


BORDER

This is a tight fit so sew accordingly.   Attach your strips end to end using a 1/4″ seam allowance so you have one long border piece. Iron open.

Boutique Bones 627handworks (21)


This will be a close fit, so don’t waste the border fabric by leaving a lot of overhang!

  • Place your border onto a side (right sides together).   Line up with top edge and sew down.  Cut the border fabric even with main block when you reach the end.
  • Now place your border (right sides together) on the opposite side.  Line it up with the top edge and sew down.  Cut the border fabric even with main block when you reach the end.
  • Repeat for the other 2 sides.


QUILT

I forgot to take a picture!  

  • Sandwich your fabrics:  scrap backing fabric (facing down), batting, bones (right side up).
  • Quilt however you’d like.
  • Trim to the border.

Boutique Bones 627handworks (23)


ZIPPER

Place your zipper right side down along the short edge of your quilted bones (see above).

Boutique Bones 627handworks (24)


Pin in place and stitch down using a zipper foot.

Boutique Bones 627handworks (26)


Now open it up and top stitch, securing your fabric and zipper.

Boutique Bones 627handworks (29)


Place your bones (facing down) onto your duck cloth (or other fabric, right side up).  Pin the zipper in place like above.

Boutique Bones 627handworks (30)

Sew with a zipper foot and top stitch in place.

Boutique Bones 627handworks (31)


Place your top and bottom right sides together, pin all the way around.

When you get to the zipper UNZIP IT!  Kind of pull the zipper to the outside of the sandwich and pin in place.

Sew along the edges using a 1/2″ seam alowance.  Sew about 1/2″ into each side where the zipper is. Be sure to secure with back stitches.

Boutique Bones 627handworks (33)

Turn it right side out through the zipper hole.

Boutique Bones 627handworks (32)


Hope you enjoyed this.  If you make one, be sure to share it with me!  Thanks again to Sew Lux Fabric.

julie

Share
November 15th, 2013

Thursday Threads is Taking a Sabbatical

by Julie Hirt

It’s time to say adieu.  At least temporarily.

My link party account is getting ready to expire and with the Holidays coming up, I think it’s a good time to work on some projects and give Thursday Threads a little break.

The linky party will be returning after the New Year, so keep me in mind!  Thank you for all of the link ups, it’s so much fun to see what everyone is working on.


julie


Share
November 10th, 2013

Ornaments with Felt, Sequins & Beads

by Julie Hirt

I’ve been all over the place regarding crafts this weekend.  I’ve worked on making a dog bed, ornaments, crochet rug, and on my Countdown to Christmas calendar.

Thanks to this awesome aqua deer ornament from Thrift Store Crafter (Sarah even has a free pattern!), I got the urge to create some ornaments.

I pulled out my felt, sequins, beads and threads and starting browsing the Googles machine for ideas.  So far I’ve made:

felt bird

This little bird was my first attempt. I totally stole the idea from somewhere online, but I can’t find the source now.

felt owl

This little owl idea is stolen from a brooch I saw :)

dala horse ornament

Dala horse –  it’s my favorite.  I actually came up with this one on my own.

Now that I have all my supplies out I’m going to try and create some vintage looking ornaments.  I’ll definitely be making Sarah’s deer pattern as well.

Hope you’re having a great weekend.

julie


Share
November 6th, 2013

Thursday Threads 11/7

by Julie Hirt

First, let me apologize for all of the low quality pictures in this post.  They are all off my phone or Facebook uploads.  Second, this is a LONG post.

Last week I said I’d share pics of the costumes I made and finally, I have photographic evidence! dalmation

My friend, Christina, was a dalmation.  Simple dress to stitch up and we added the ears to a headband.  She’s fostered a lot of dogs this year, so it was a fitting costume for her.

ben franklin colonial thing

My brother wanted a Colonial man type outfit. At one point in the evening I think he referred to himself as Benjamin Franklin. ha!  I wish you could see the breeches, white socks and buckles on the shoes!  This was a lot more work and I didn’t have a pattern, so I was pretty happy with how it turned out.  I don’t really sew a lot of clothing.


Last night I got crazy and decided to rip an old queen sheet into strips and crochet them together.

crochet sheets

According to Instagram I should make a rug out of it.  I just may do that.

crochet with sheets

I’ll have to rip up some more sheets if I make a rug.  Believe it or not this is 2/3 of a queen sheet and it’s only about 16″ wide.

I’m using a size N hook and 3/4″ sheet strips.  I attached the strip ends together with a zig-zag stitch because I don’t like the bumps and knots other methods result in.

BASIC DC ROUND PATTERN:

  • Chain 5 and Slip Stitch
  • Rnd 1: 8 SC  in the center and slip stitch to join.
  • Rnd 2: Ch 3, 1 DC in same stitch, 2 DC in each stitch around. (16 total including chain) Slip Stitch in top of CH 3 to join.
  • Rnd 3: Ch 3, 1 DC in same stitch,  *DC in next stitch, 2 DC in the next stitch.  Repeat from * around.   Slip Stitch in top of CH 3 to join.
  • Rnd 4: Ch 3, 1 DC in same stitch,  *DC in next 2 stitches, 2 DC in the next stitch.  Repeat from * around.   Slip Stitch in top of CH 3 to join.
  • Rnd 5: Ch 3, 1 DC in same stitch,  *DC in next 3 stitches, 2 DC in the next stitch.  Repeat from * around.   Slip Stitch in top of CH 3 to join.
  • Rnd 6: Ch 3, 1 DC in same stitch,  *DC in next 4 stitches, 2 DC in the next stitch.  Repeat from * around.   Slip Stitch in top of CH 3 to join.
  • Rnd 7: Ch 3, 1 DC in same stitch,  *DC in next 5 stitches, 2 DC in the next stitch.  Repeat from * around.   Slip Stitch in top of CH 3 to join.
  • — follow the pattern until it’s as big as you want by increasing the number in red for each additional round.


KNITTING.  knitted socks

Do any of you knit? Do you knit socks? I just don’t have the patience for knitting and I wish I did.   My latest Etsy purchase – wool socks!  I wish I could make my own.

<div align="center"><a href="http://627handworks.com" title="Thursday Threads"><img src="http://627handworks.com/wp-content/uploads/2013/05/linkyparty_02.jpg" alt="Thursday Threads" style="border:none;" /></a></div>

Let’s take a week at some of last weeks link ups:

reindeer-ornament-1

Eeeeee! I love this little Rudolph ornament from Thrift Store Crafter.


OLYMPUS DIGITAL CAMERA

Beautiful Fall Quilt from Iron Violet Designs.


DSC04824 (640x480) watermarked

Great colors in this Flying to Paradise WIP from Modern Tradition Quilts.

What’s up your sleeve this week?

julie


.

Related Posts Plugin for WordPress, Blogger...
Share