Archive for ‘Sewing & Fabric’

December 31st, 2014

DANGER: Long Post! Year End Projects + Thoughts on 2015

by Julie Hirt

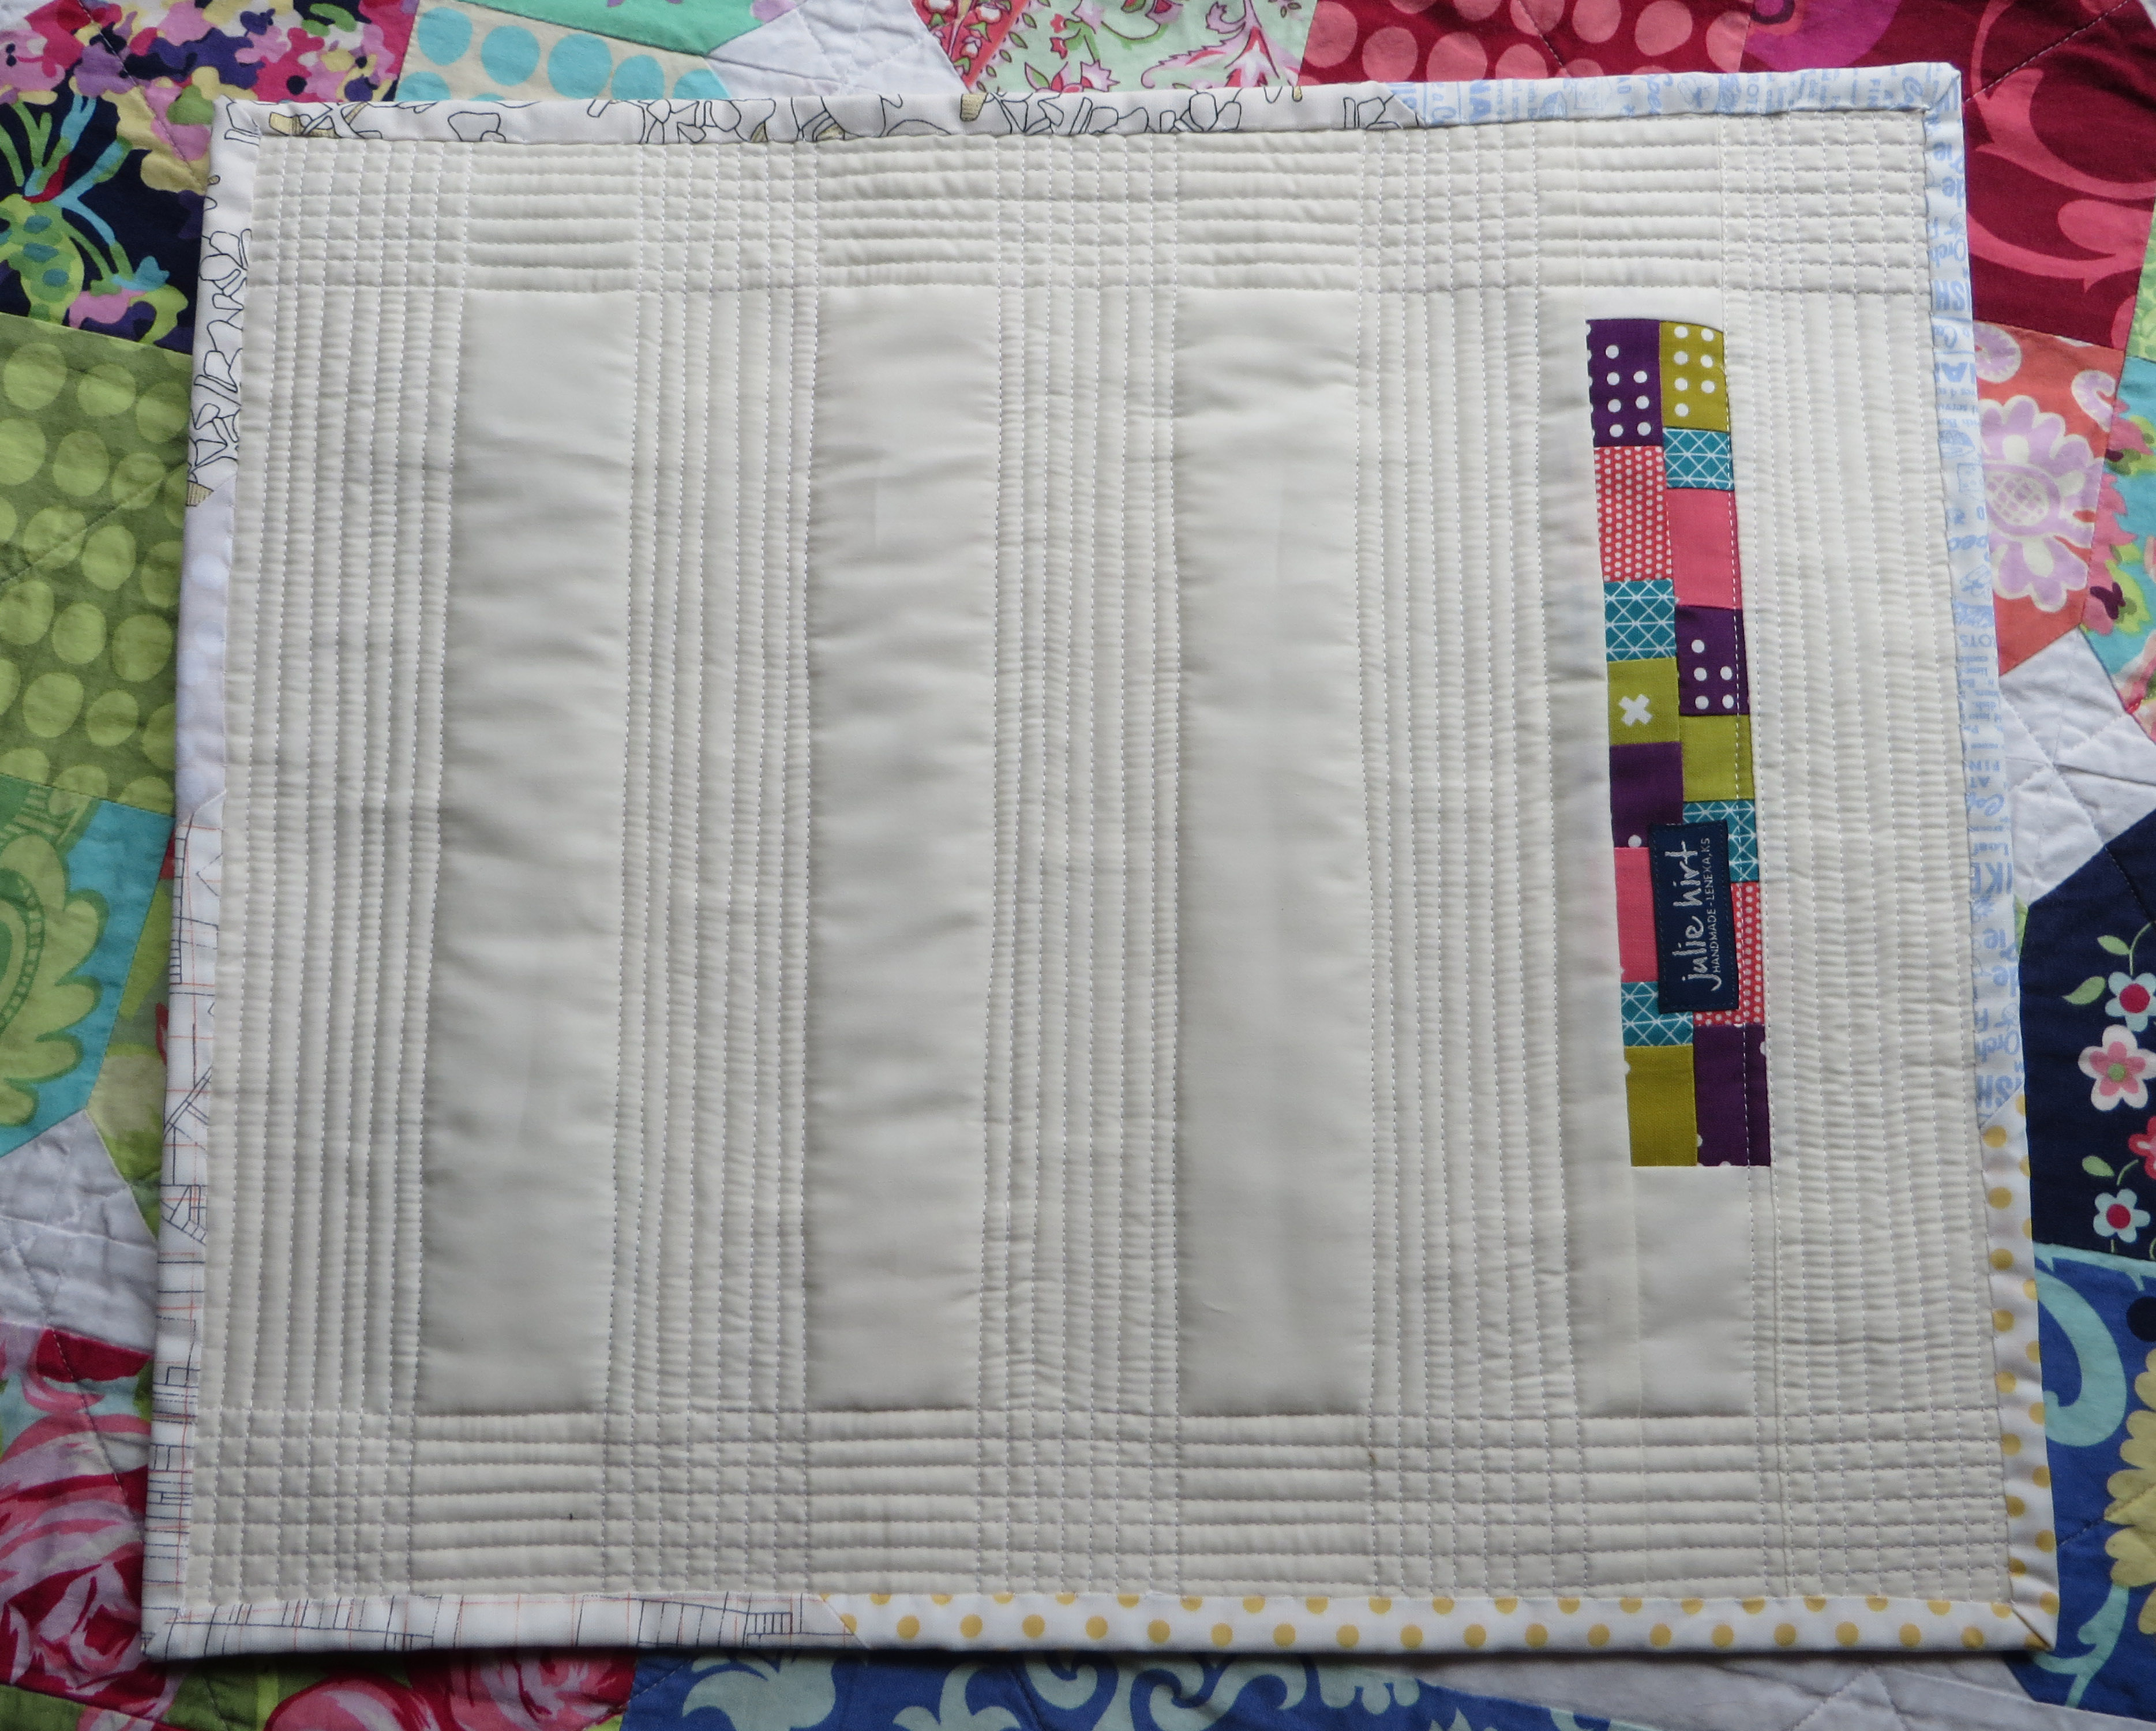
Lots of little projects to share and I’ll start with this:

IMG_1065

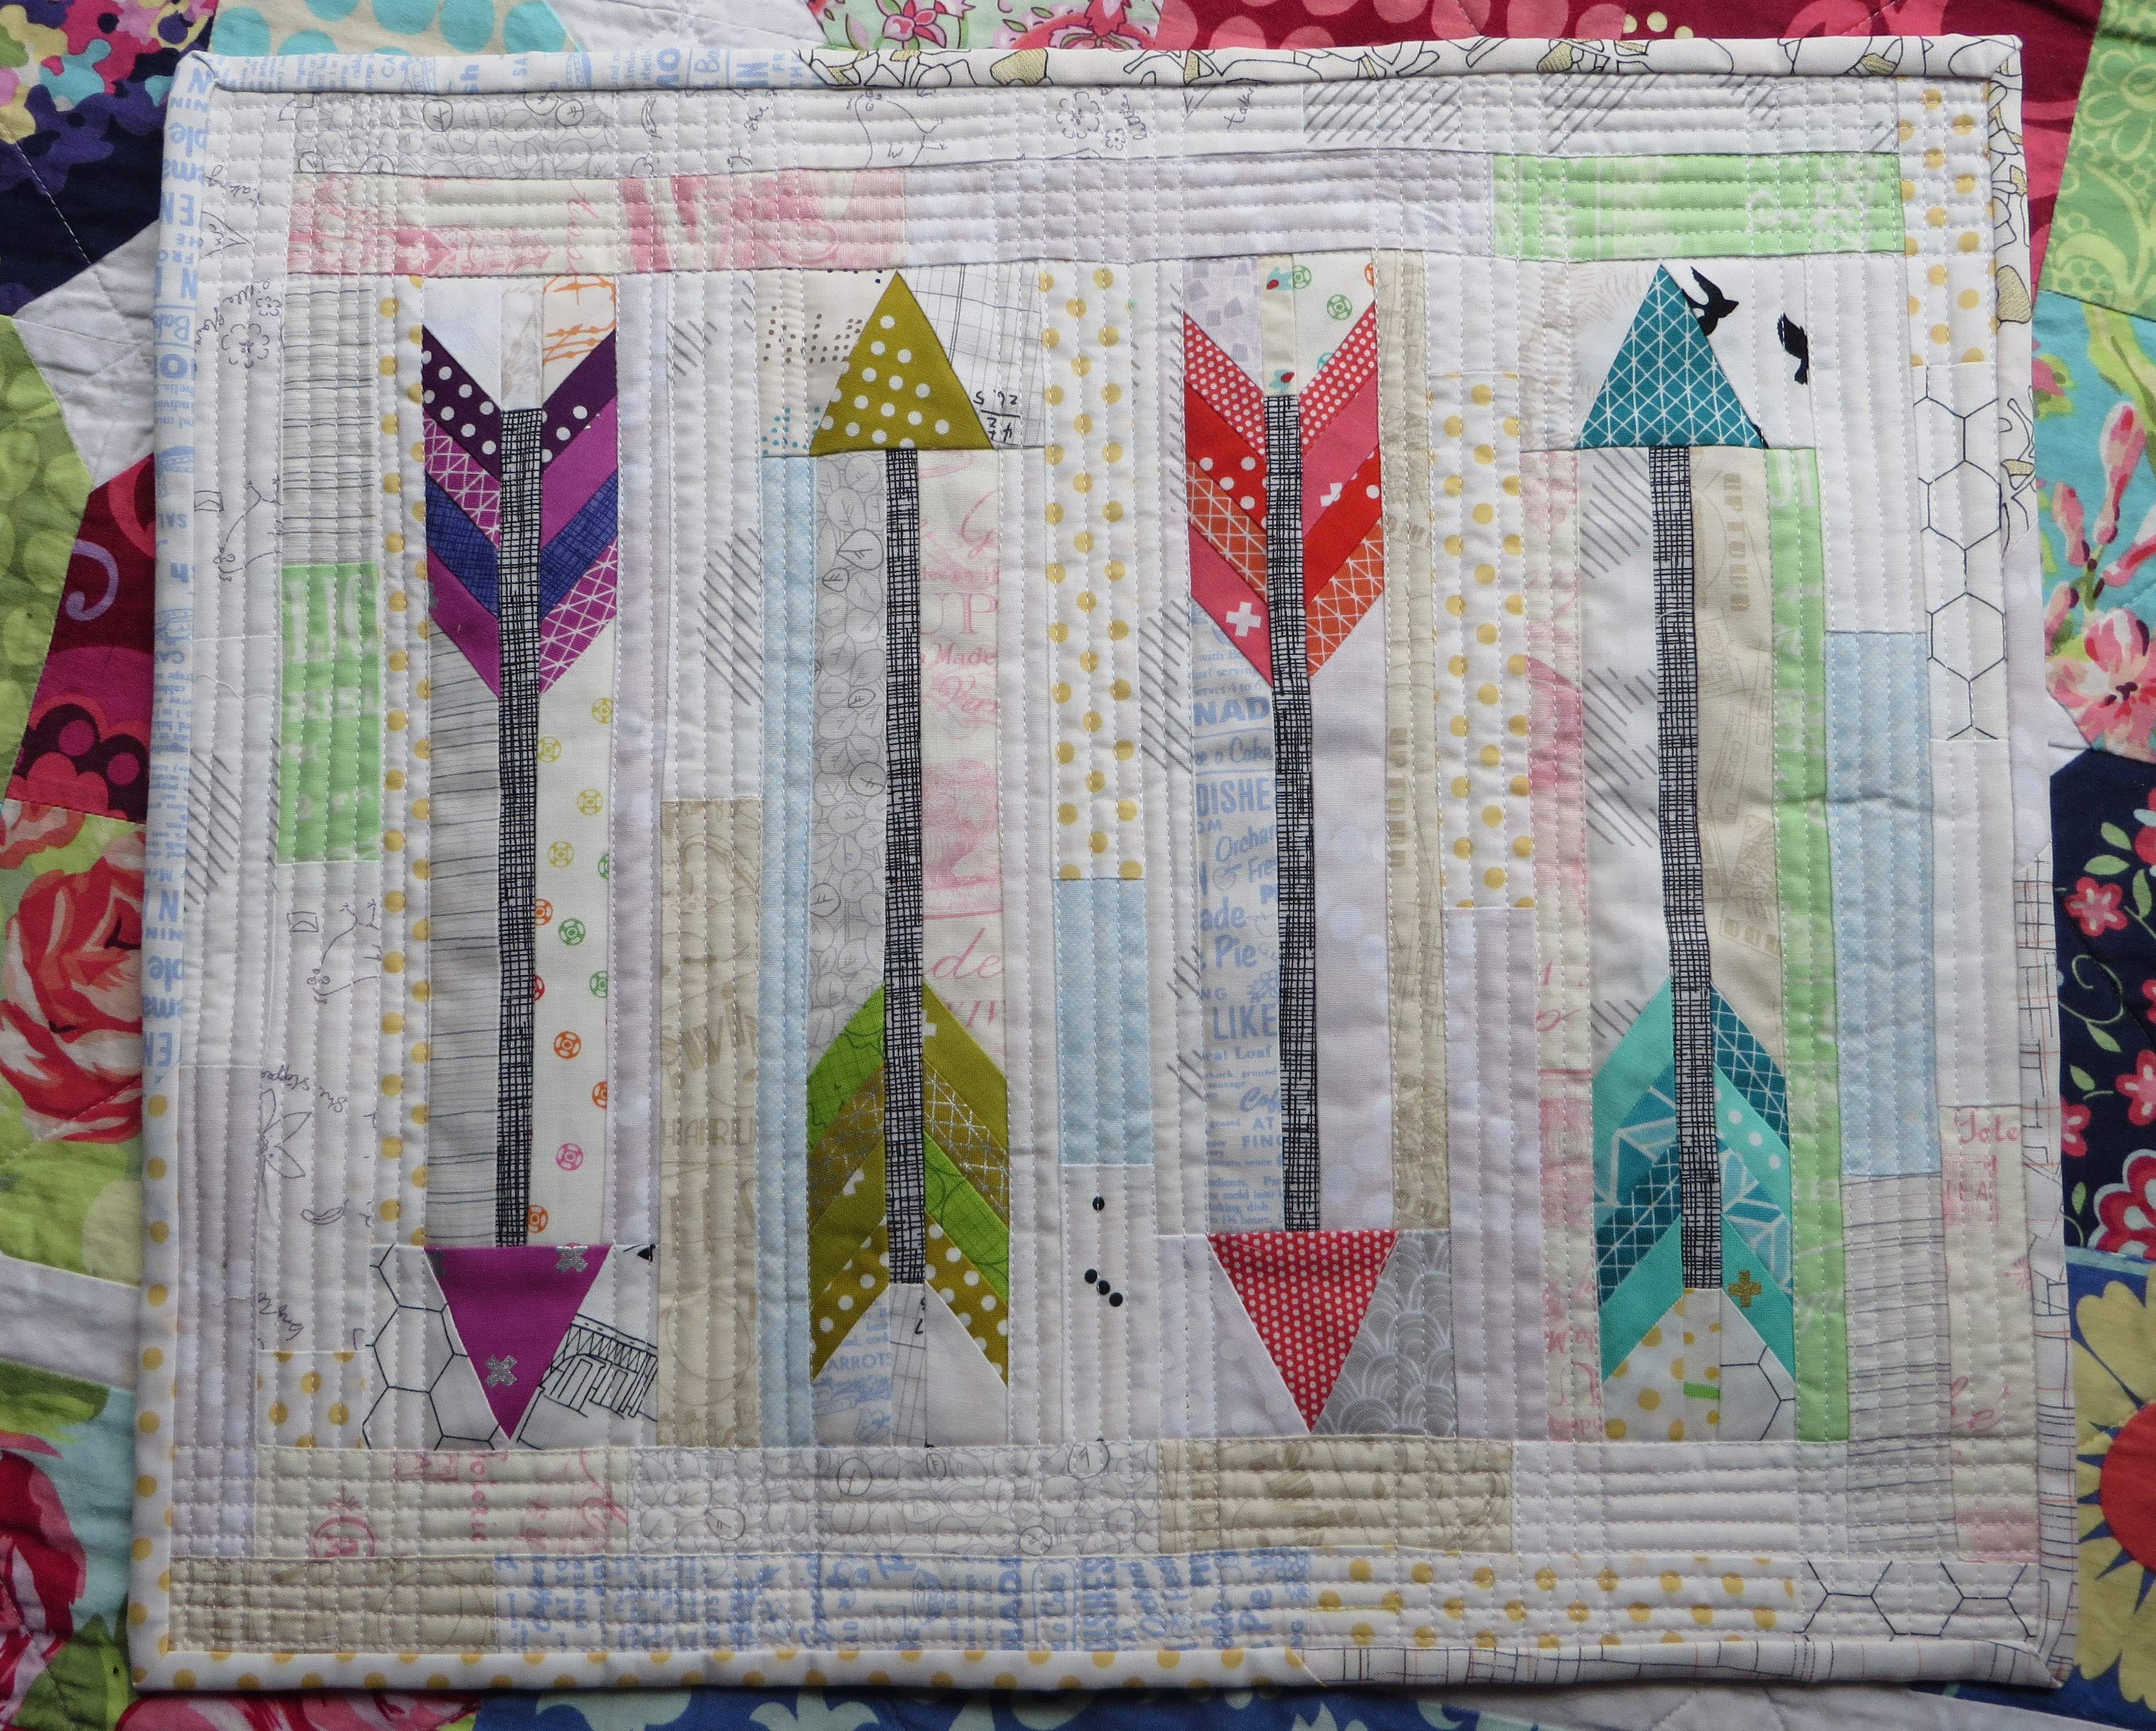
It’s a birthday mini for SimonSaysSew.

IMG_1061

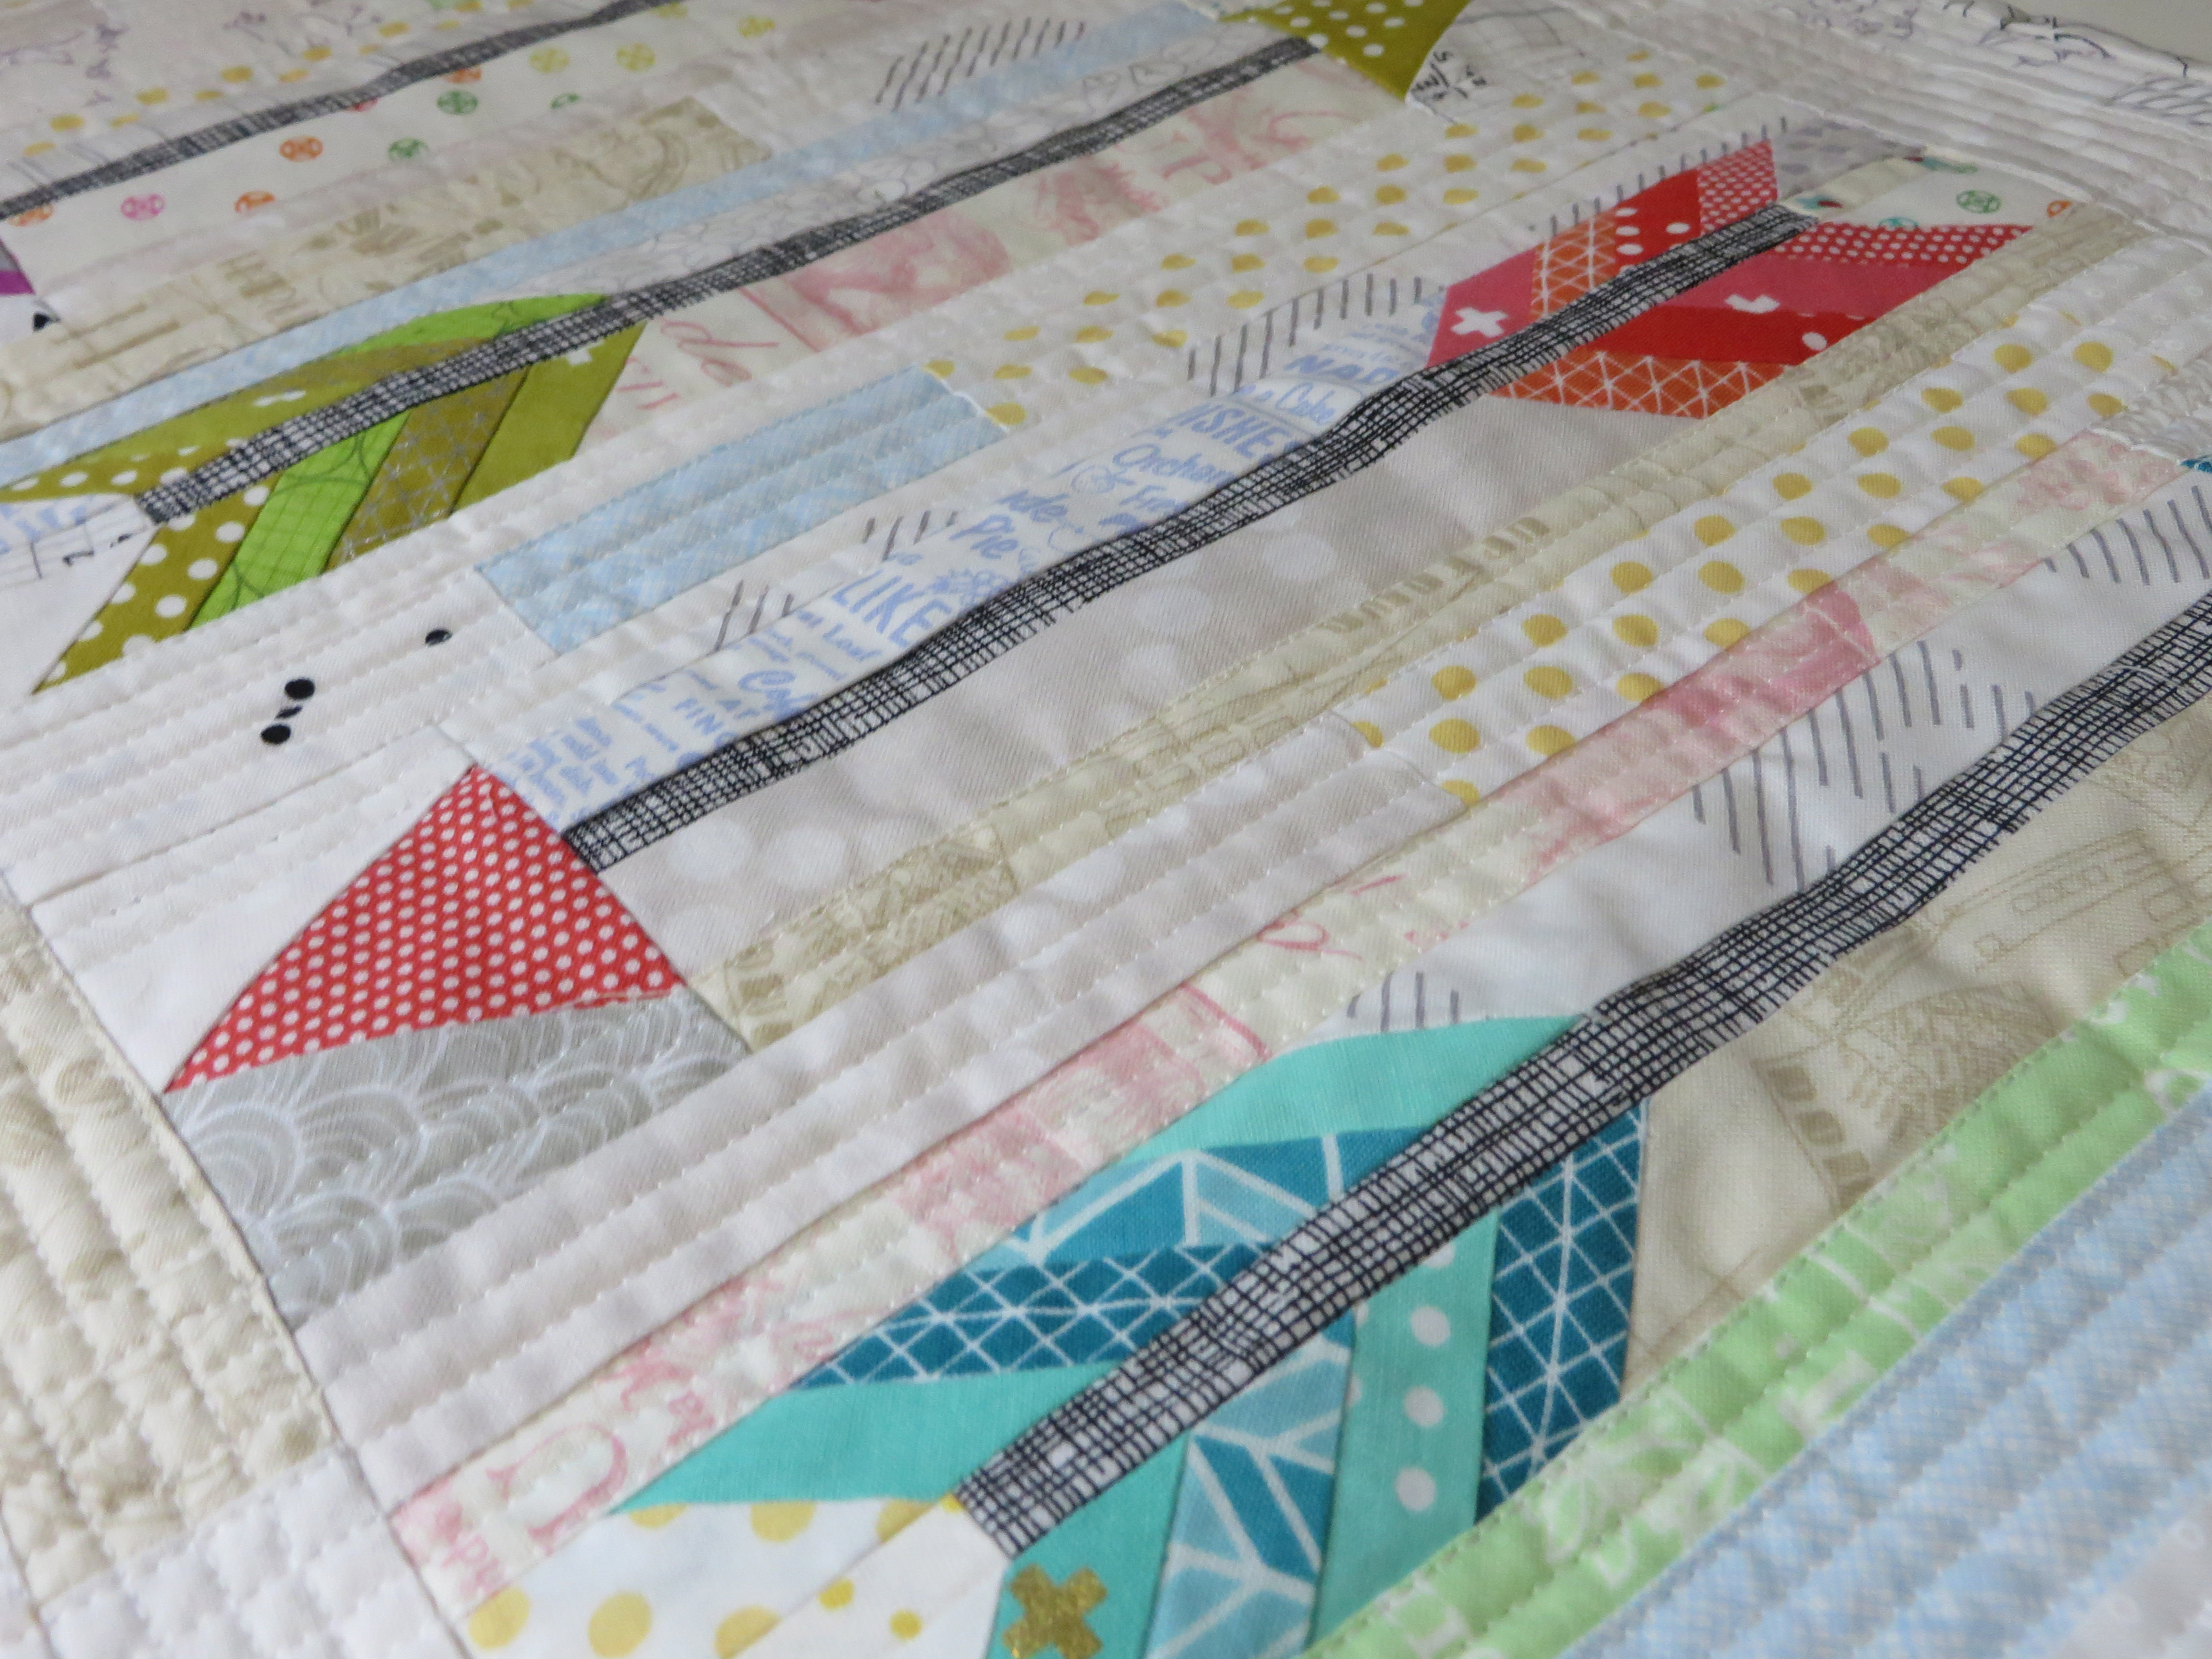
I love how it turned out and I wanted to keep it for myself!  It’s really the first time I’ve played around with using a variety of low volume scraps for the background.

IMG_1066

The feathers are an awesome paper piecing pattern from Quiet Play.

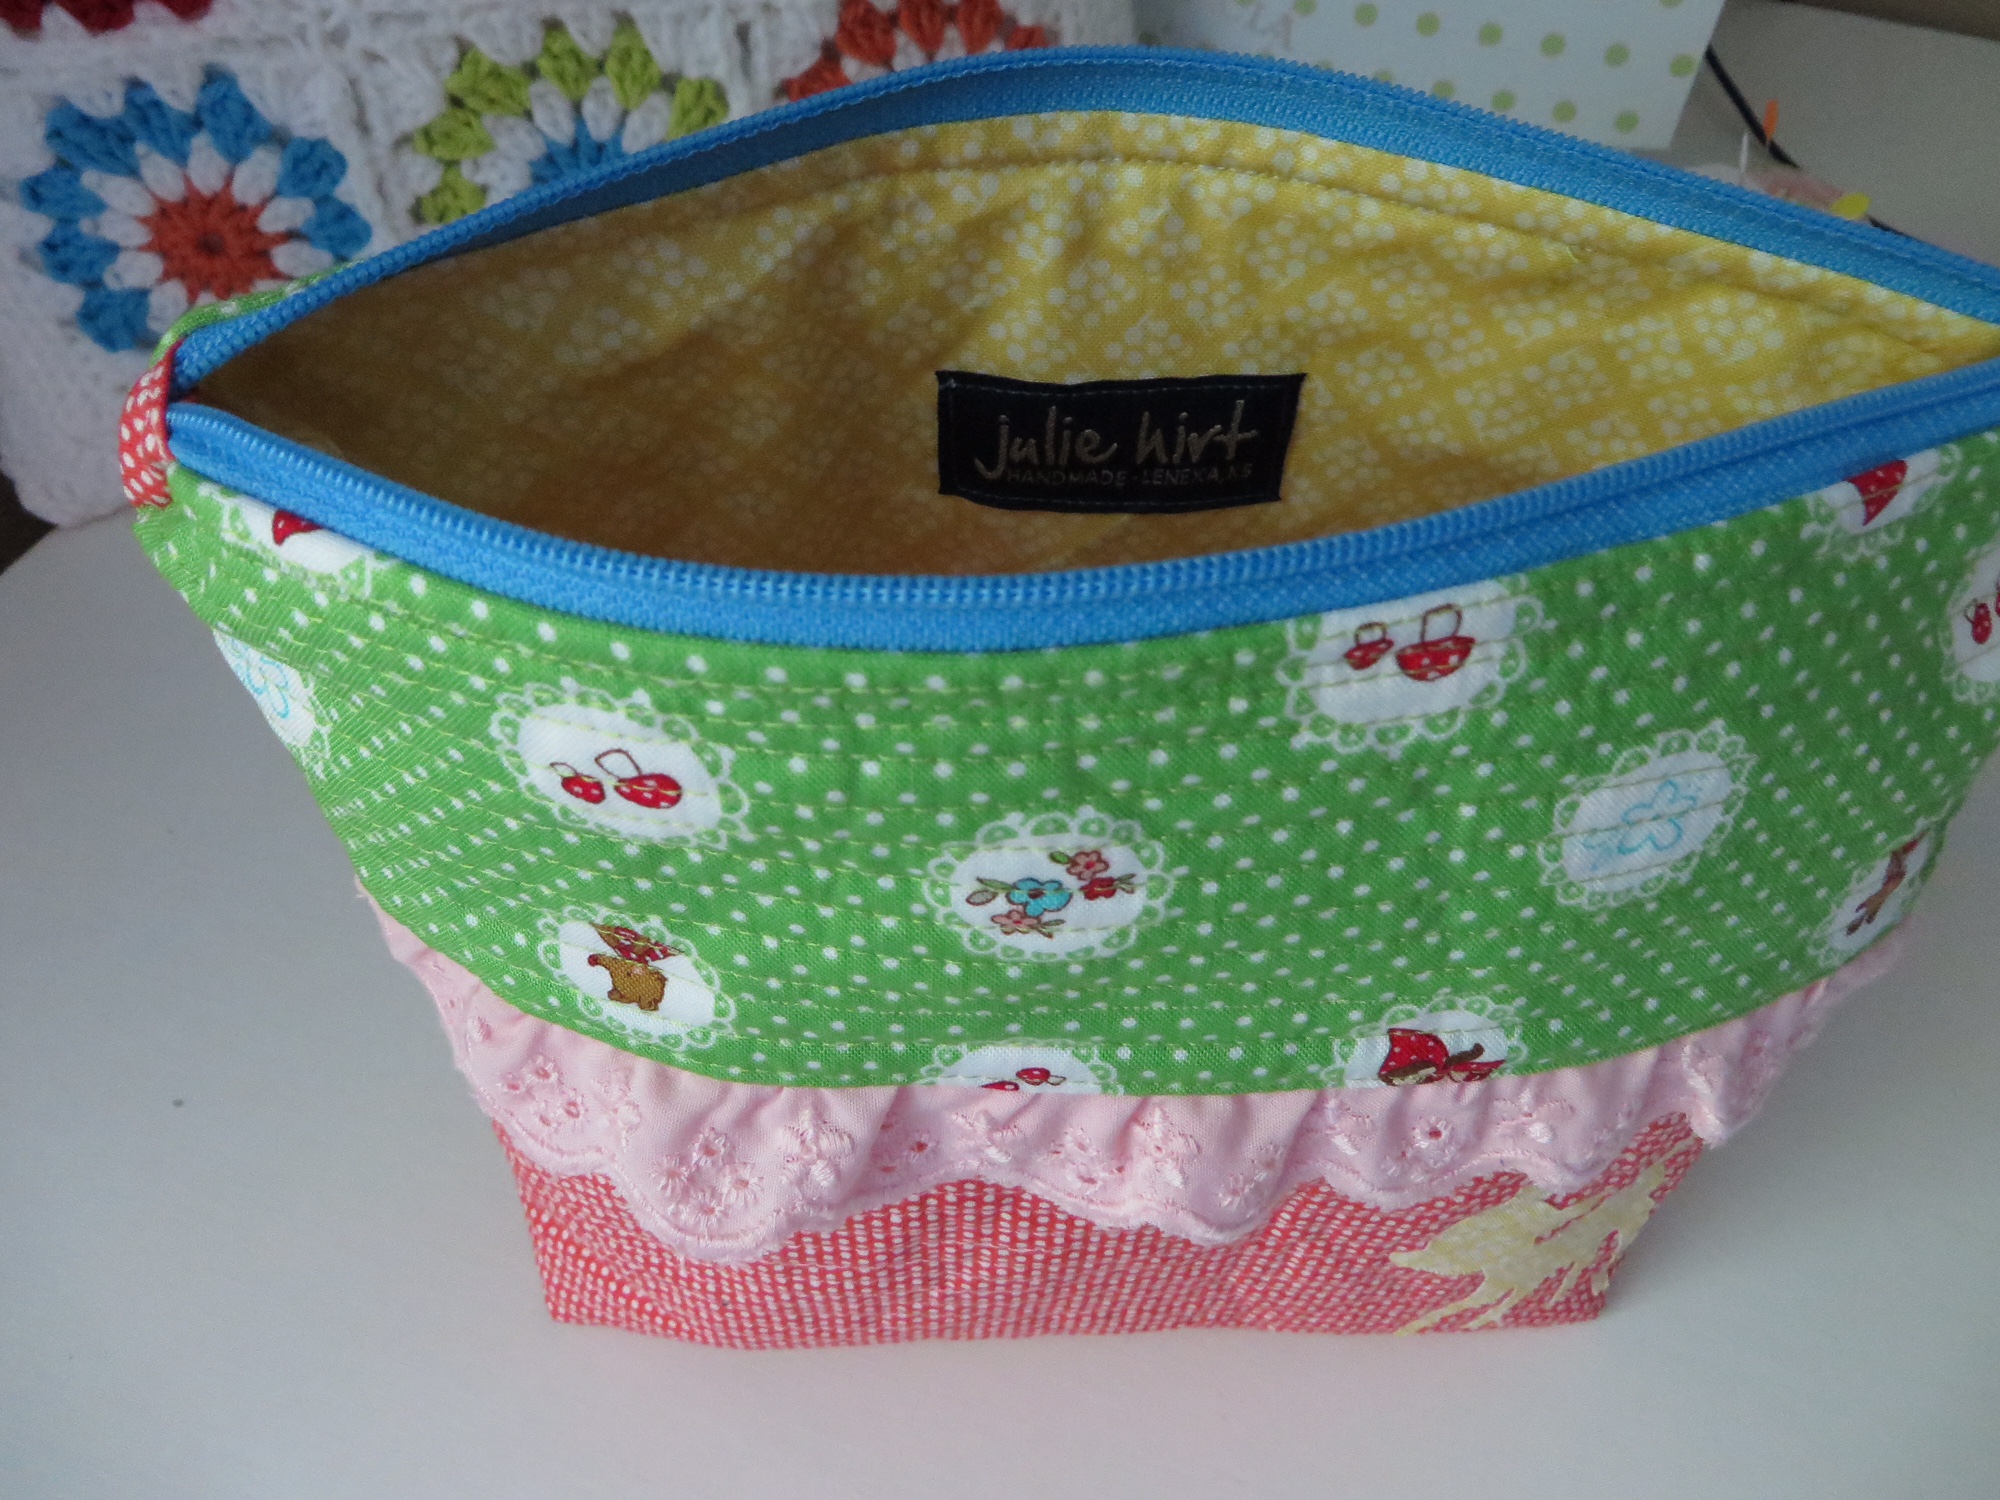
Next up are the pouches I made for Leona‘s birthday swap.

IMG_0790

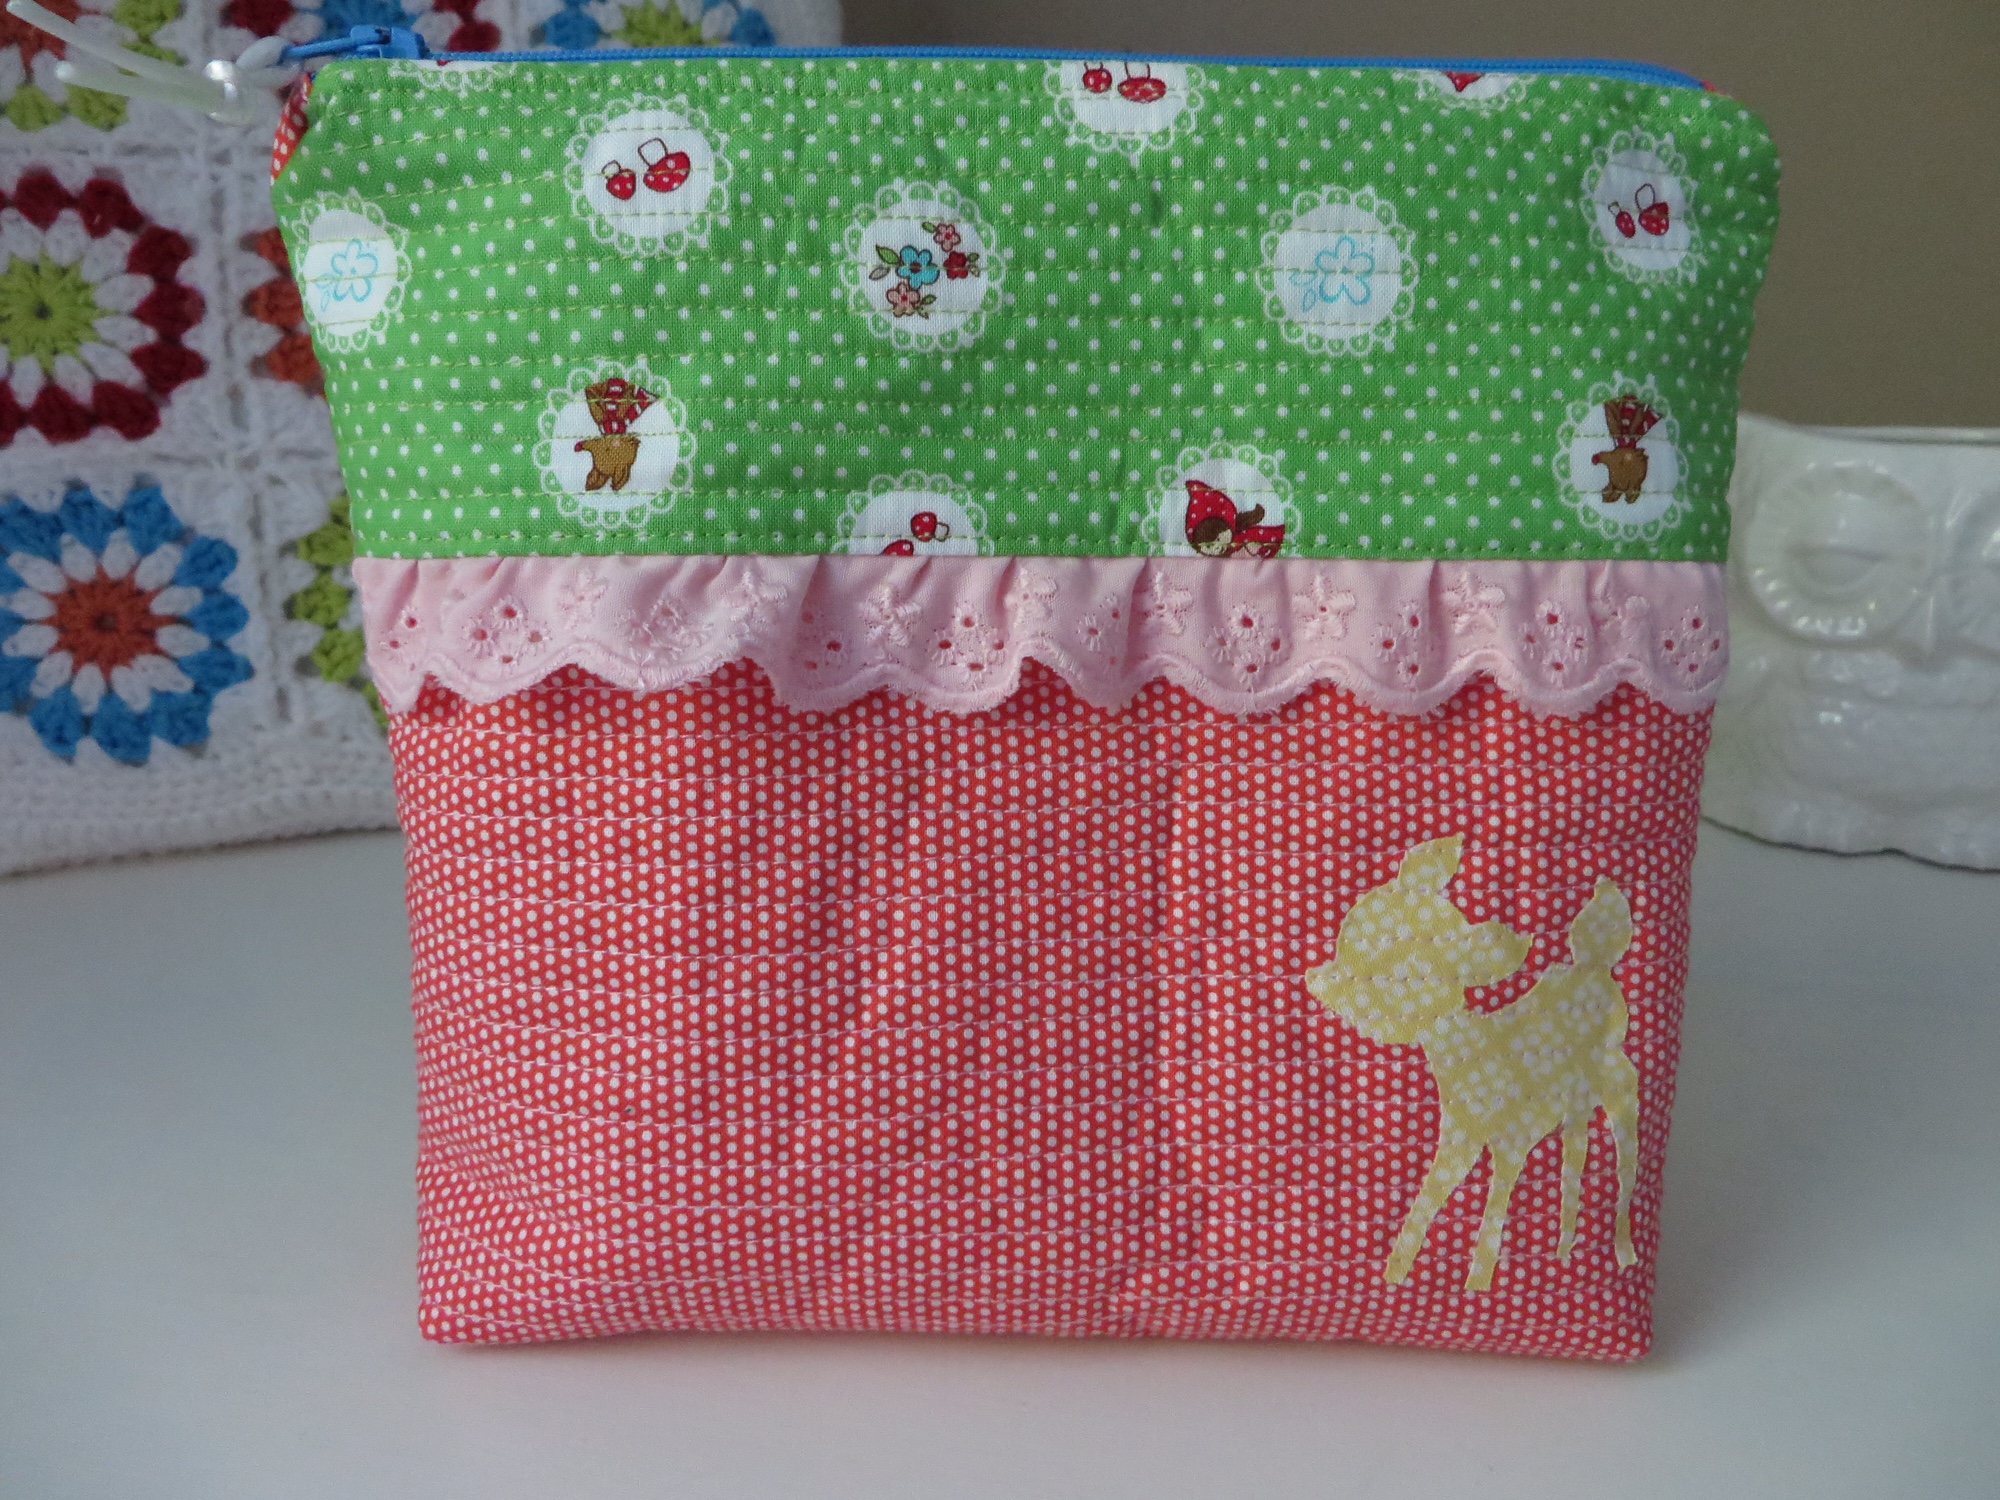
I just love that little deer.

IMG_0784

IMG_0785

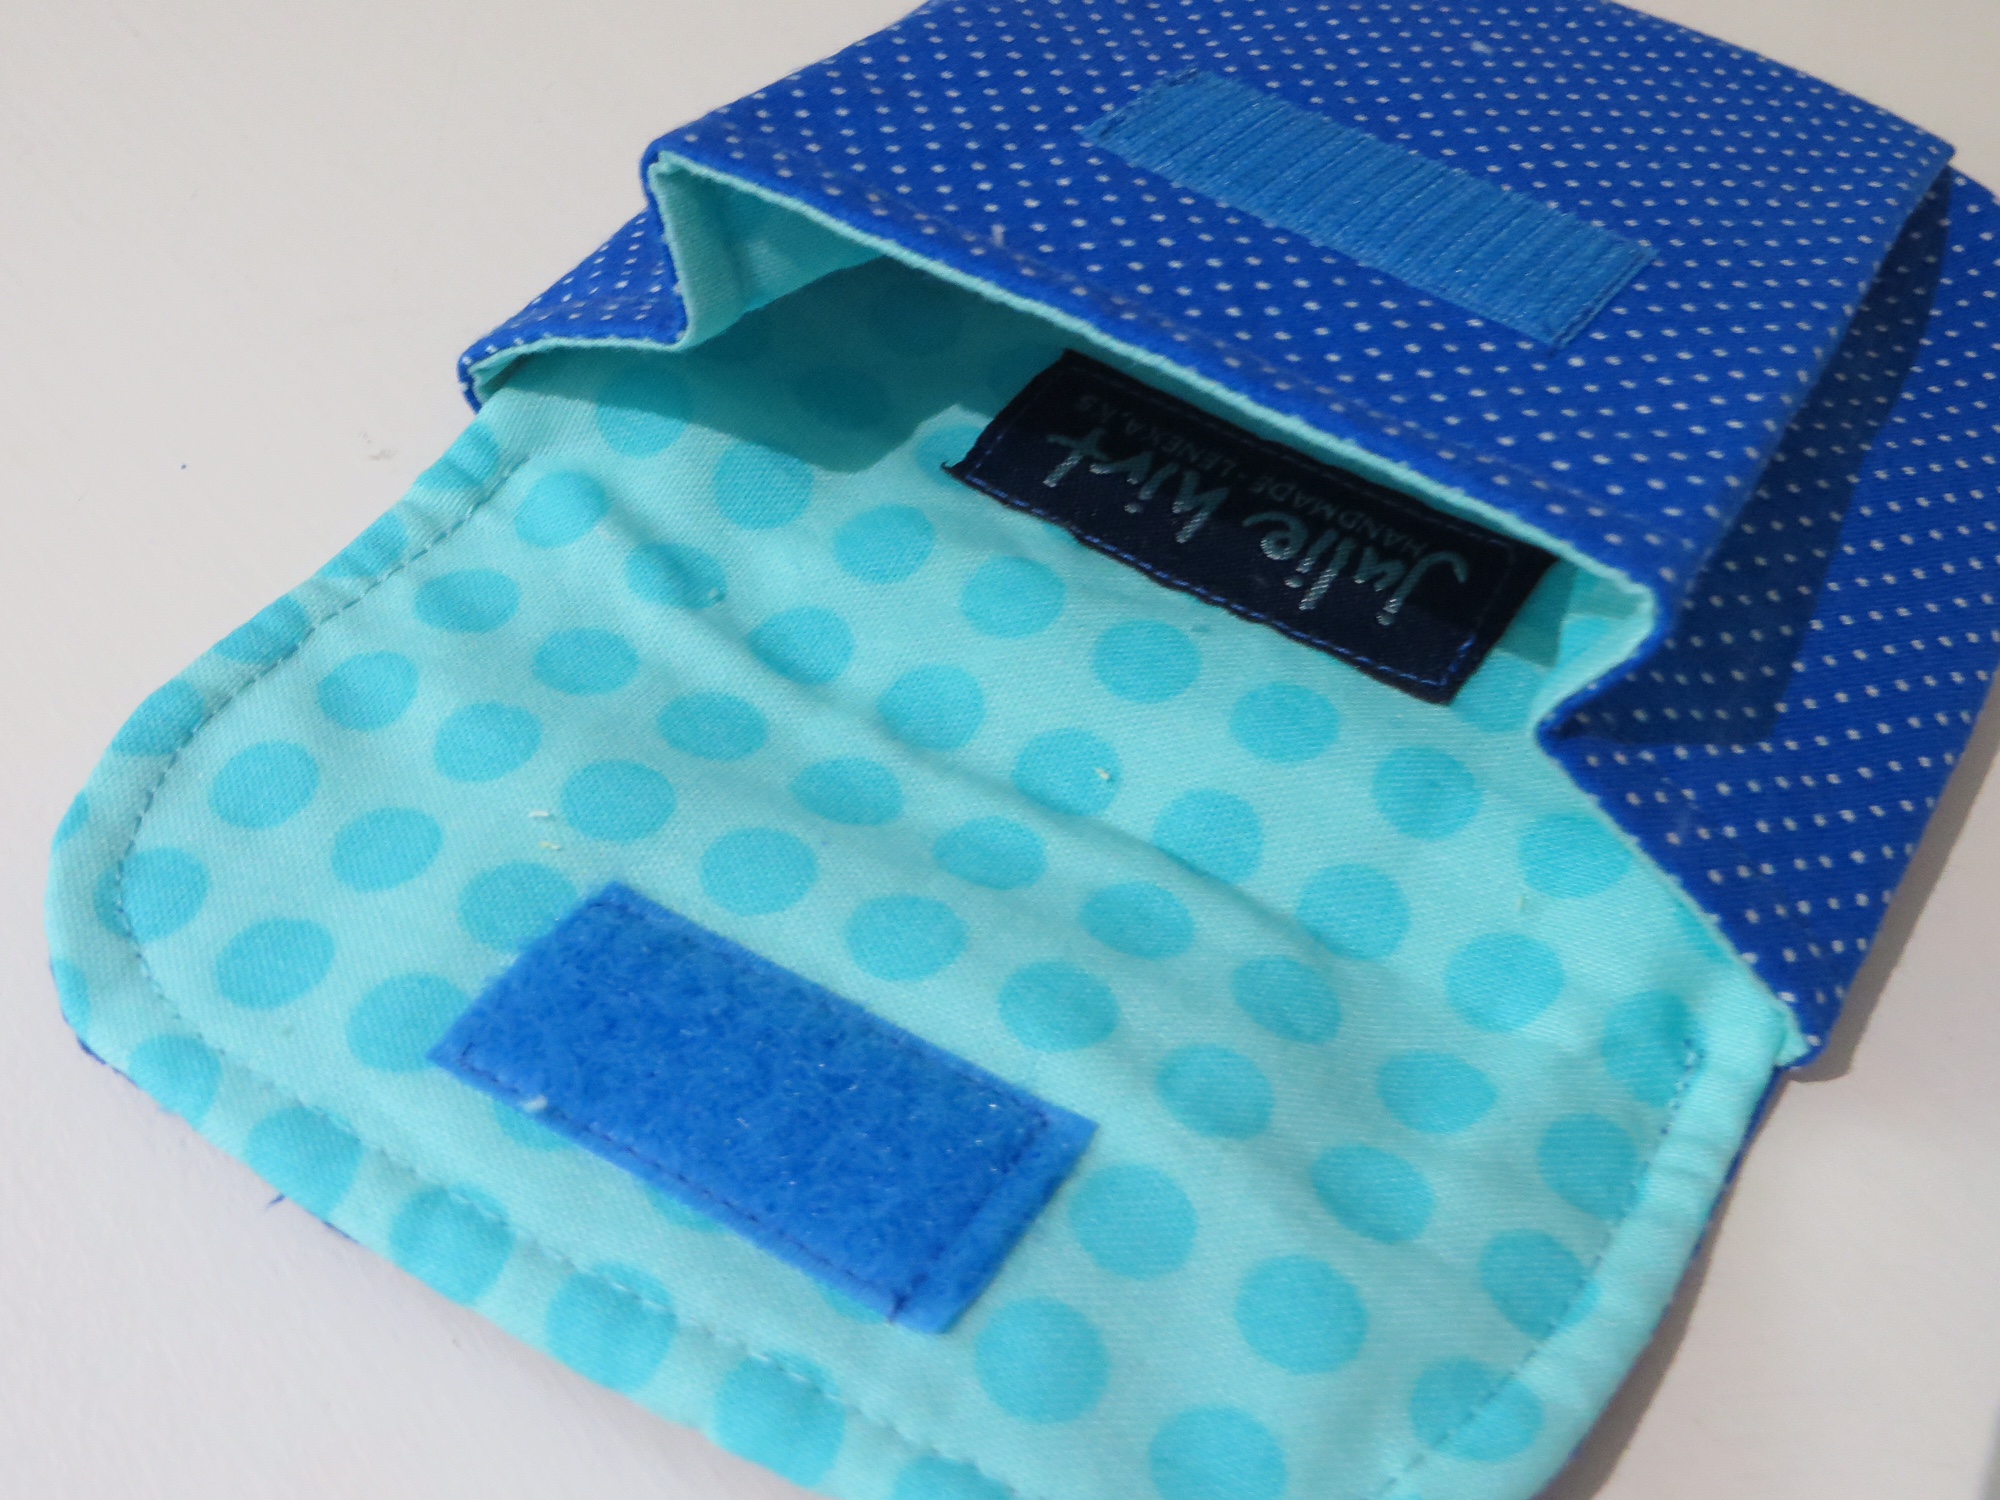
And a smaller velcro pouch:

IMG_0789

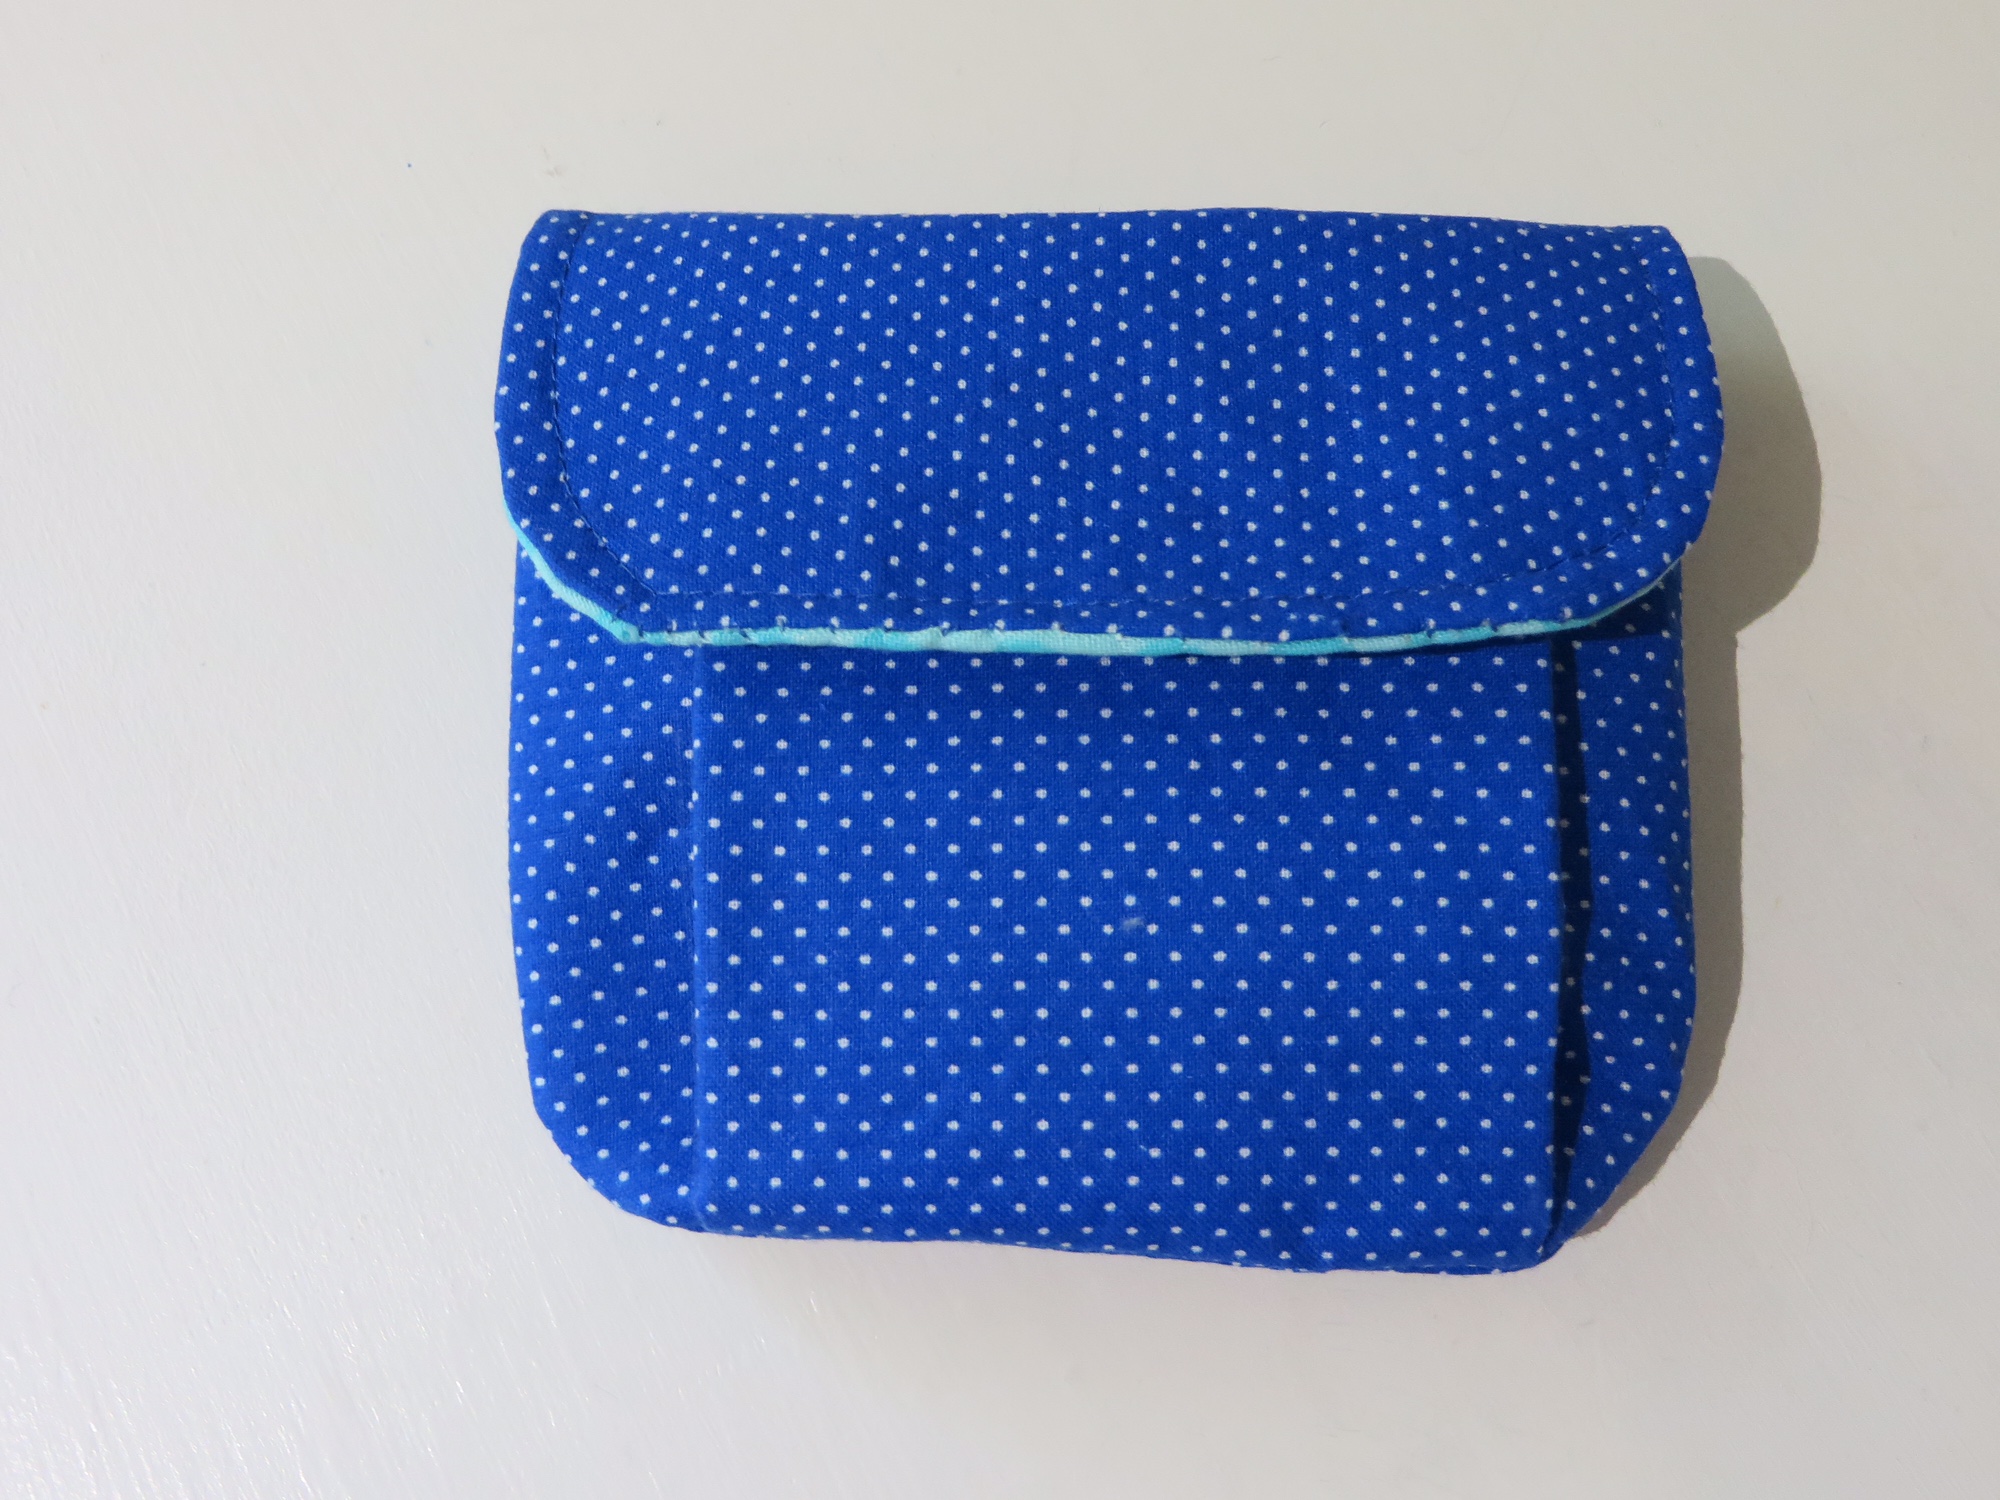
This one is a pattern by Michelle Patterns.  I love her patterns. Like, a lot.   It’s available in 3 sizes and the smaller one is perfect for storing tea bags or other miscellaneous things to toss in your bag.

IMG_0788

Next up is my quilt for the Schnitzel & Boo Mini Quilt Swap.  Ohmygosh I hope she likes it.

IMG_1218

IMG_1220

I know these are fabrics she likes (Alison Glass, Handcrafted) and I just hope the pattern and quilting are her style as well.  It’s surprisingly nerve wrecking making something for someone else.

IMG_1219

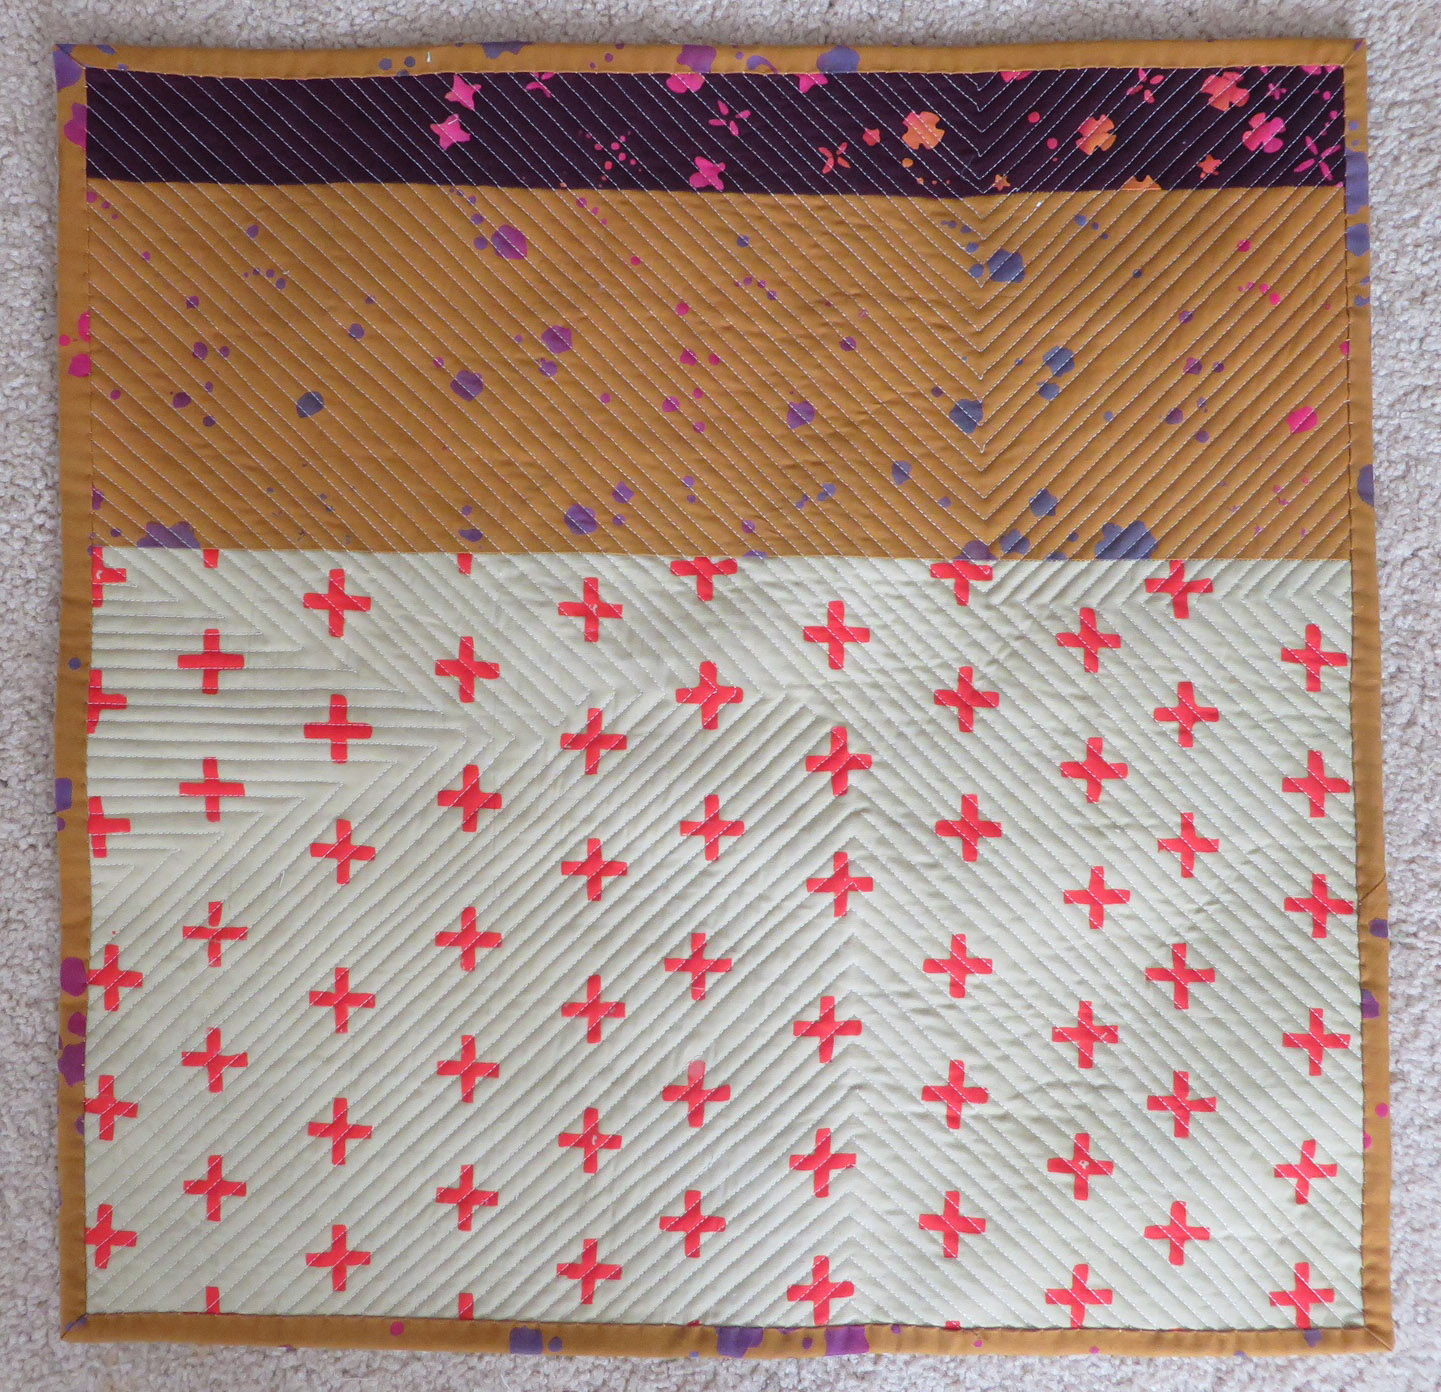
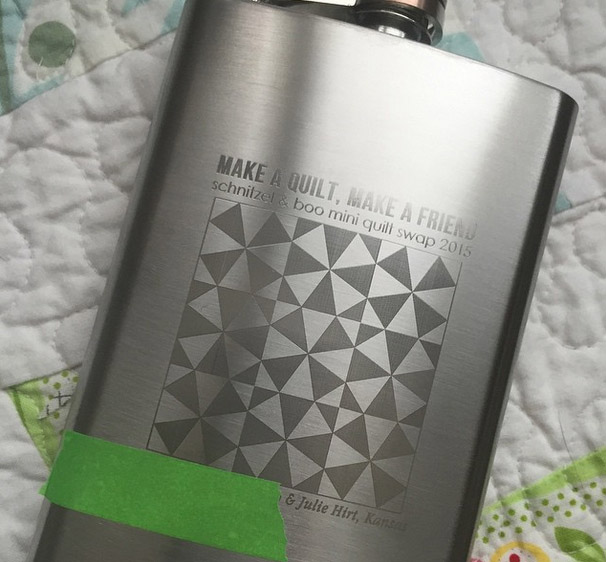
Just in case she hates the quilt, I think she will like this.  Etsy never ceases to amaze me.  I sent my image over and a week later, here it was.

flask

Okay……… now here is where I’ve started with my 2015 plans. I will not use the word resolution, but I do have some ideas.  I’ve cleaned up my sewing space and updated my to do list.

IMG_1206

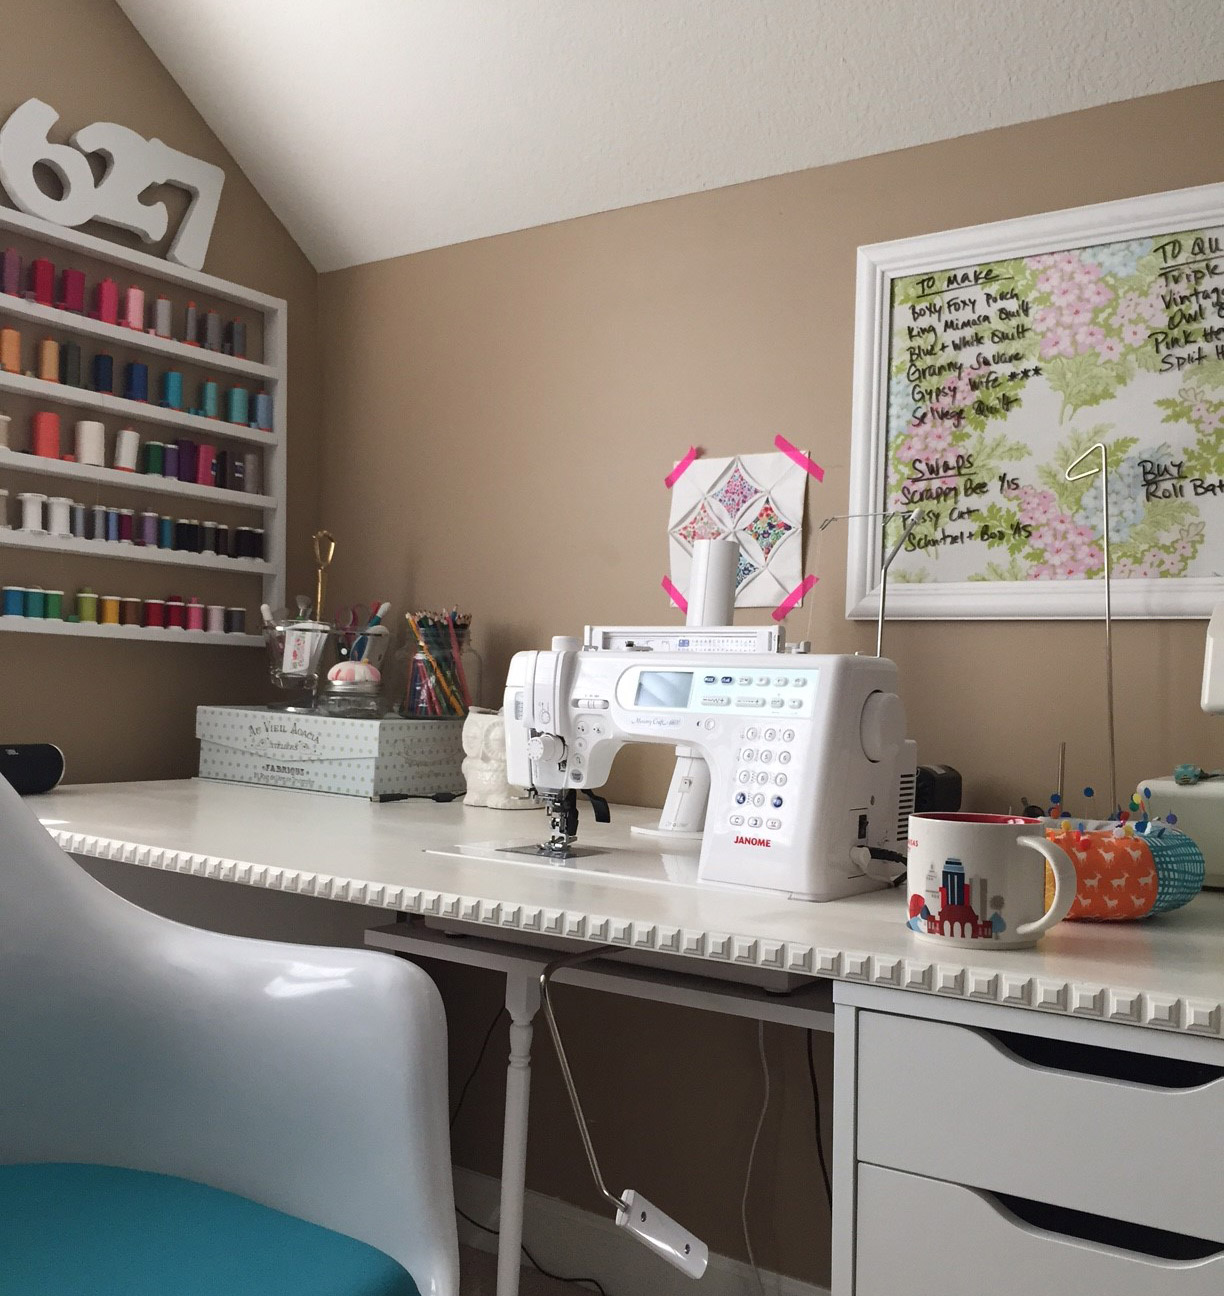
After organizing my fabrics I realized I need to stop buying it.  Easy to say, hard to do – you all know that.  So my plans are to go light on buying fabrics. Like only if I really, really, really have to have it – and I have to wait a week before buying it so I know I still really, really, really want it.

That list on the wall of To-Make and To-Quilt has to be at least cut in half before I’m allowed to start anything else.

Nothing harsh, just a plan of sorts.  I’m not sharing my to-make and to-quilt lists so you won’t know if I cheat!

The plan is already working – I’ve finished up a few WIP’s:

IMG_1227

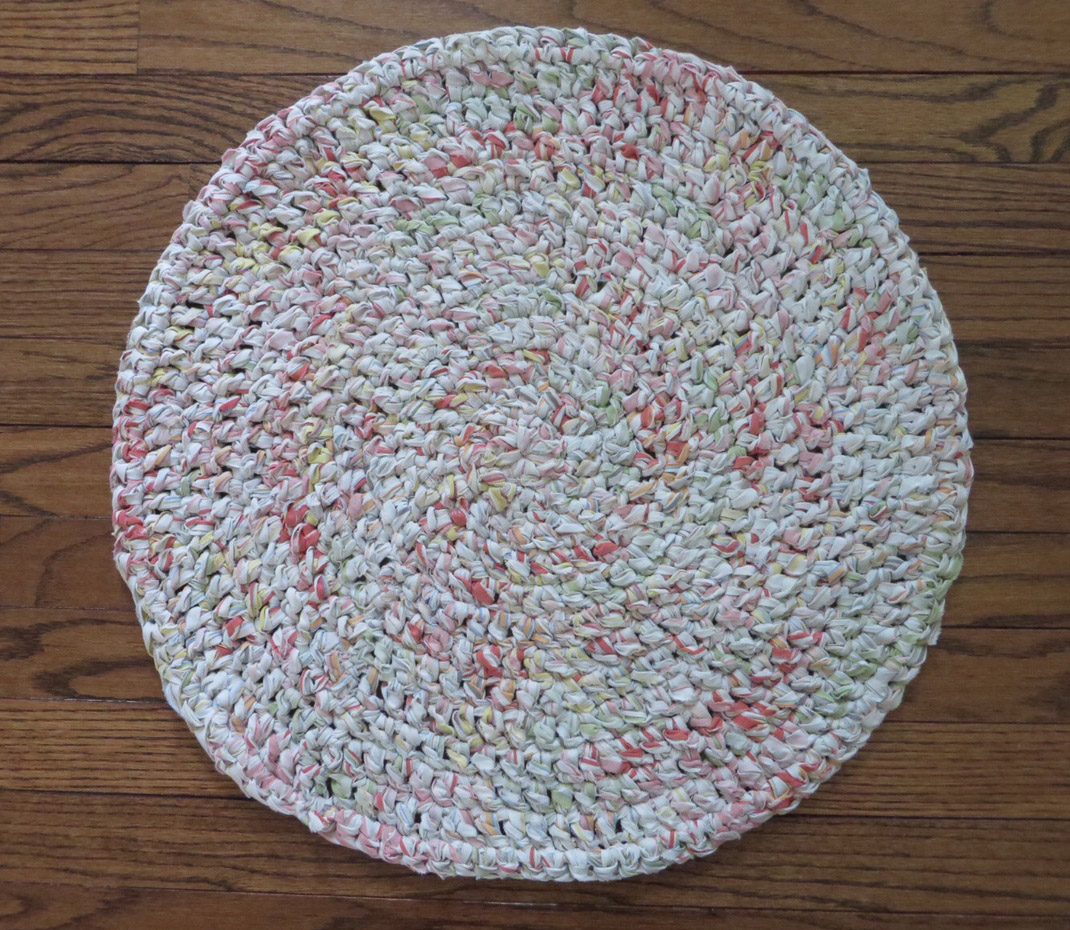
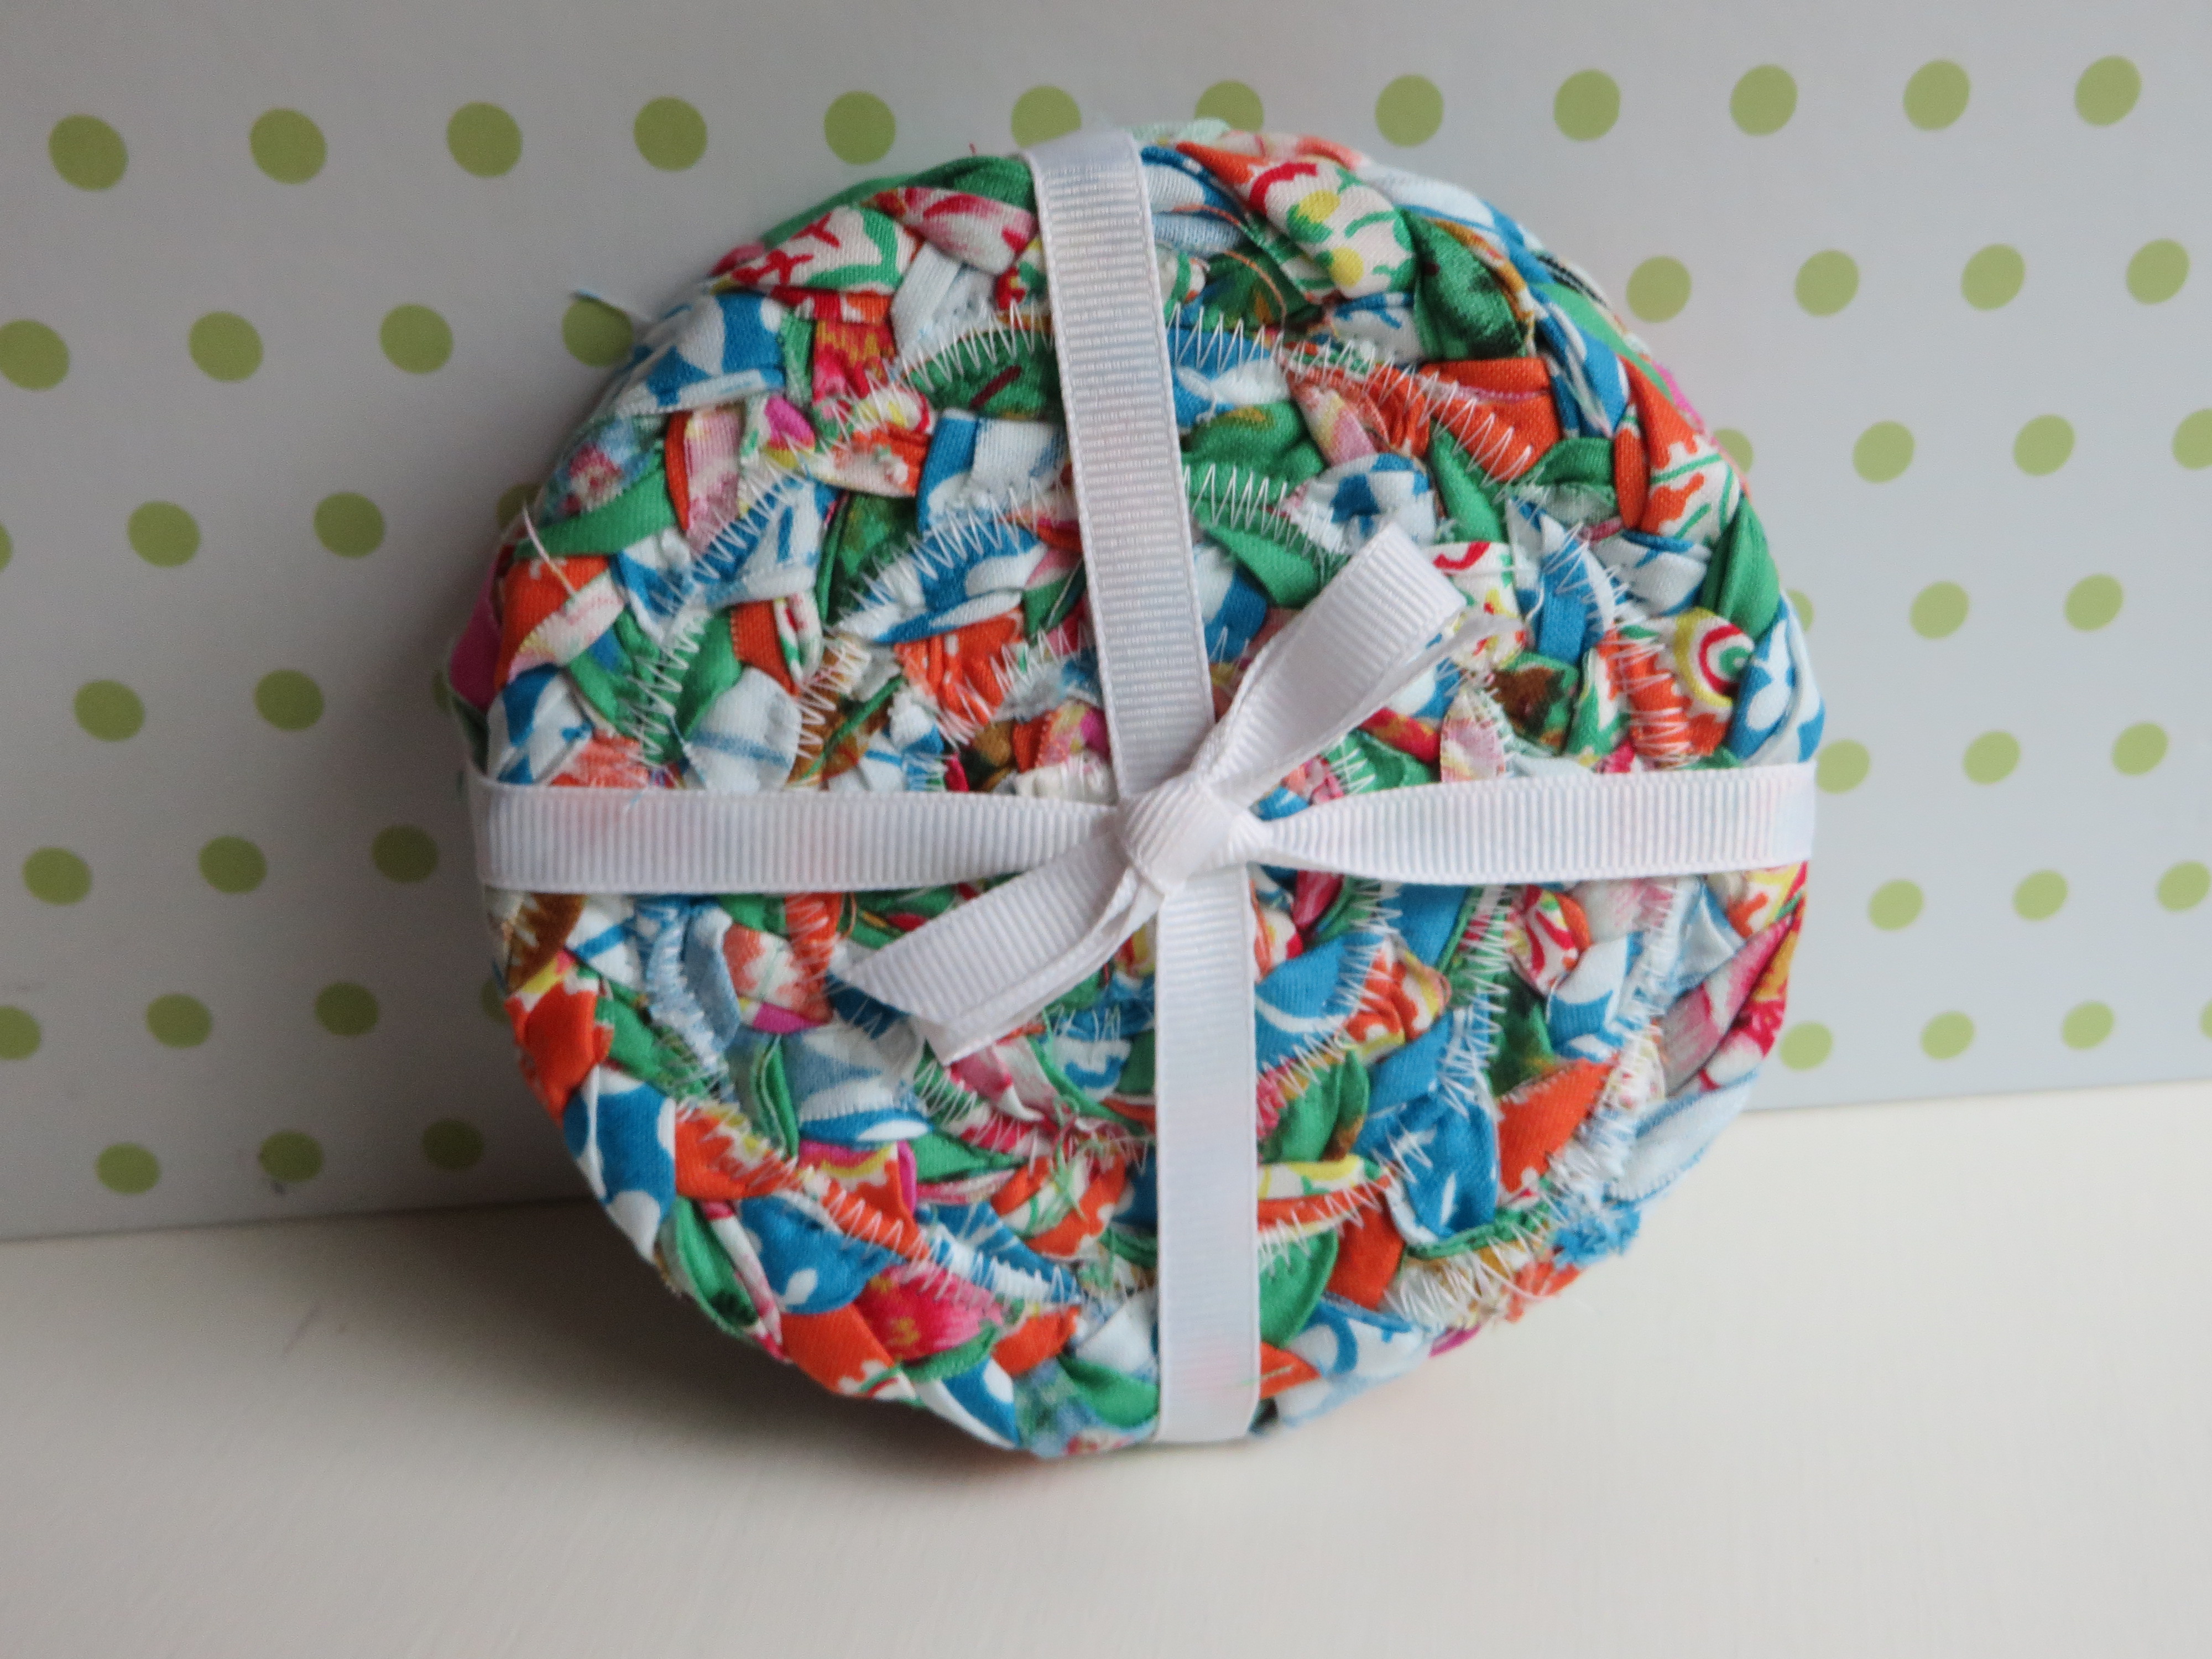
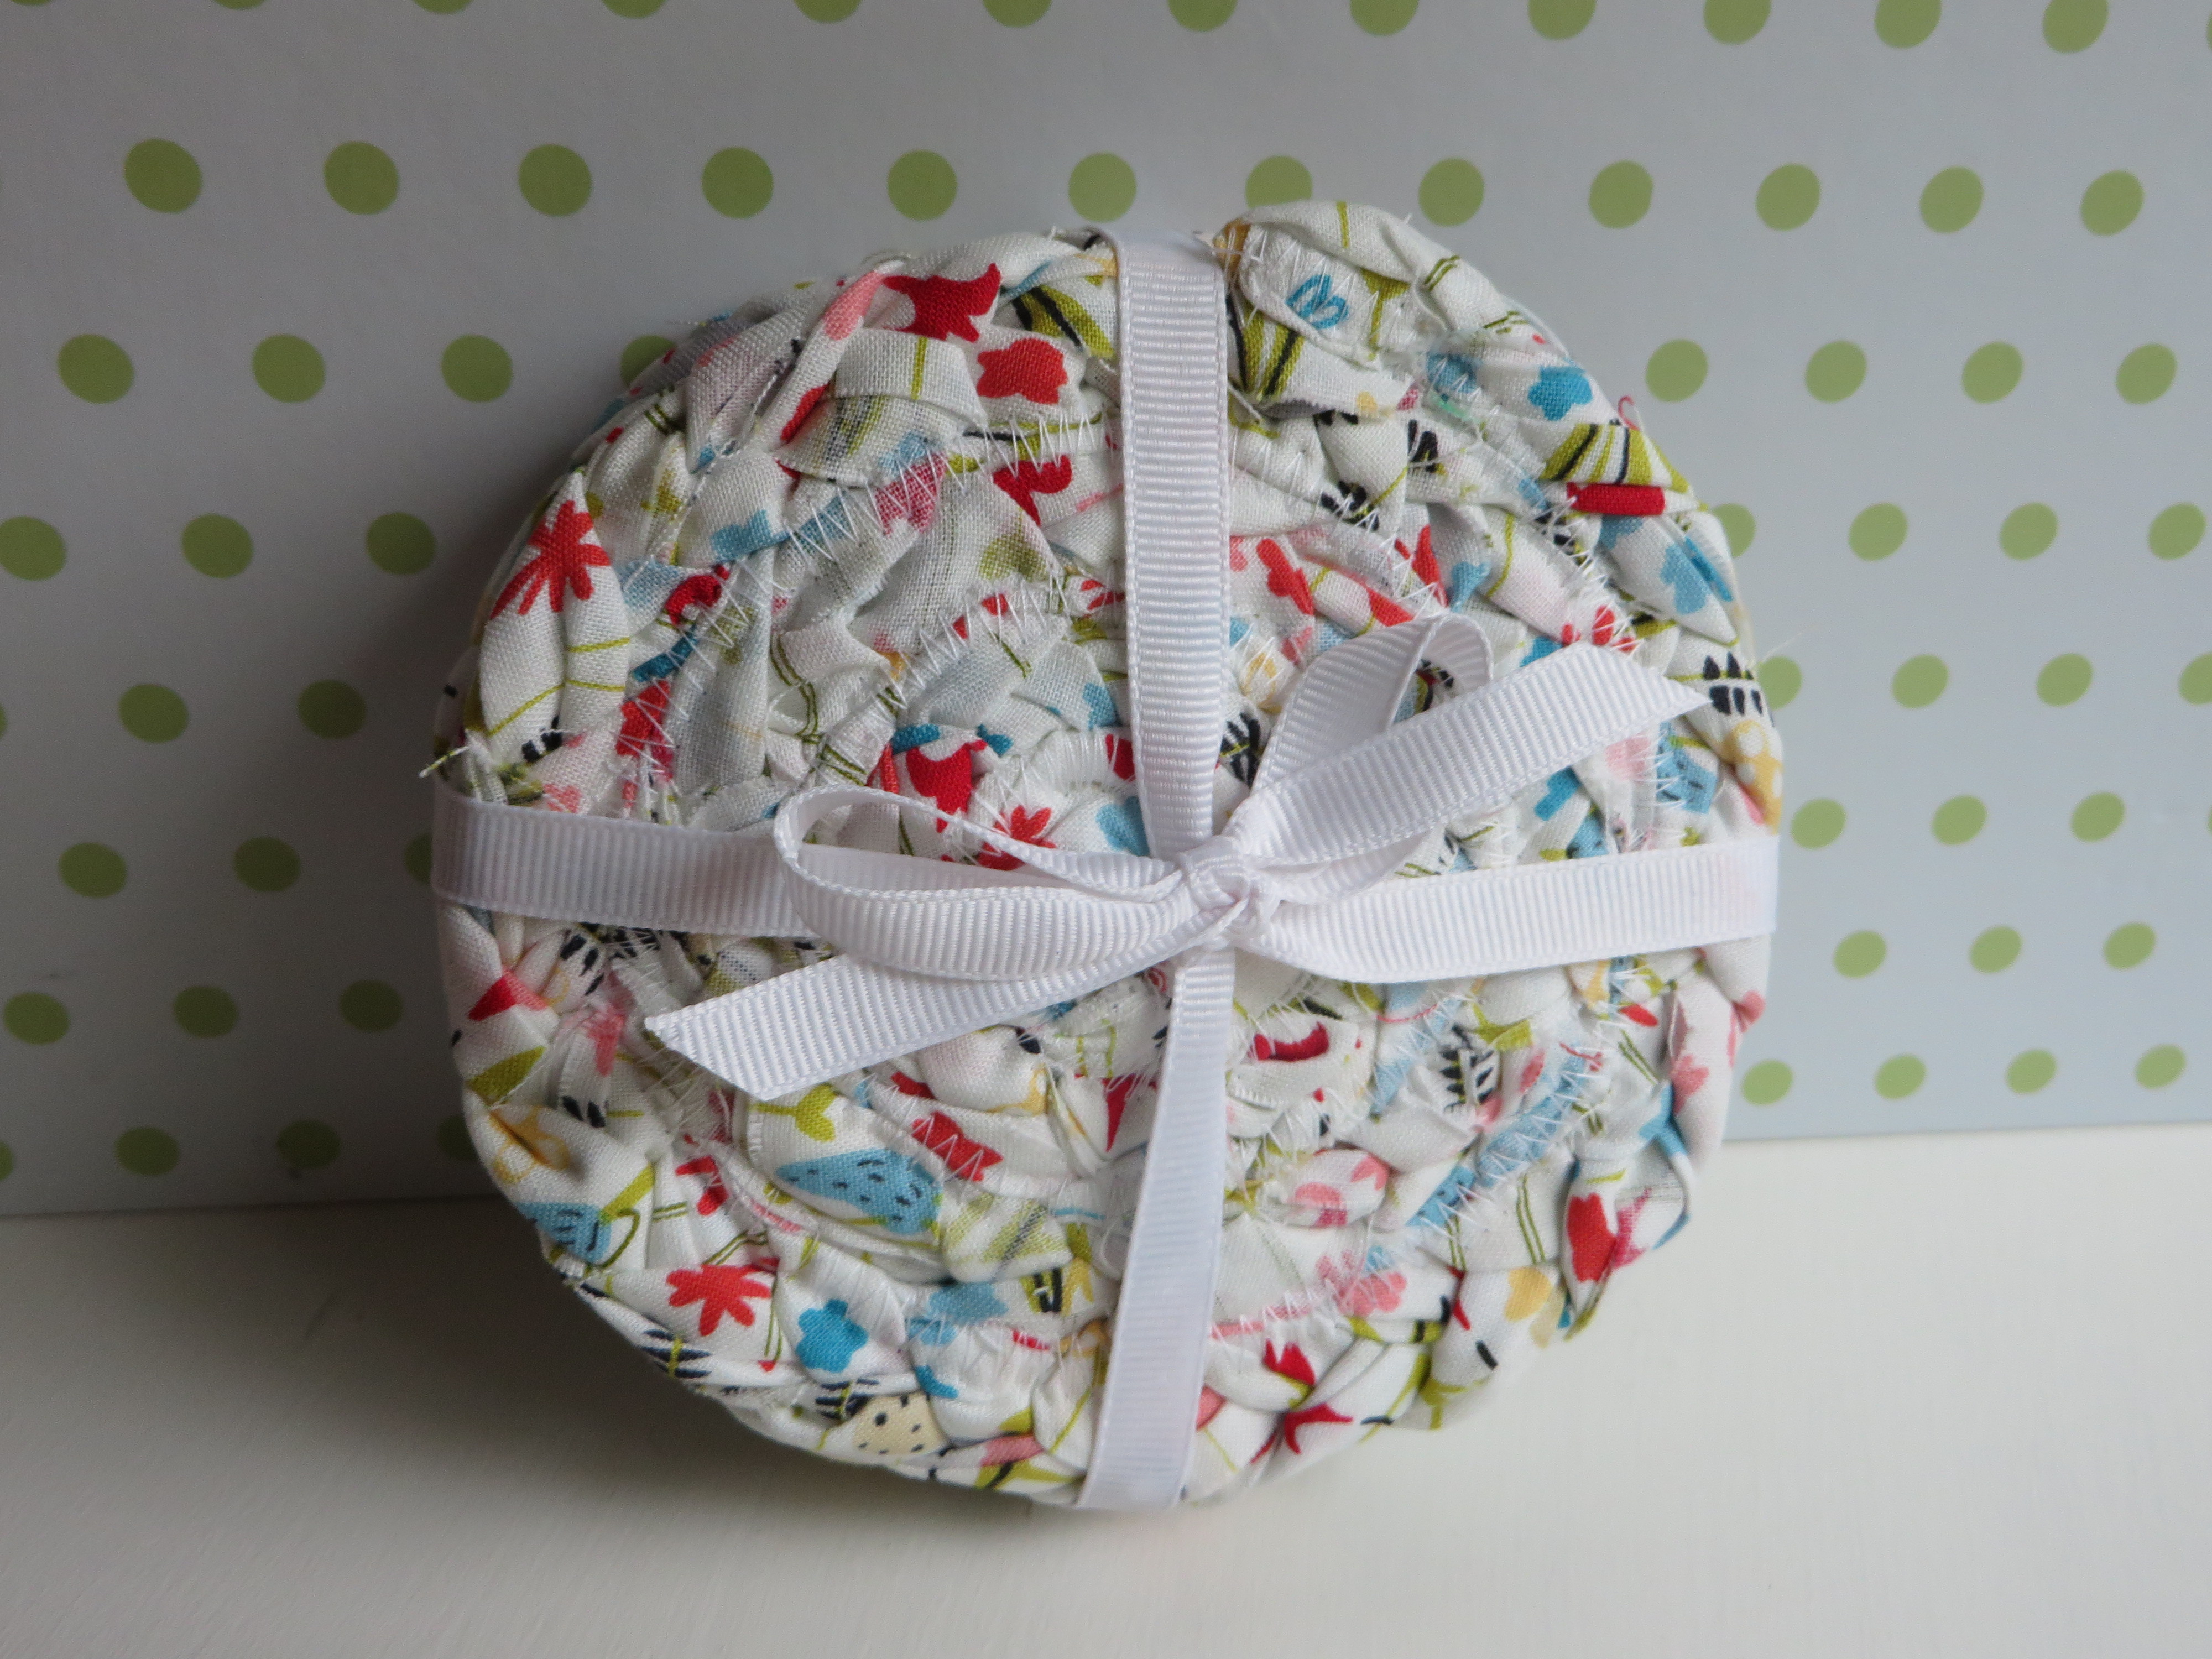
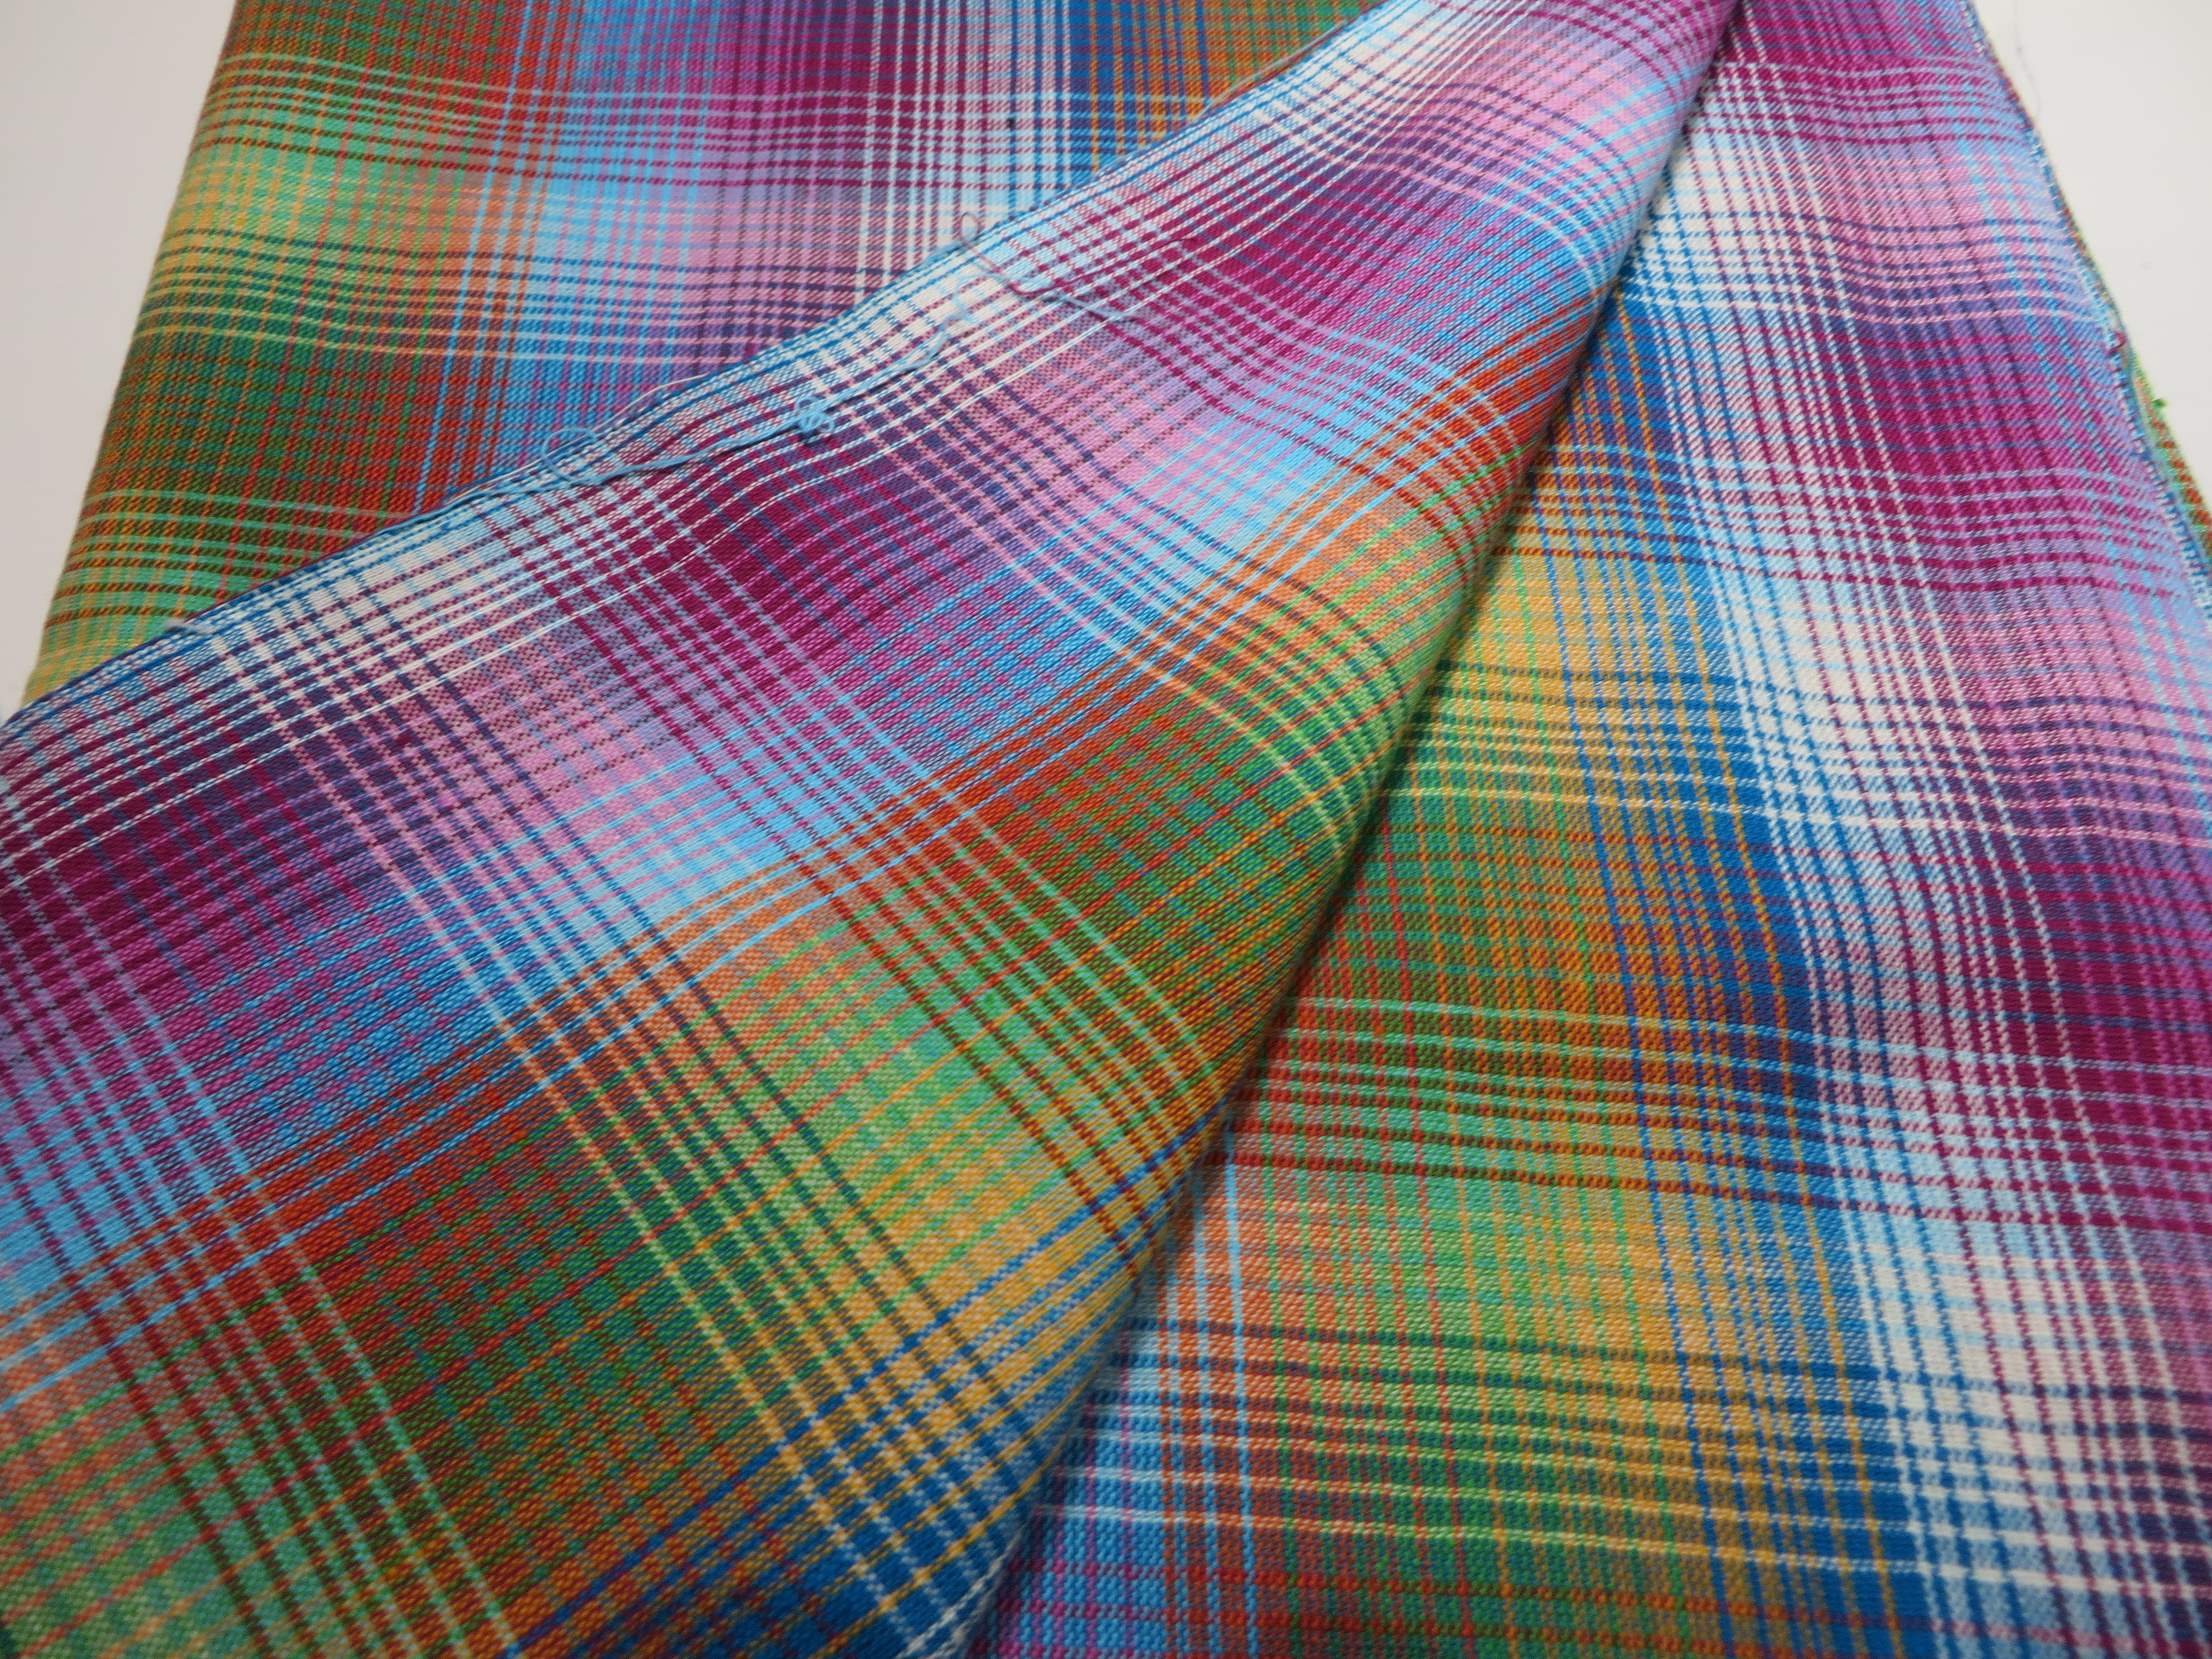
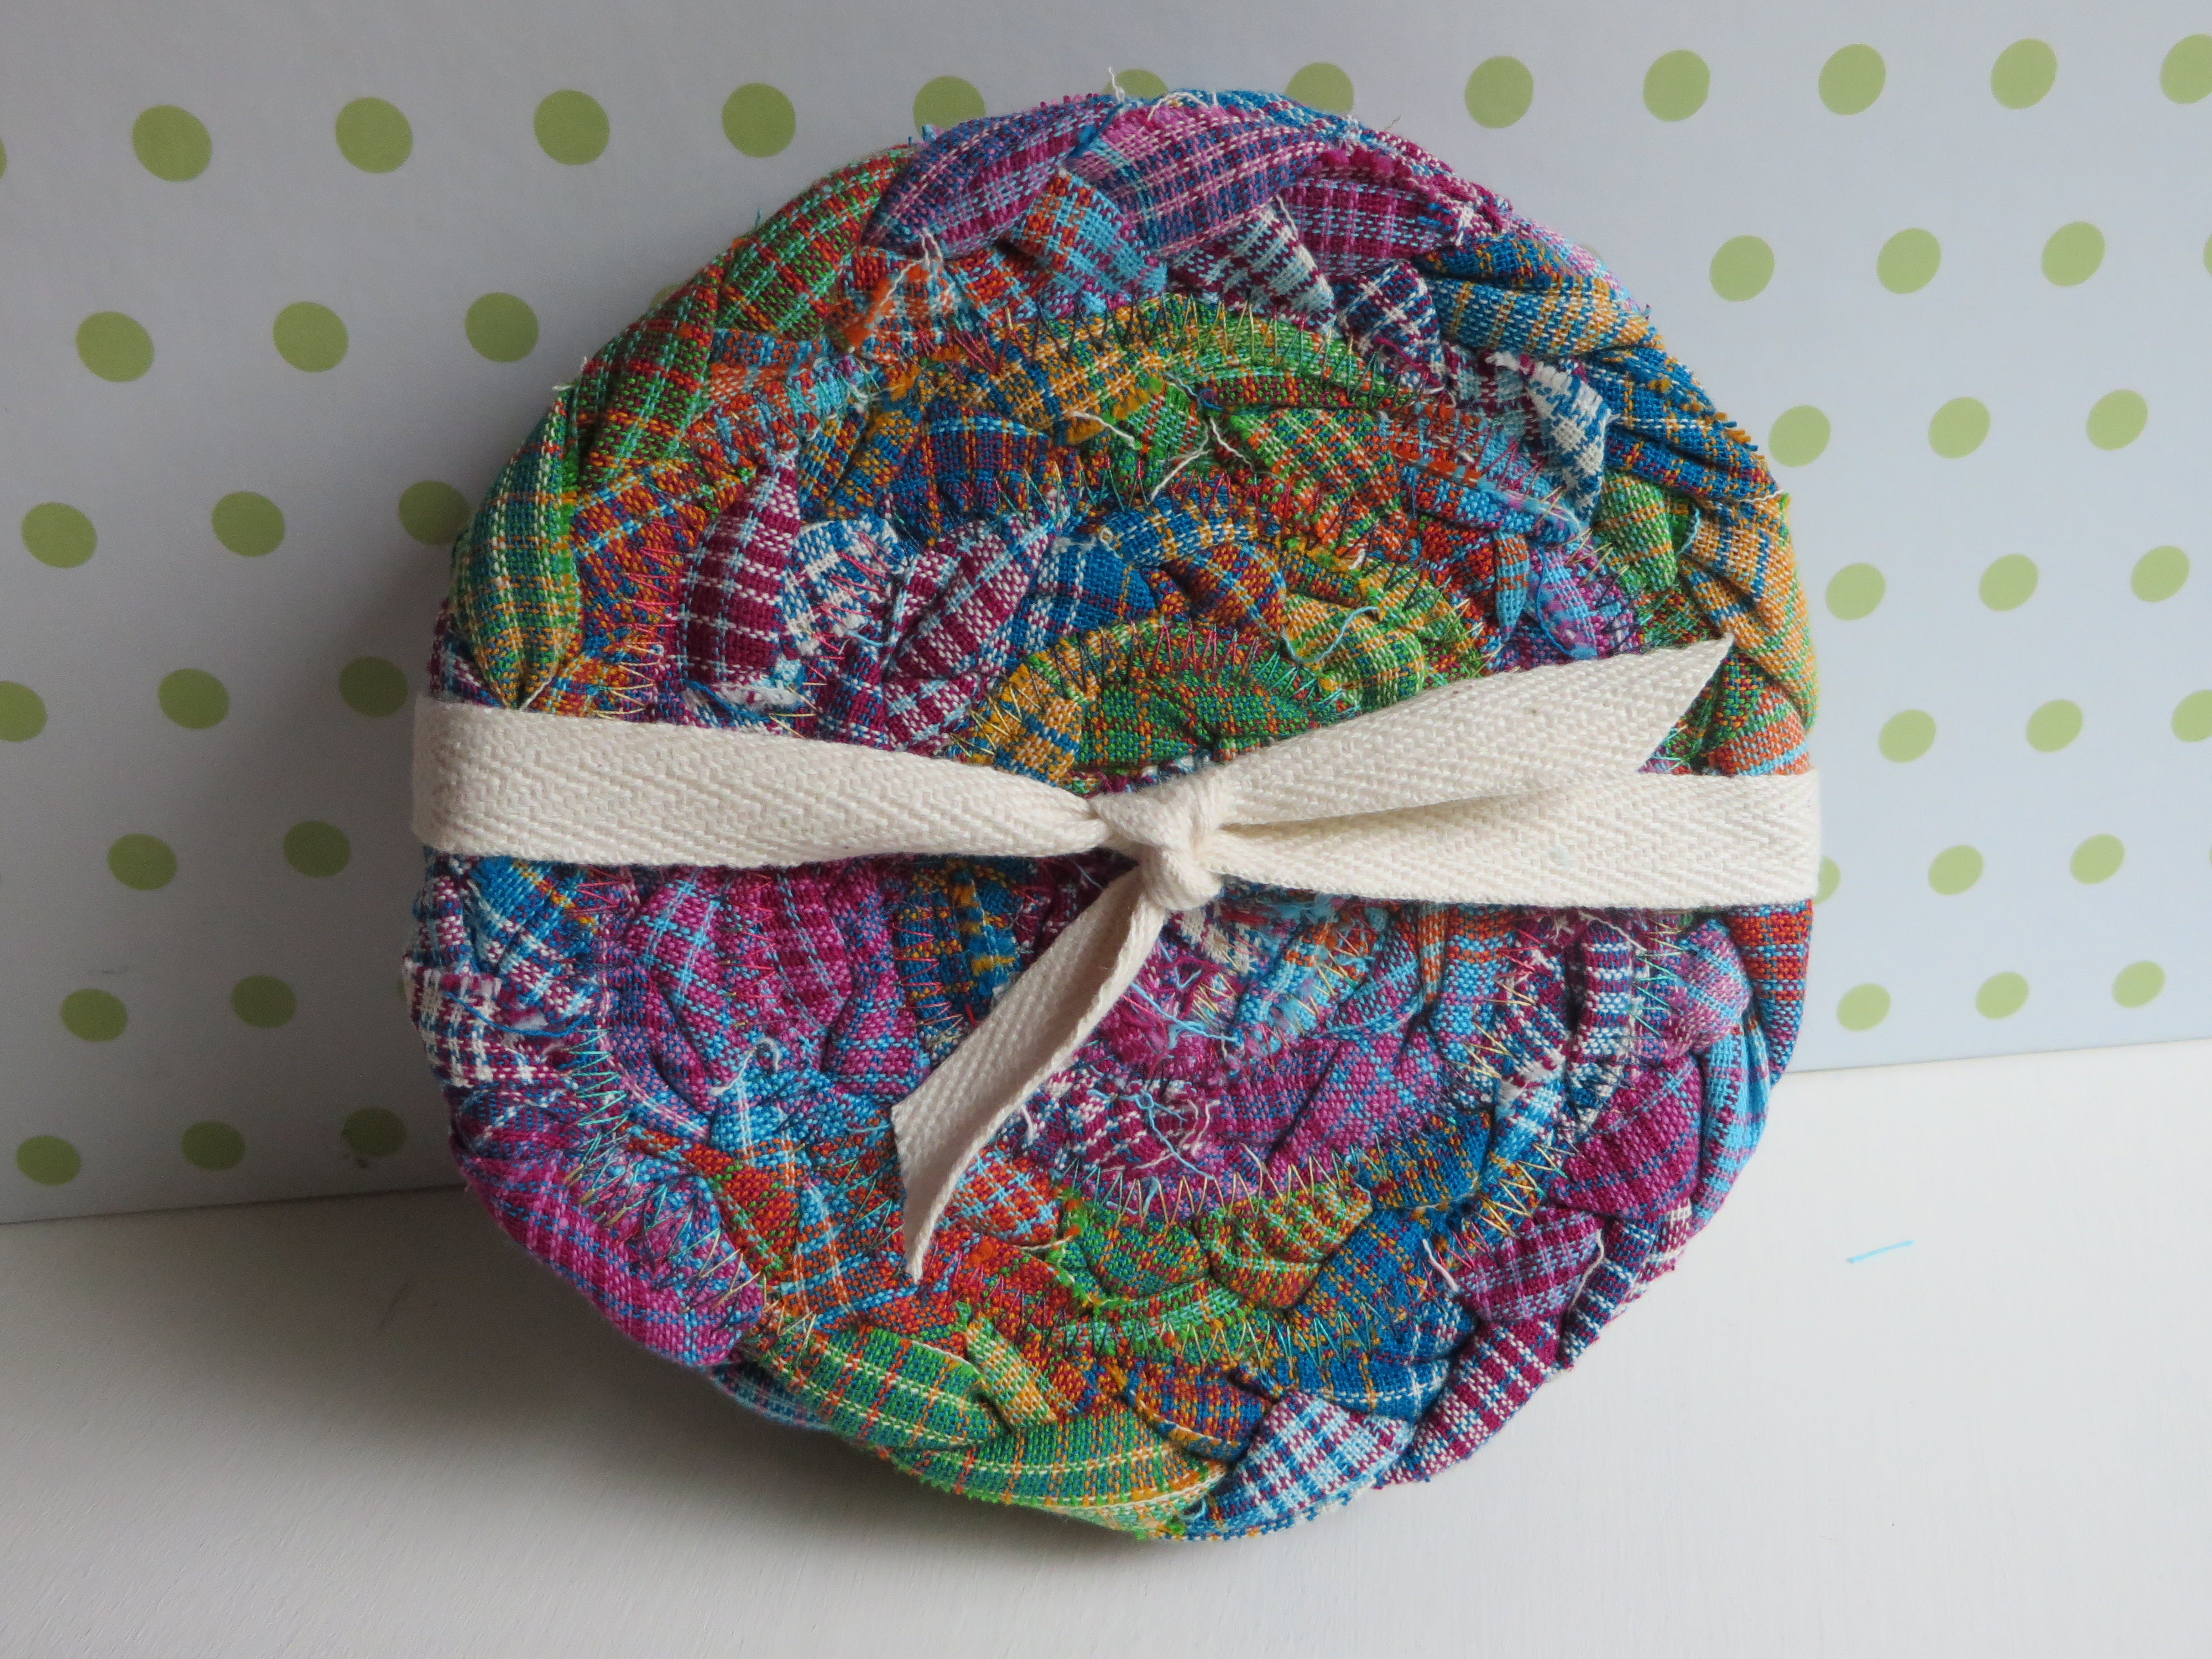
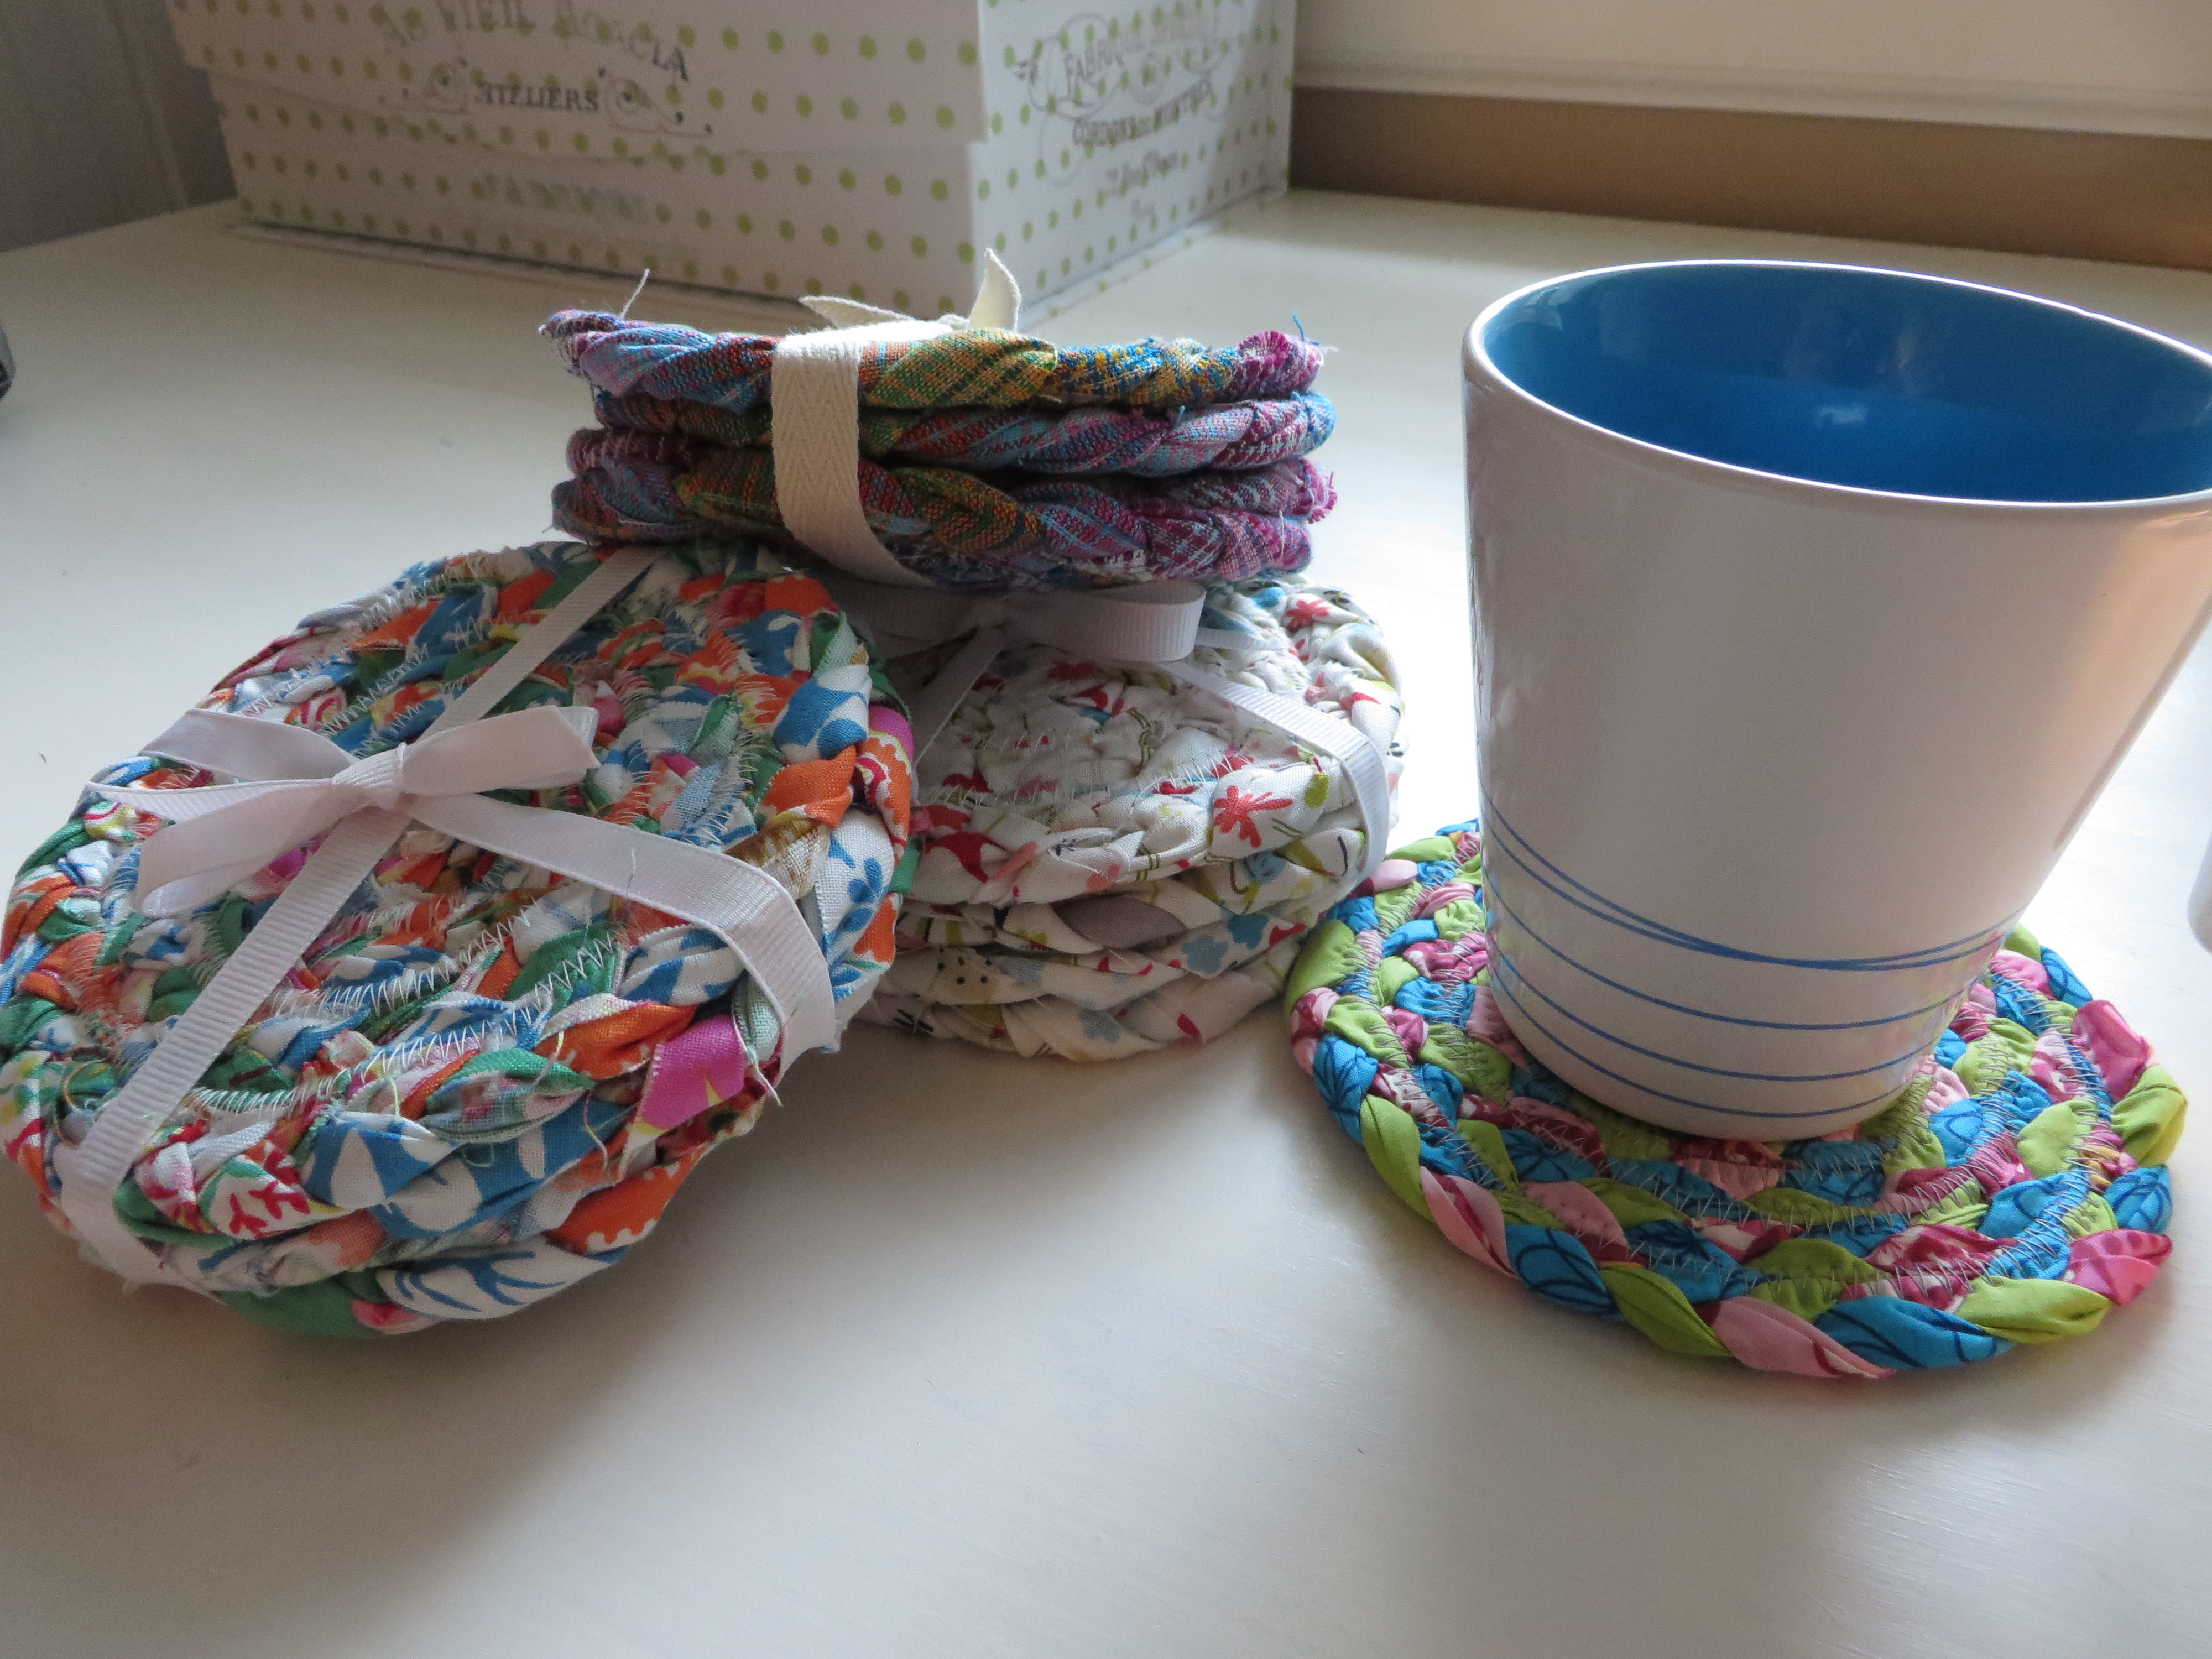
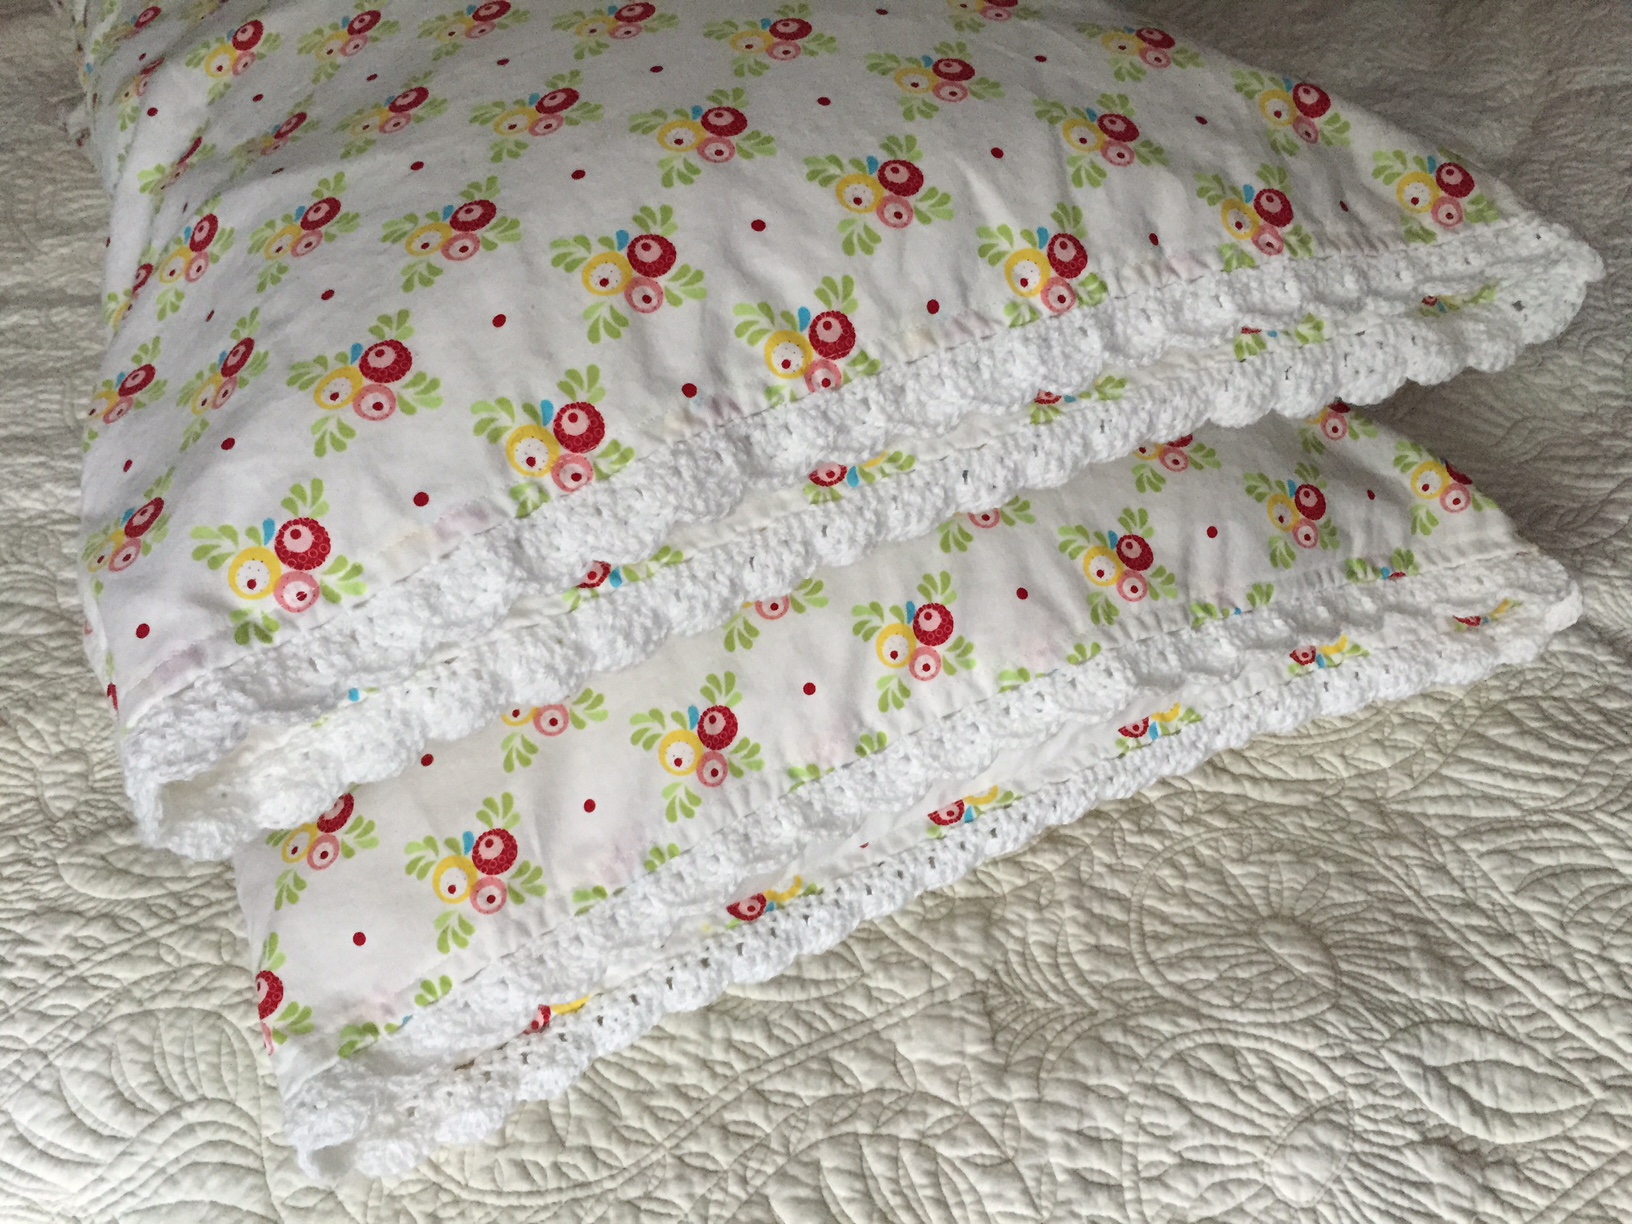
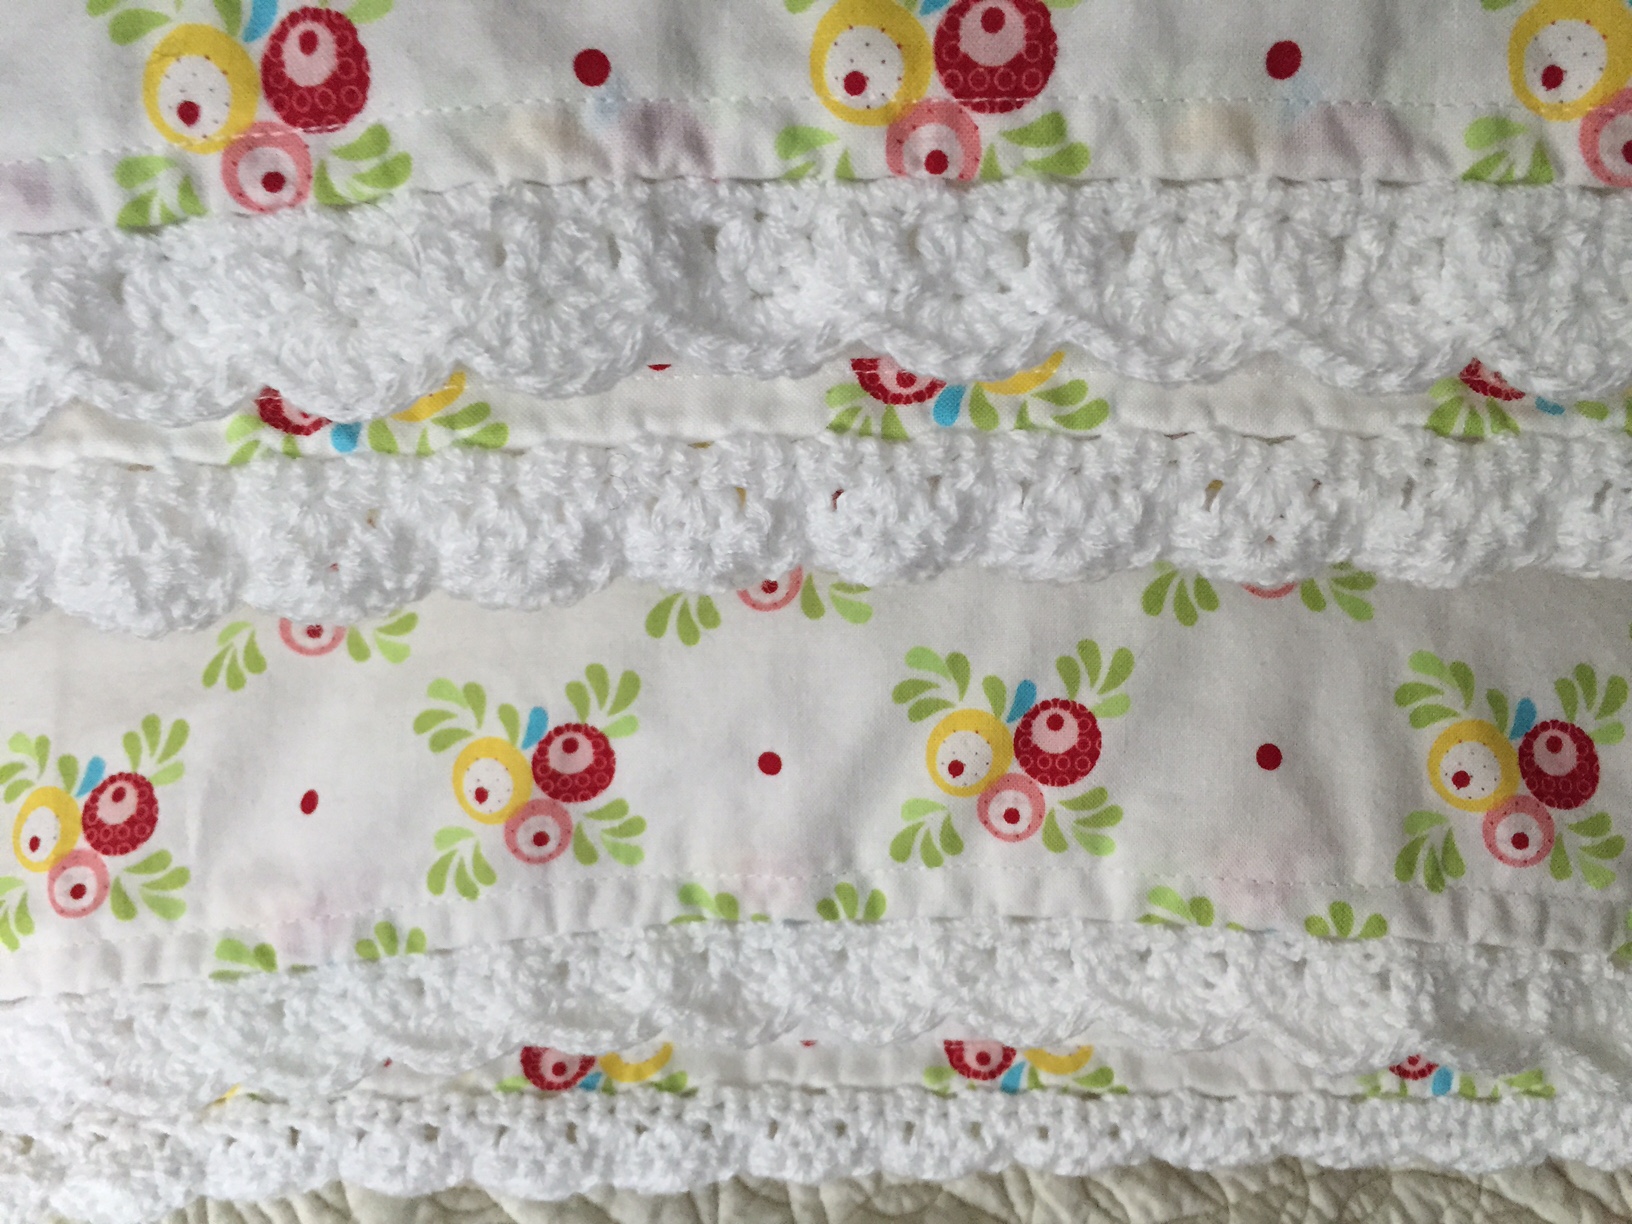
I started this earlier in the year (or maybe last year?).  It’s a full size thrifted sheet, ripped into 3/4″ strips and double crocheted, the last round is reverse single crochet.  Can you believe an entire sheet only makes a 2′ round rag rug?

IMG_1226

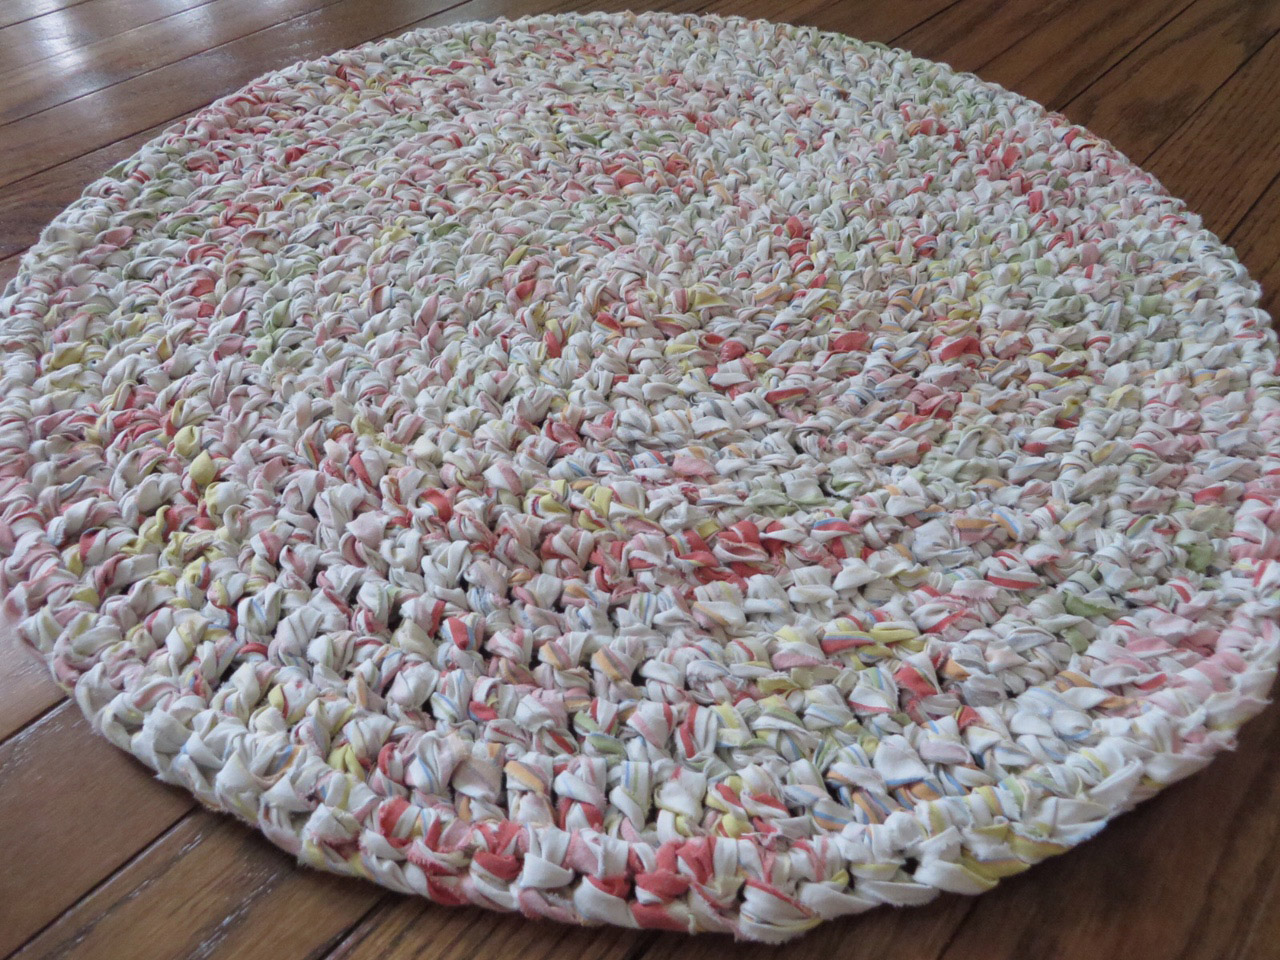
I decided to stop at this size  because 1) I’s finished.  2) If I make one again, I’ll use skinnier strips and a bigger hook. It was a little tight.  3) It’s a good size to put under the dogs water bowl.

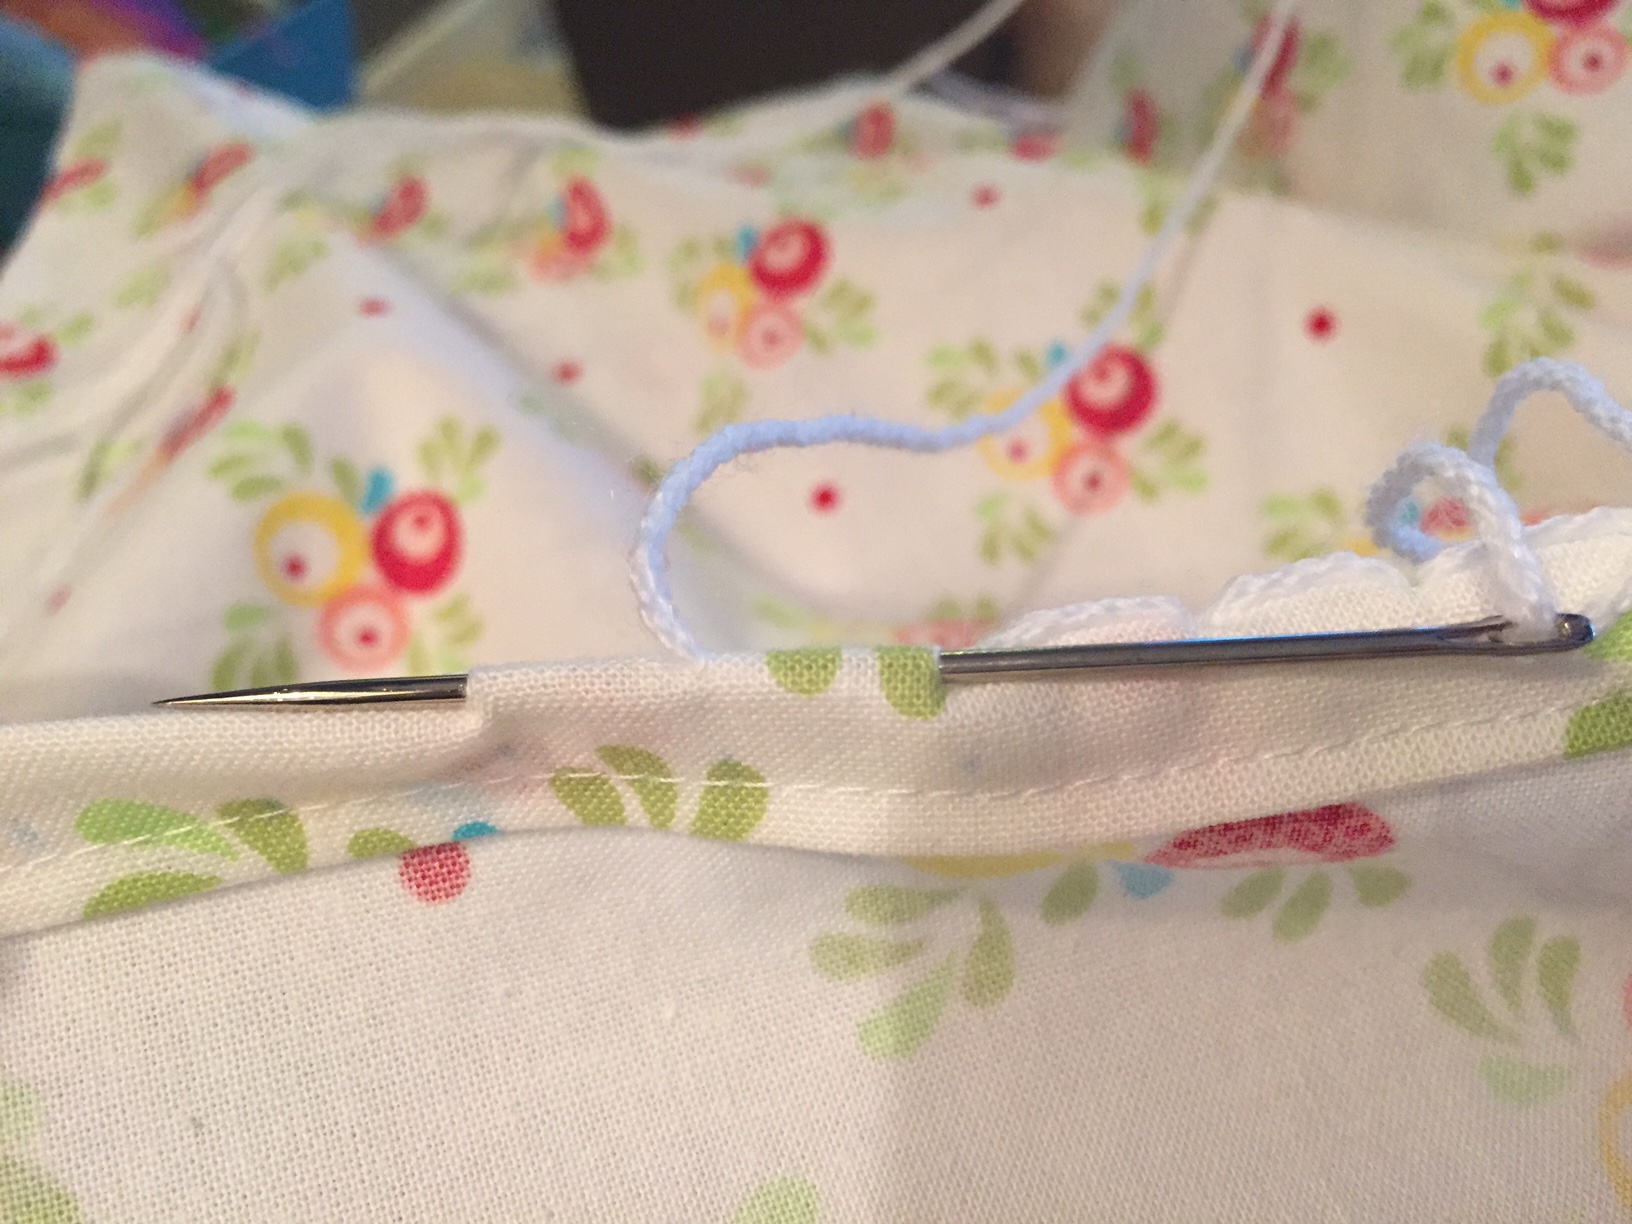
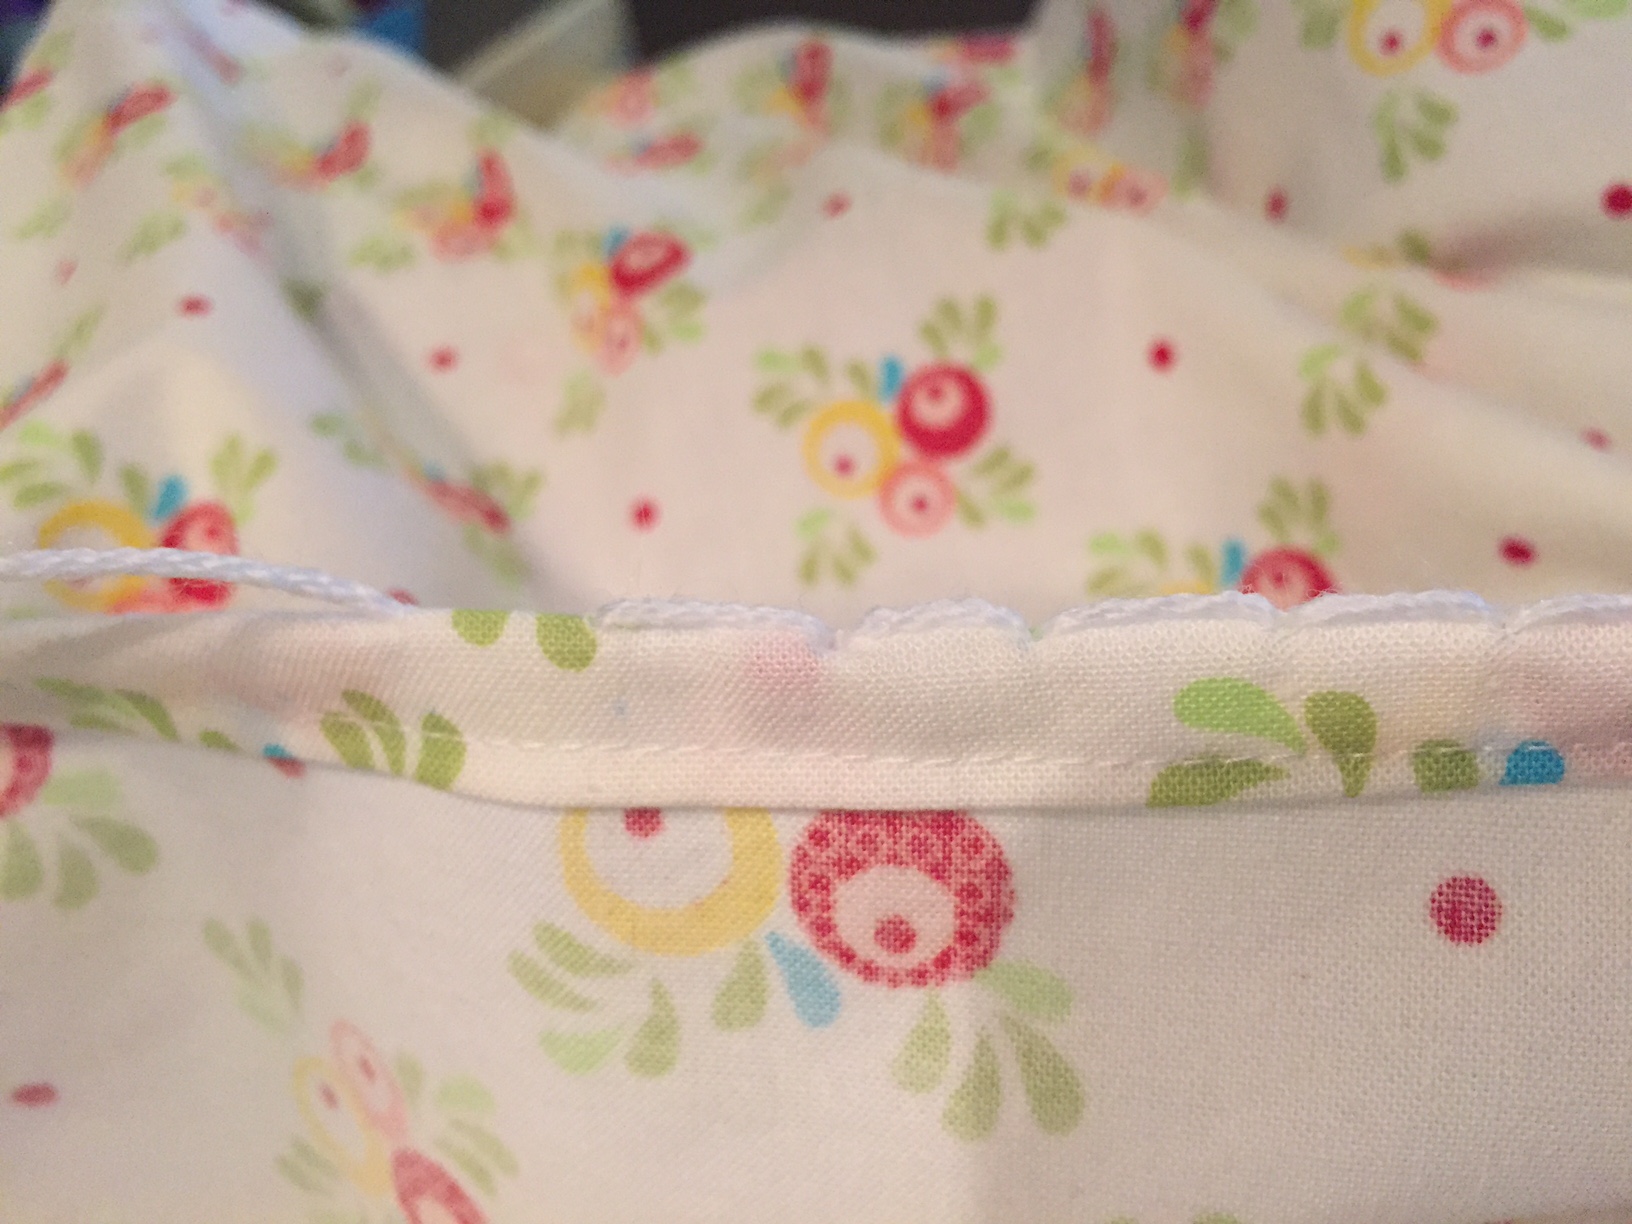
Next up is what I keep calling my Foxy Boxy bag and I don’t know why. They are obviously raccoons.

IMG_1222

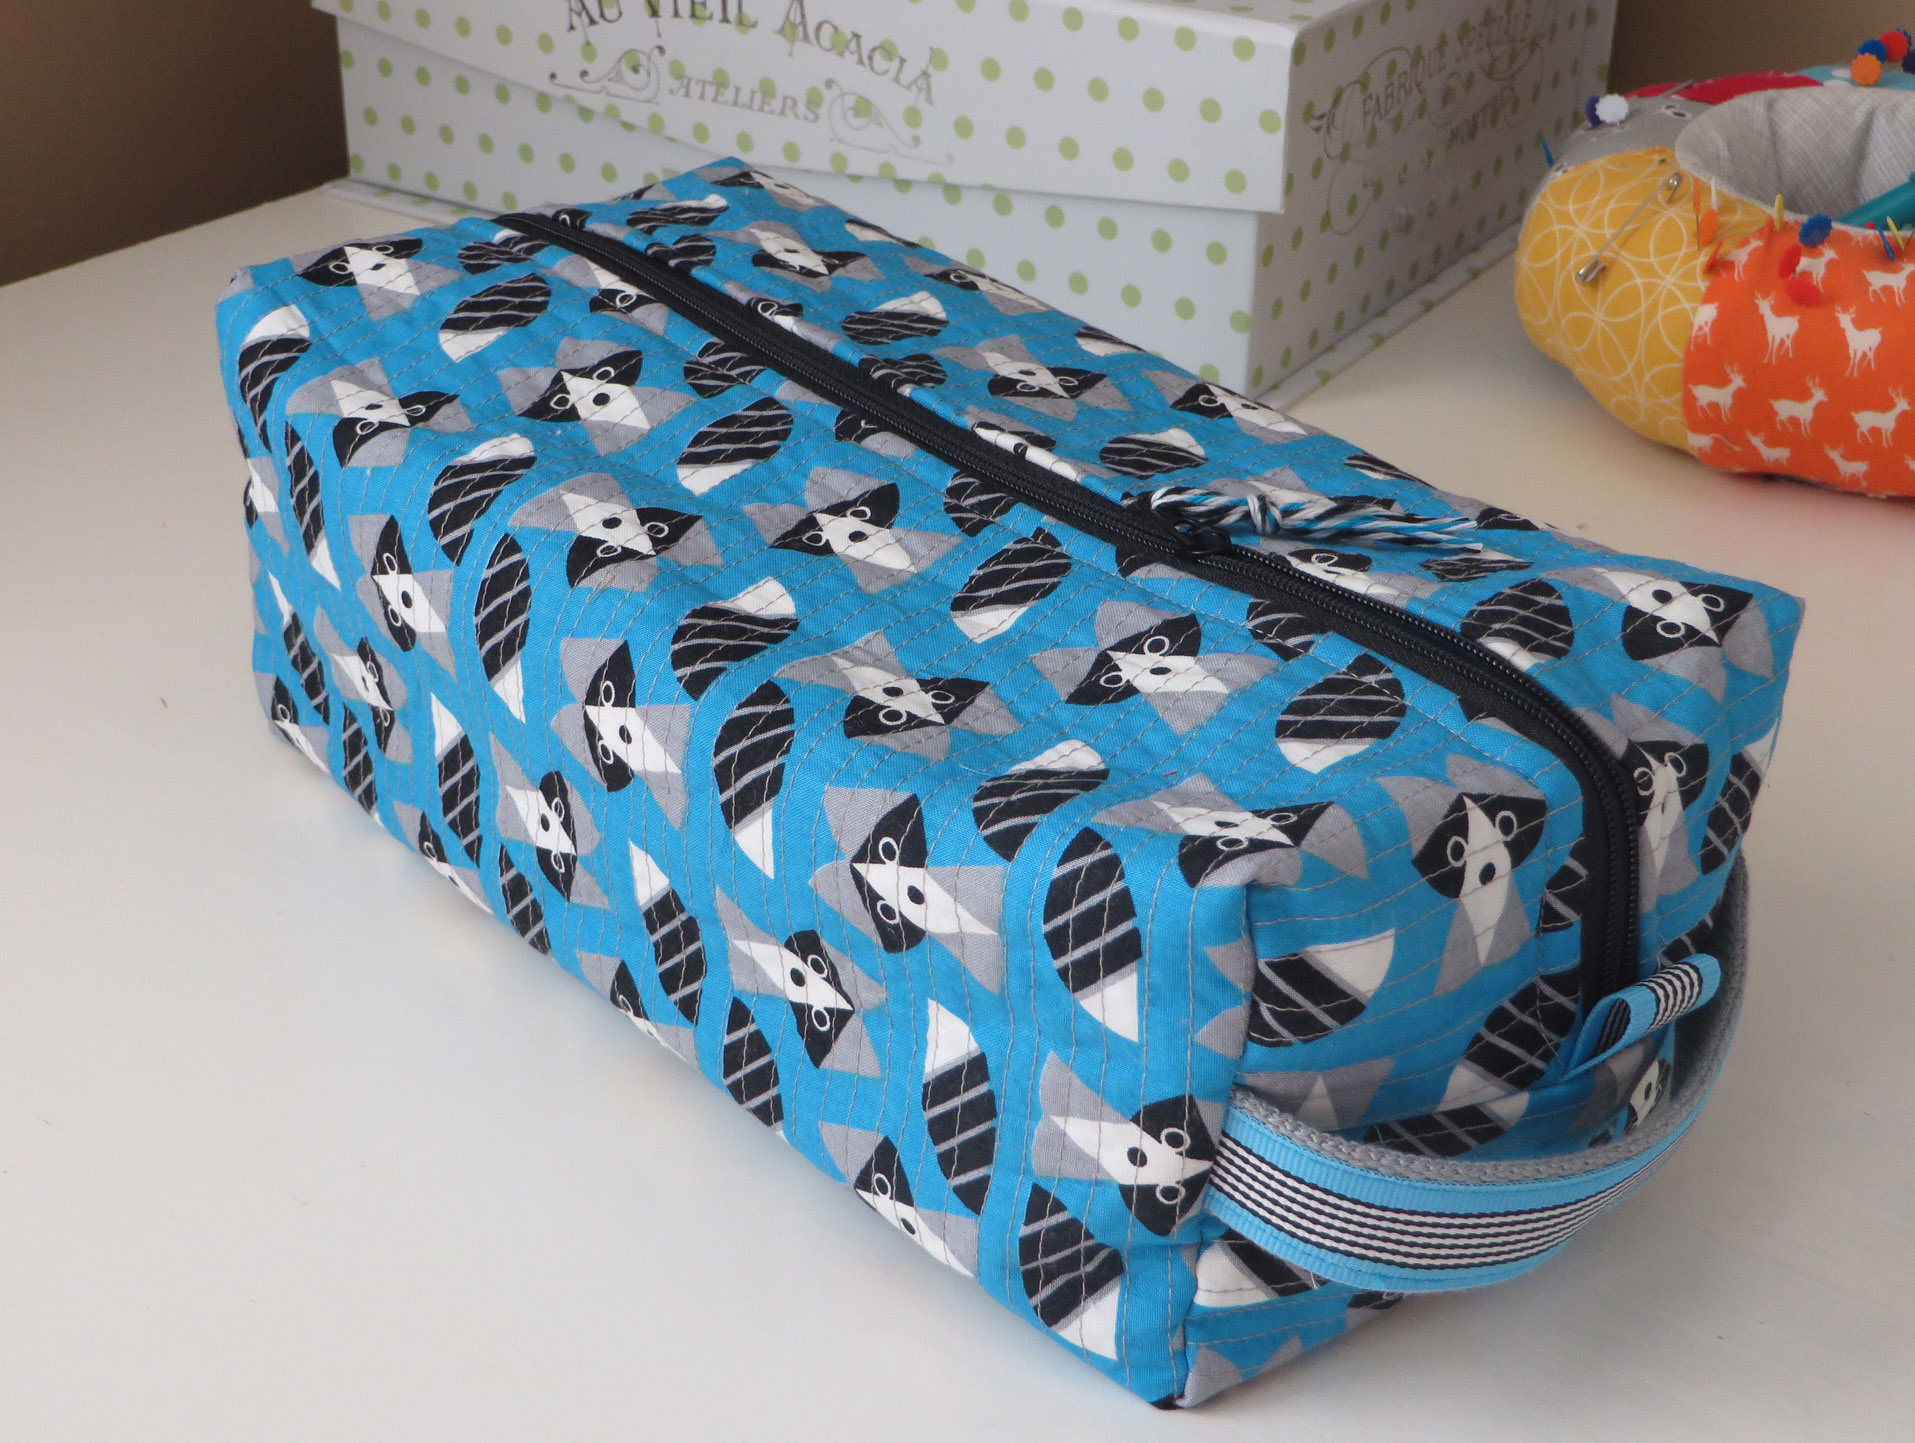
I’ve had the fabrics cut, interior fabric laminated, ribbon and zipper pulled since this summer. They’ve just been sitting there mocking me.

IMG_1223

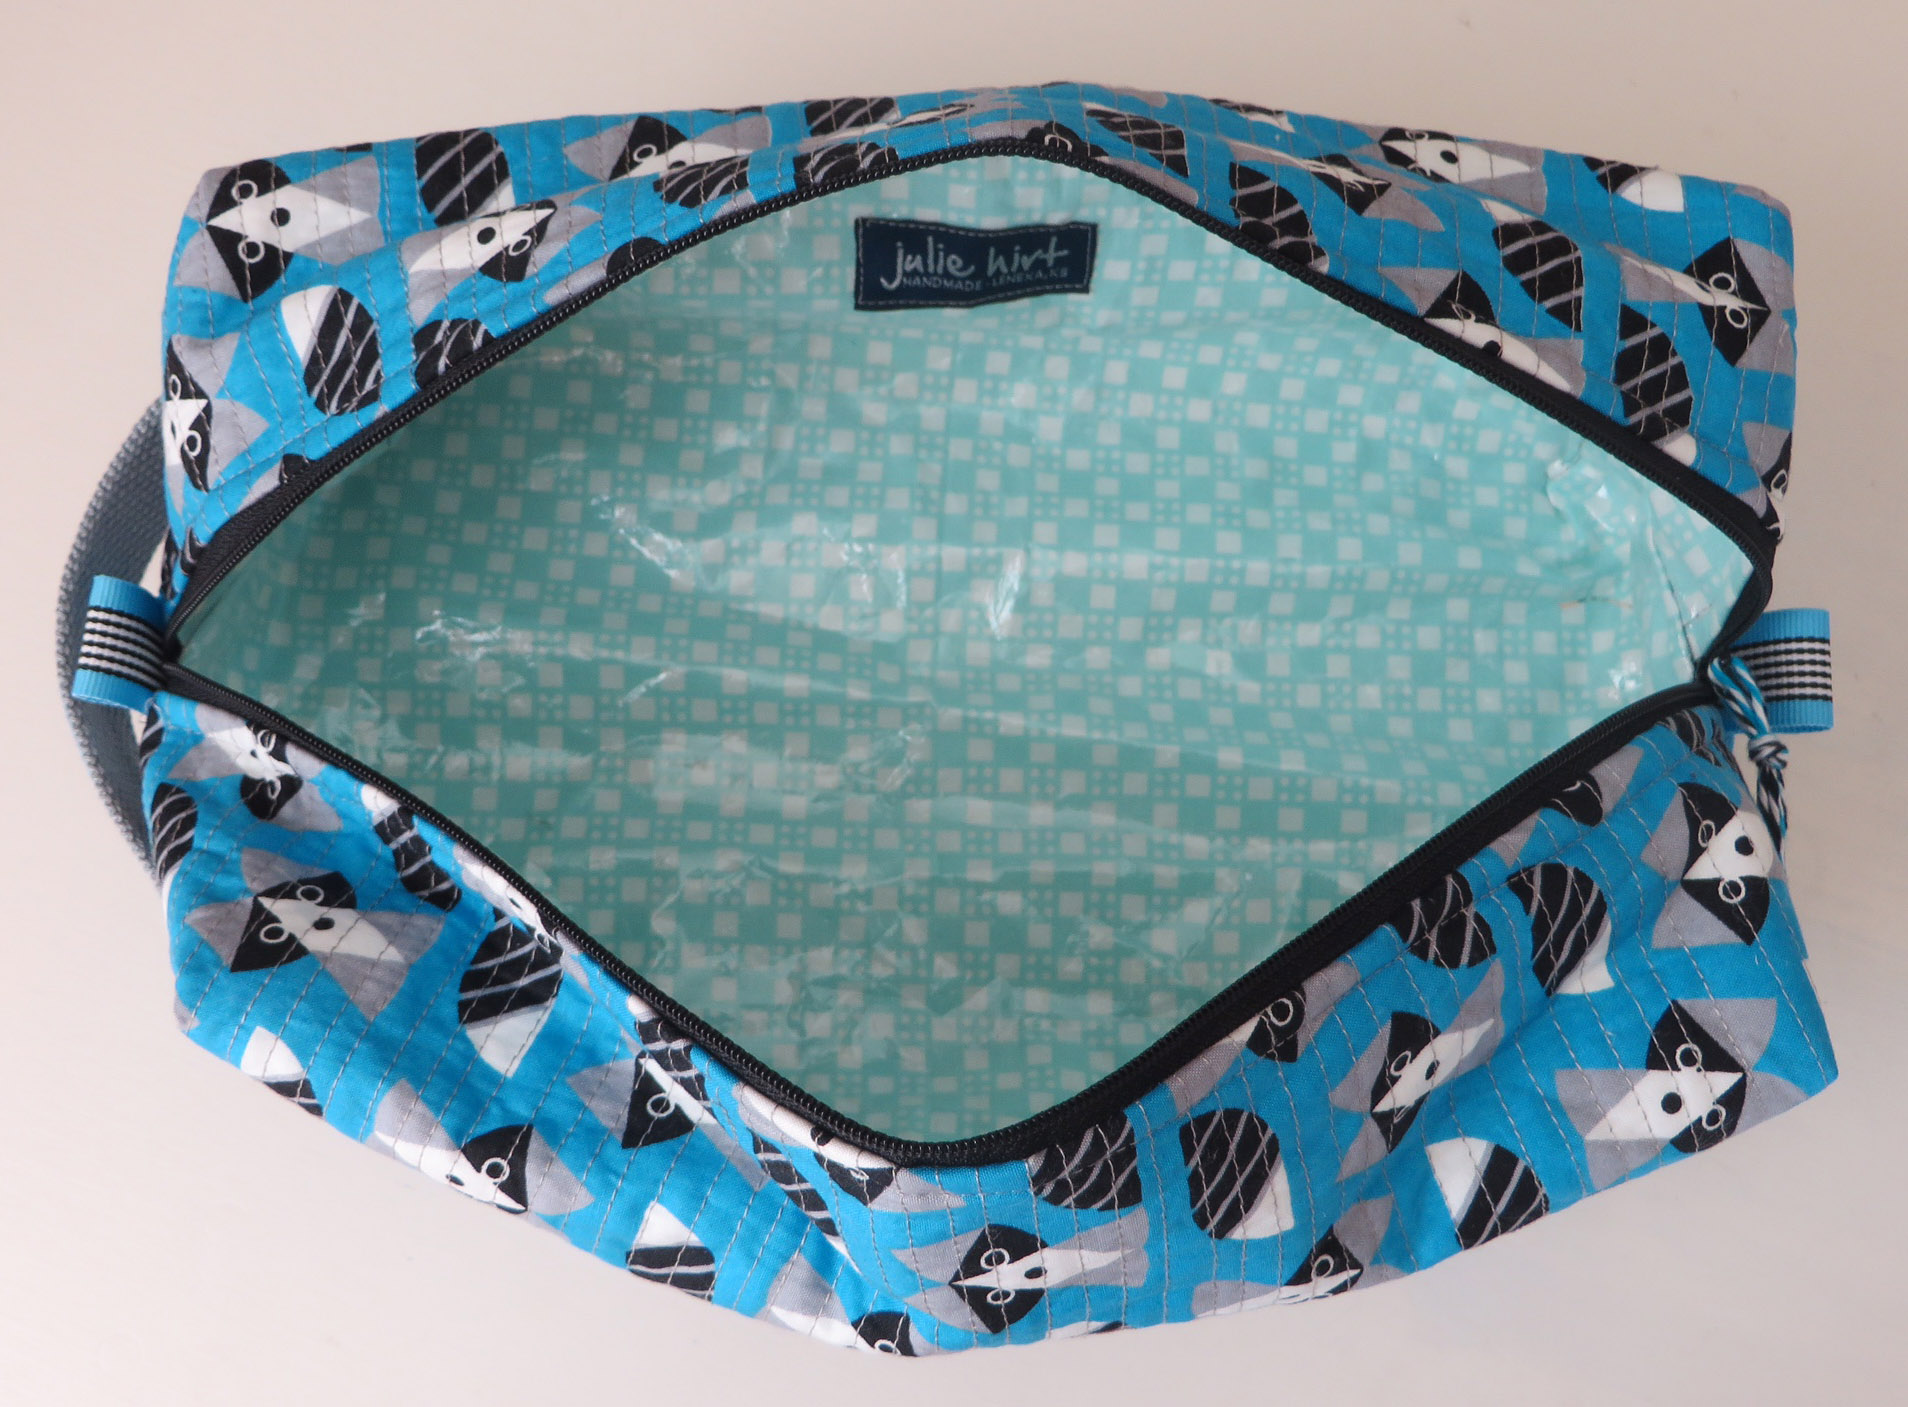
I like that the bag holds it’s shape (I think due to quilting and the laminated interior fabric) and it’s a fairly large size. I’ll either use it or give it away sometime soon.

Next is something I hope will help with my free motion quilting ideas (actually USING that new Long Arm is part of my 2015 plans) and open my mind for new patterns.

IMG_1224

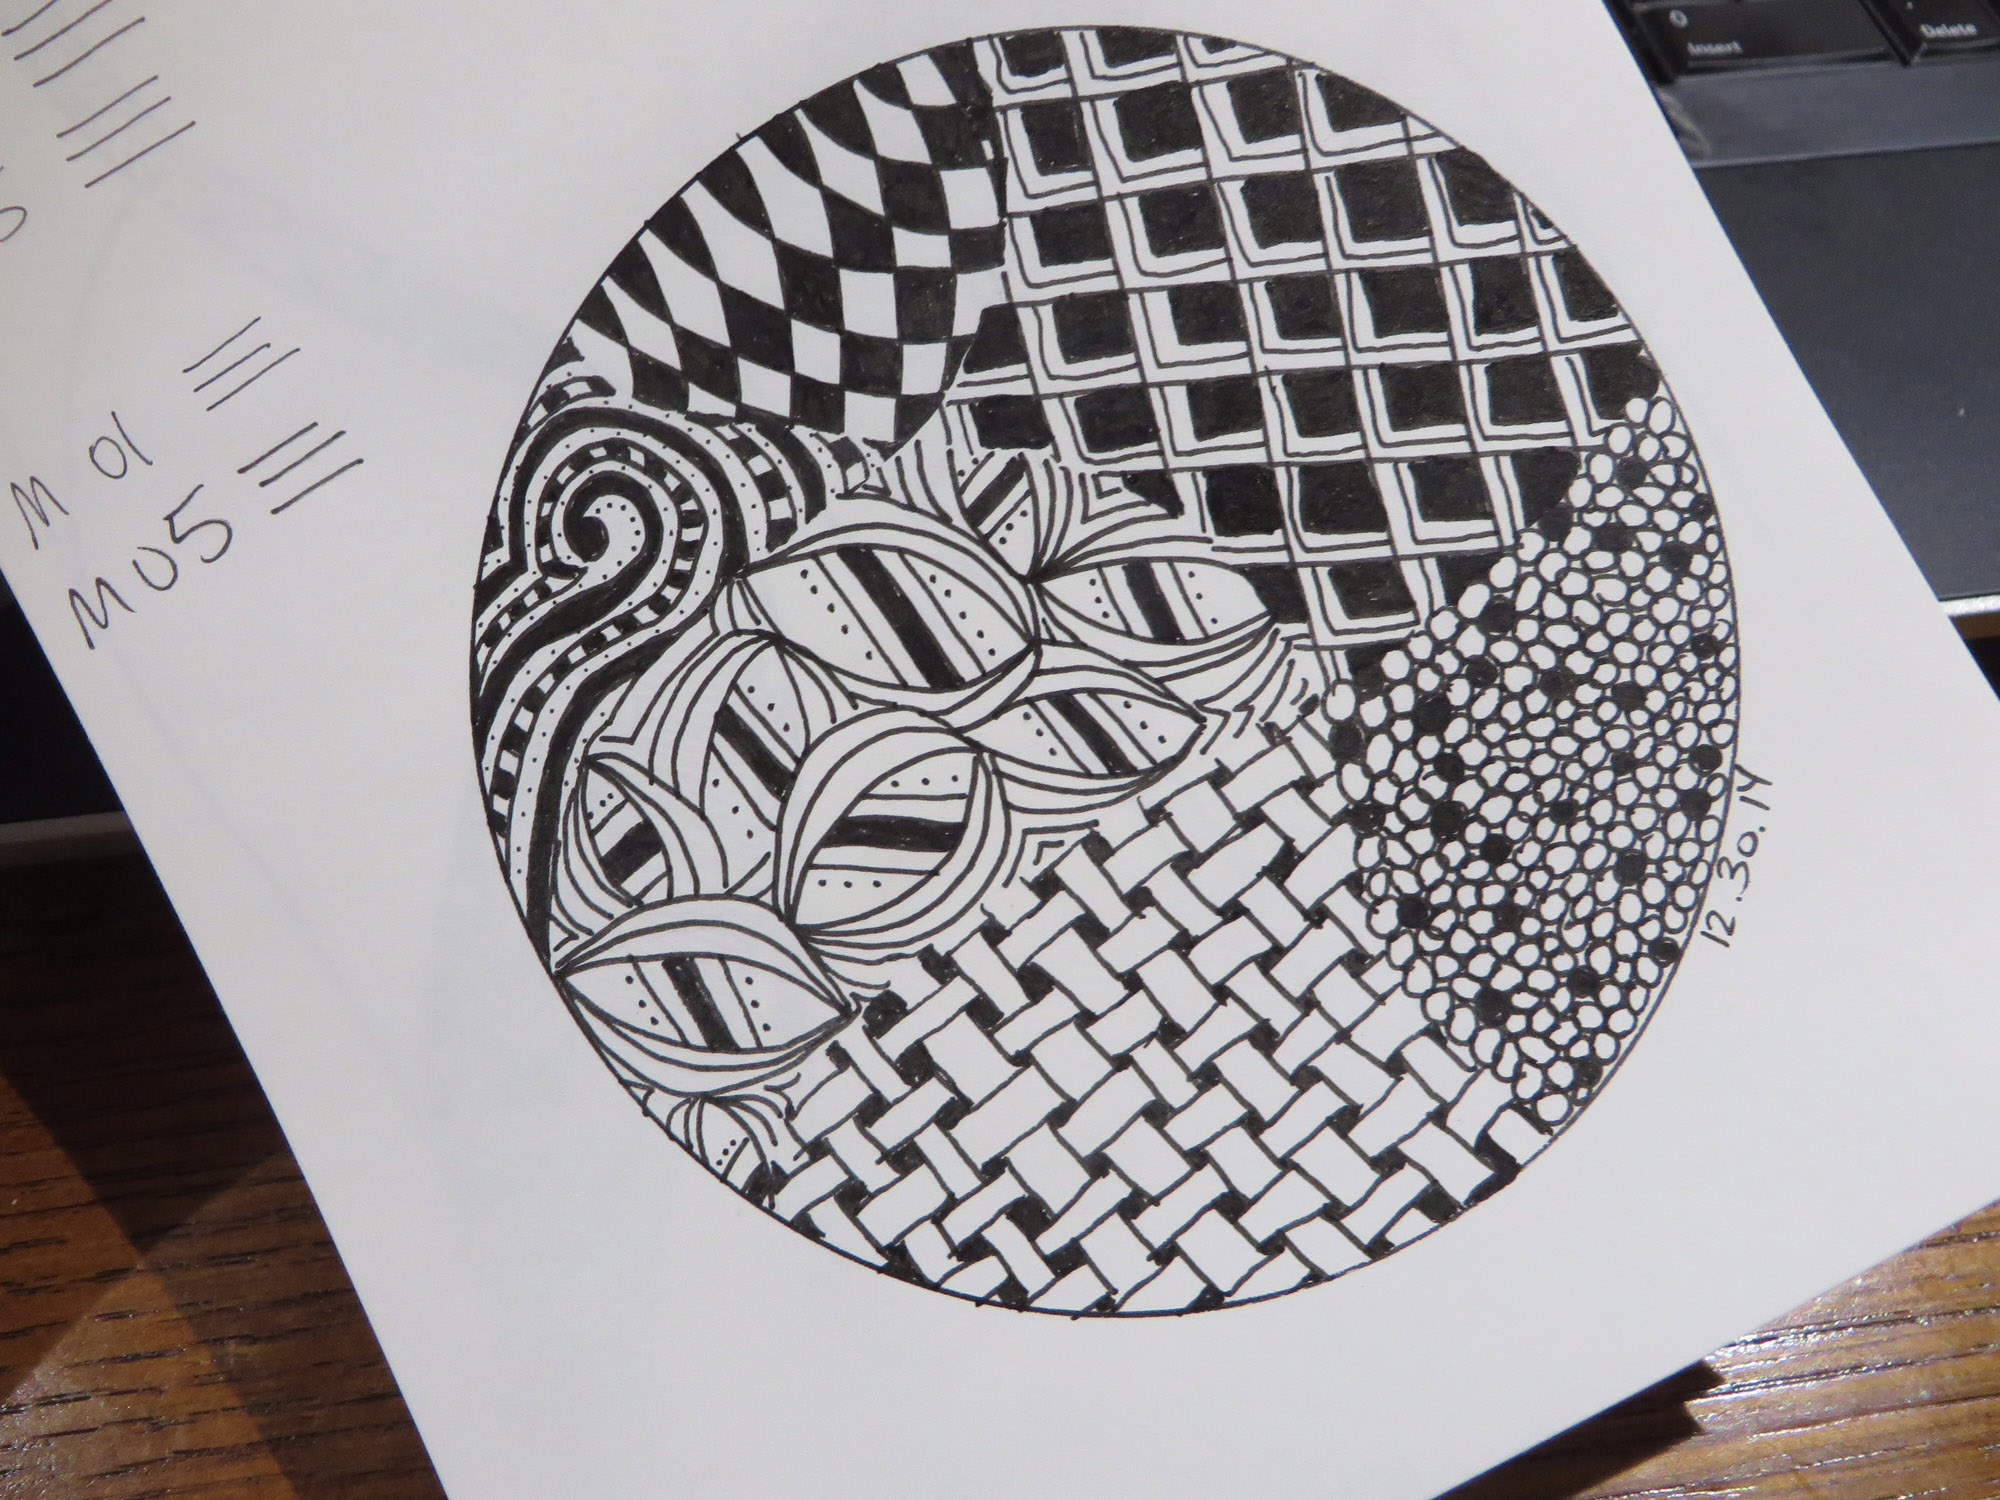
Every time I see people  making pretty doodles or doing this thing called zentagling, I’m jealous. My brain just doesn’t work that way.  So I decided I should do what makes me uncomfortable and give it a try.

After reading about the ‘Zentangle’ process and watching videos, I was pleasantly surprised.  It’s actually a little structured, there are tons of existing patterns to try (with instructions – sweet relief) and eventually you can create your own. Unless you’re a natural doodler and off you go on your own from the beginning.  Just know I’m jealous.

Way back in the dark ages I took design classes, so I pulled out my old Rapidograph set. The pens need serious cleaning but I knew I’ve been keeping them around for something.  They are perfect for this.

Anyway, I purchased a blank book with 100 pages.  My goal is to fill it by the end of the 2015.  That’s only like 2 Zentangles a week, so not a lot of pressure.

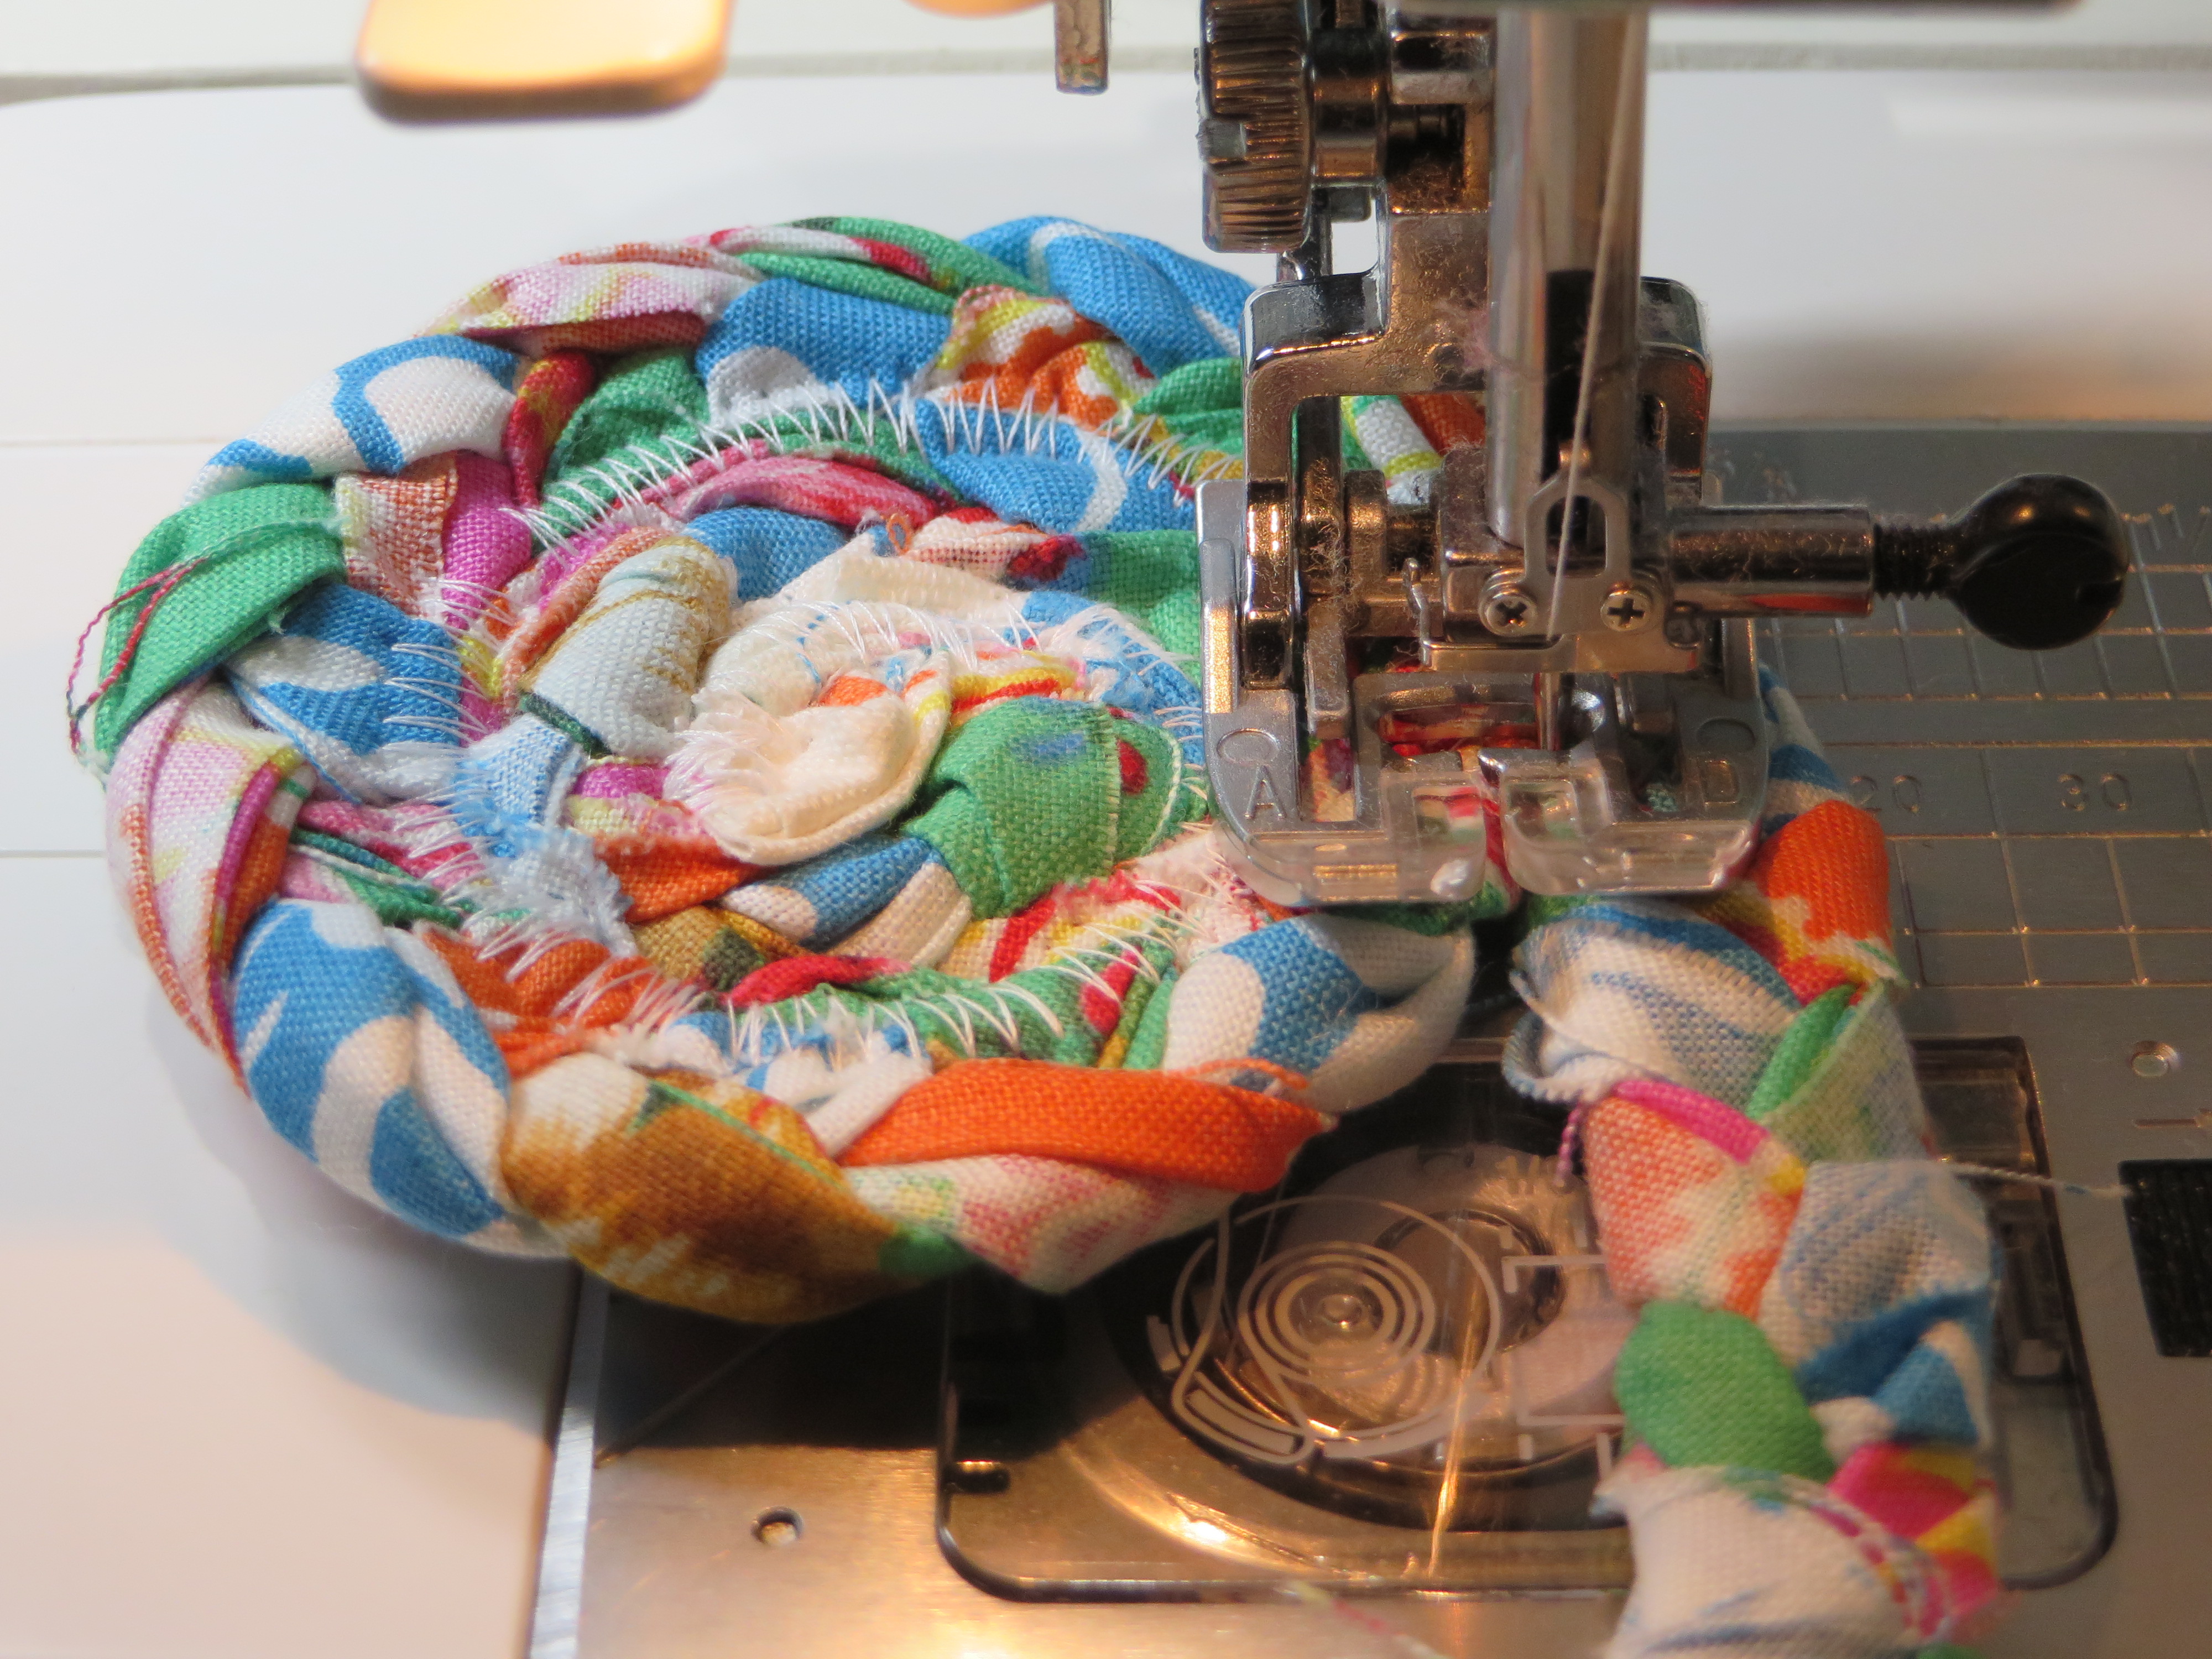
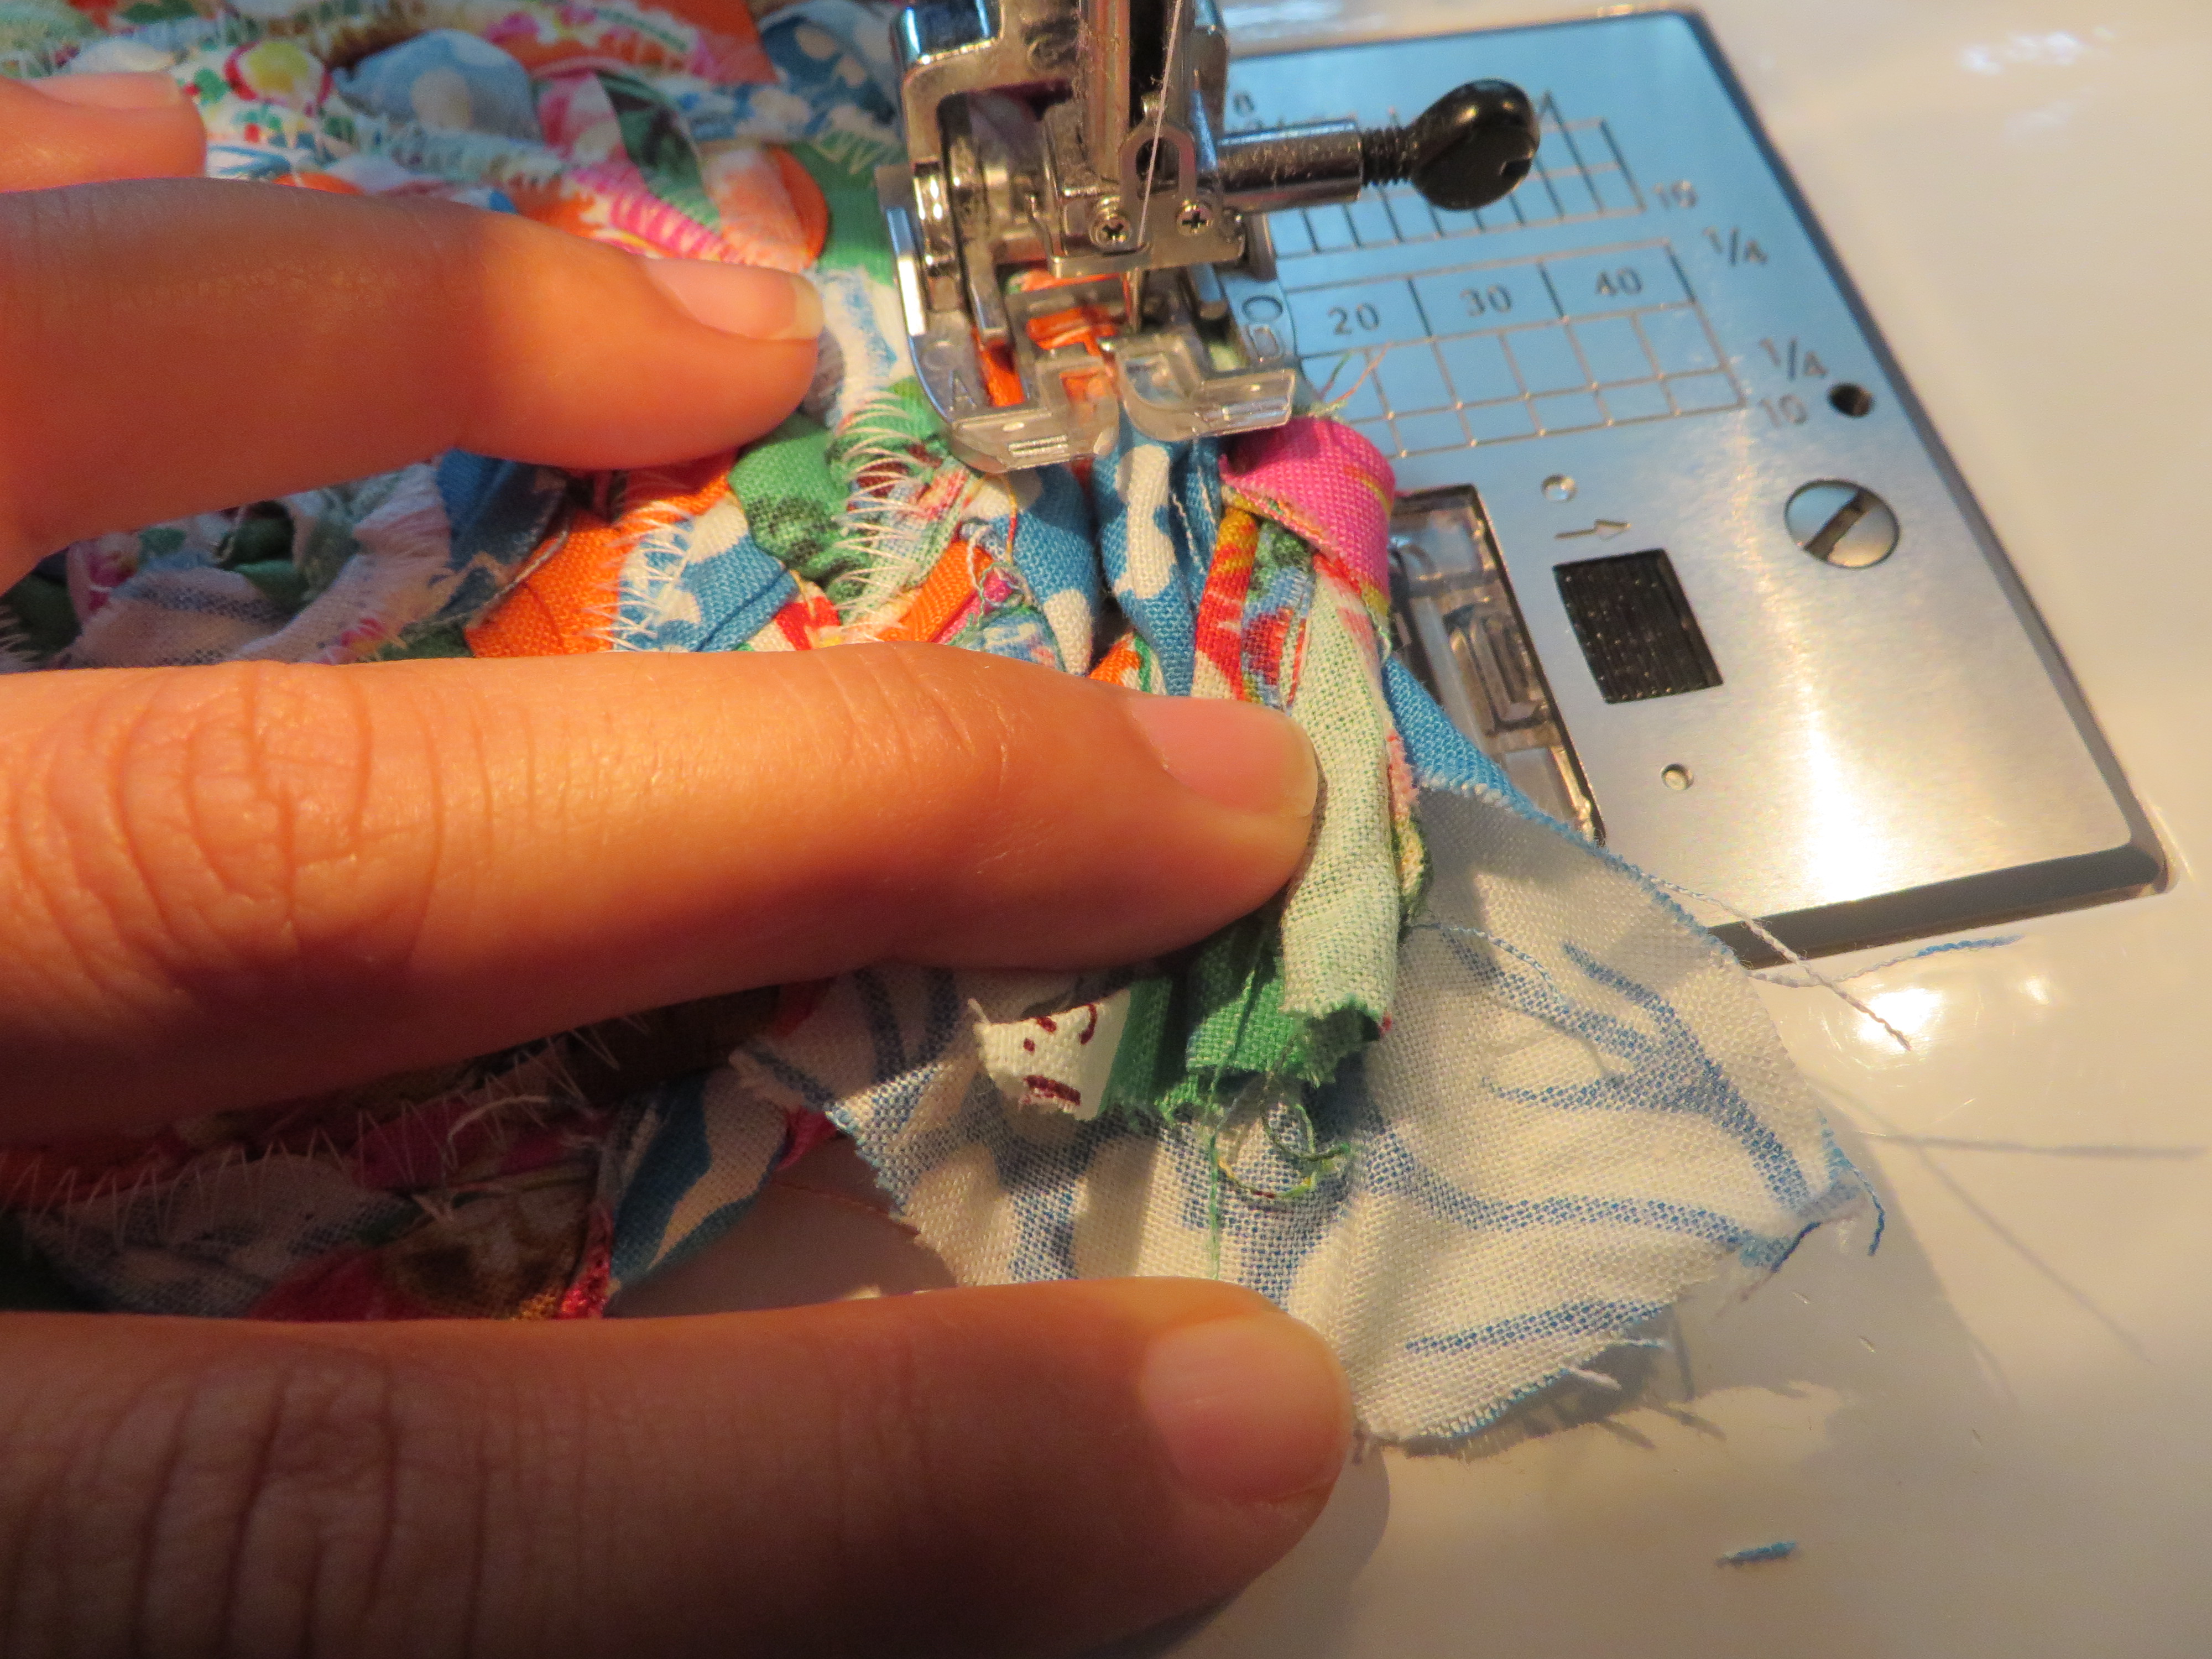
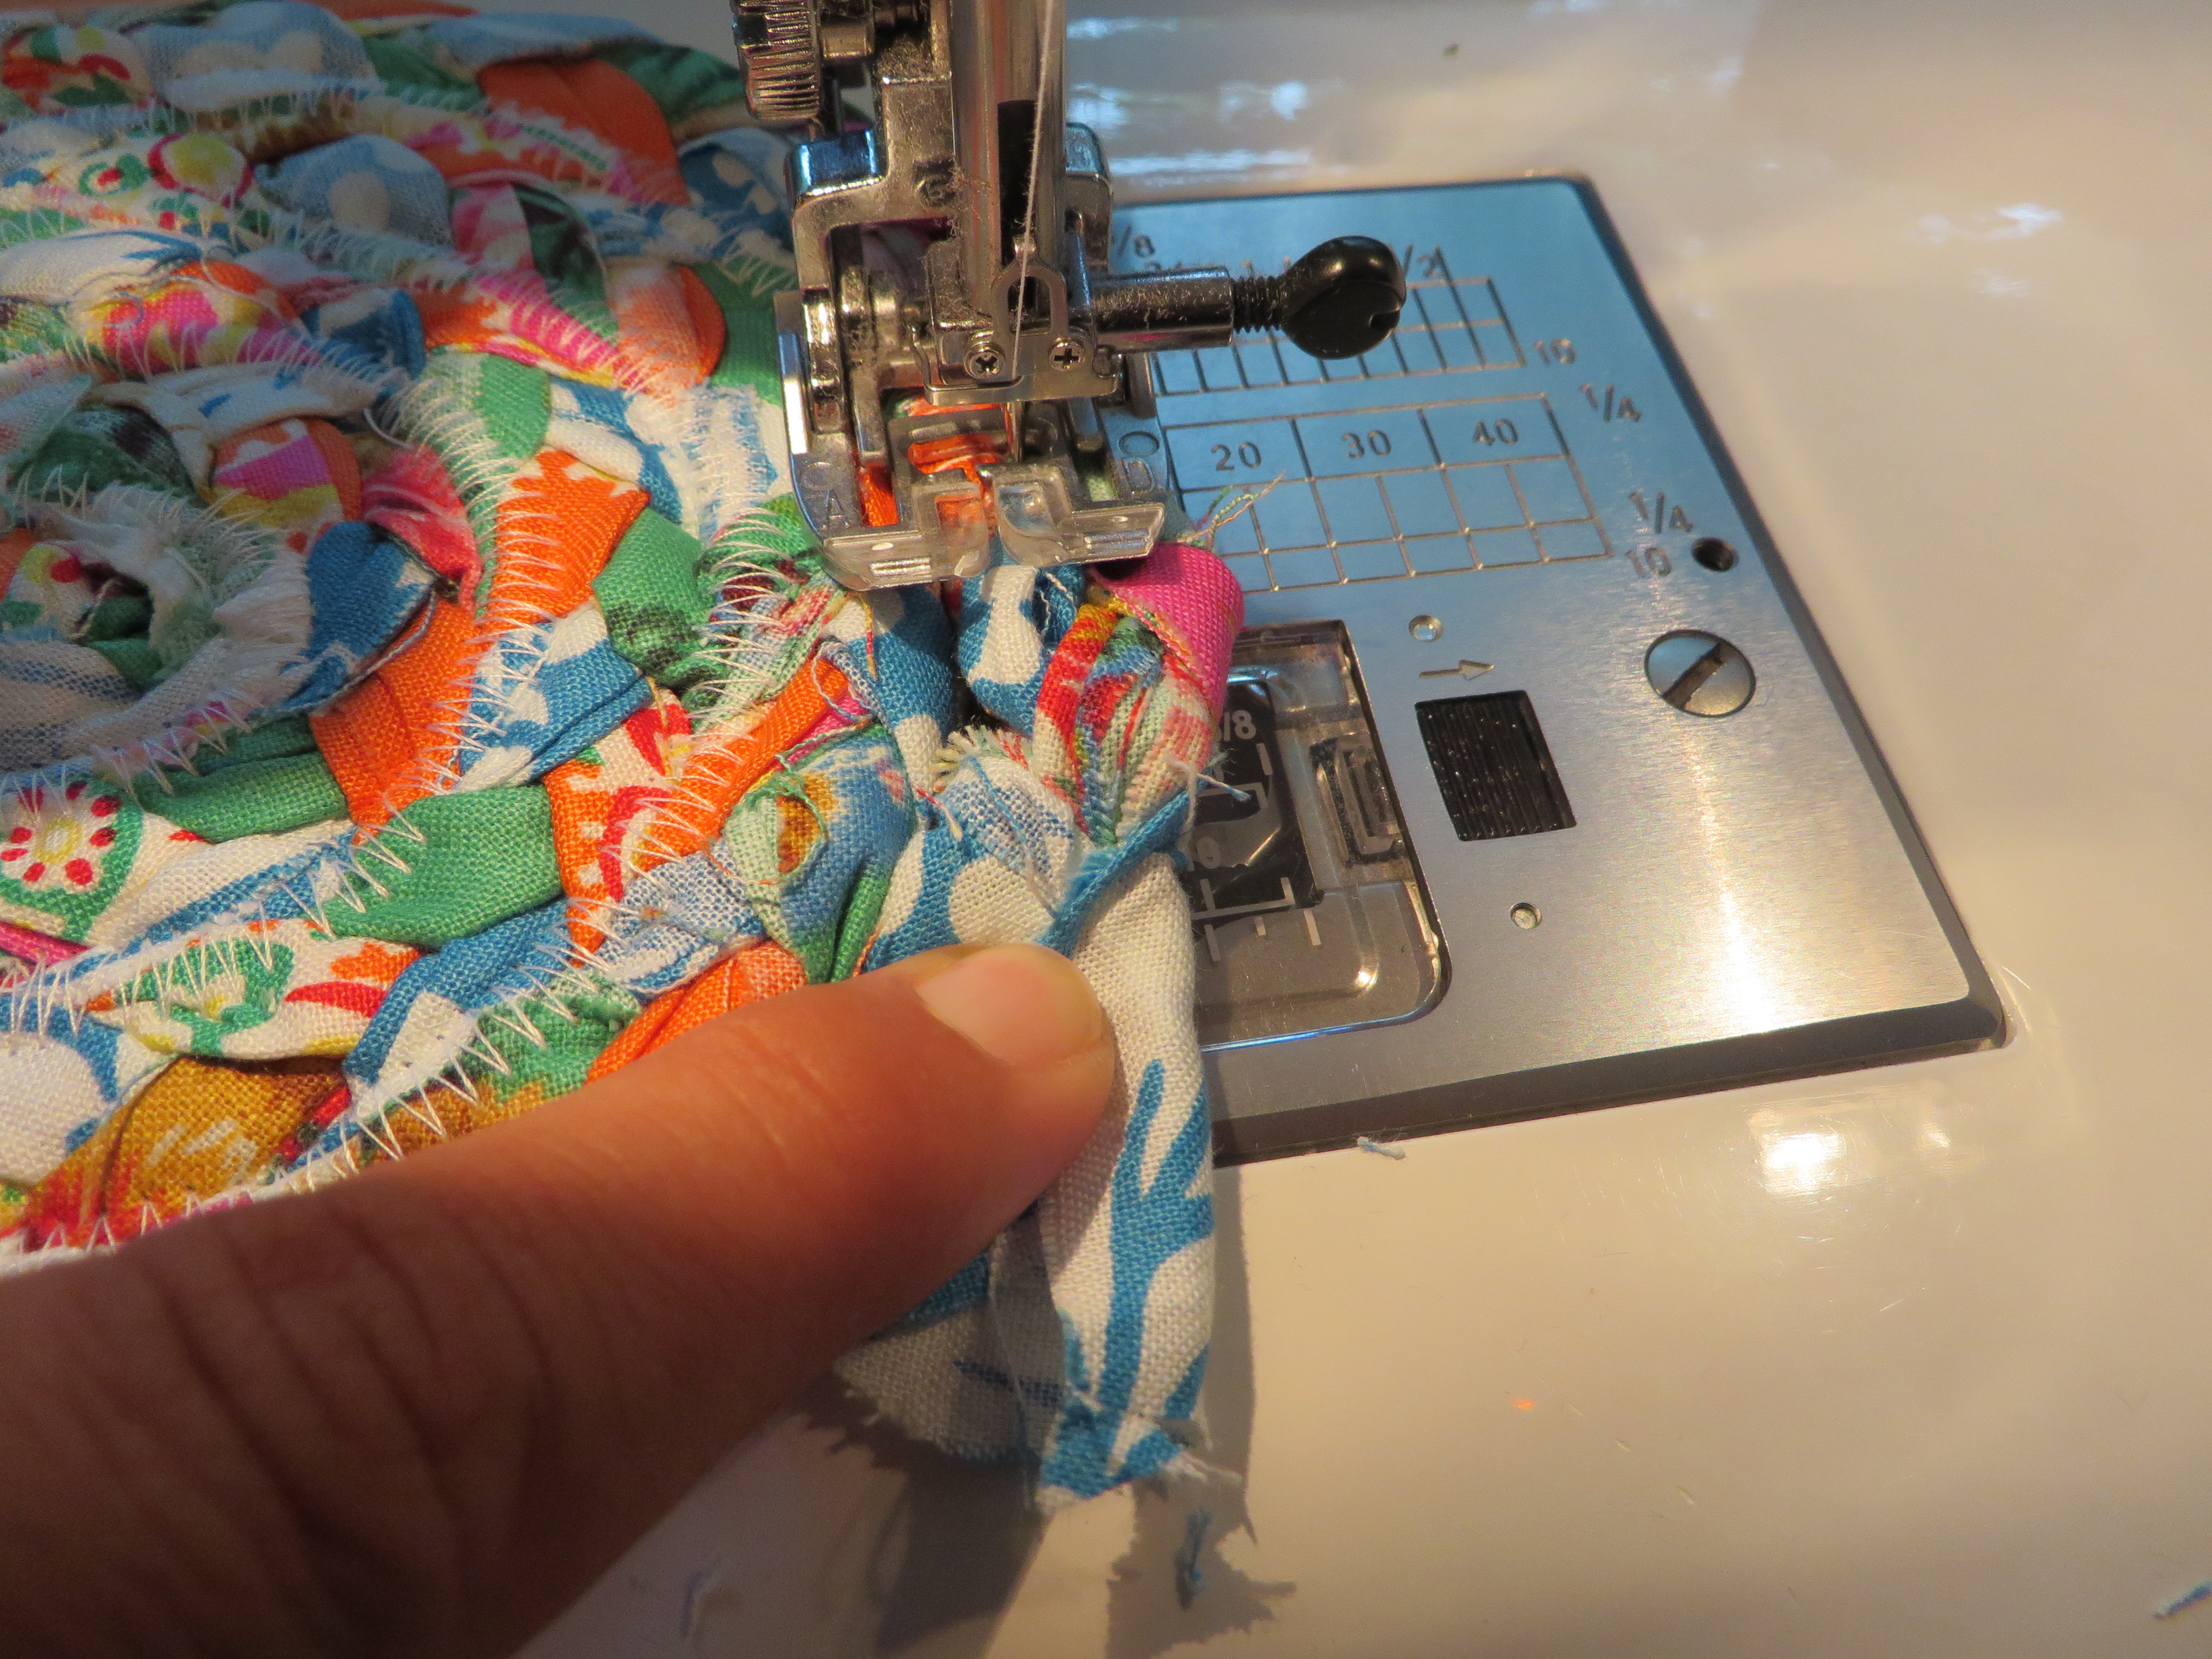
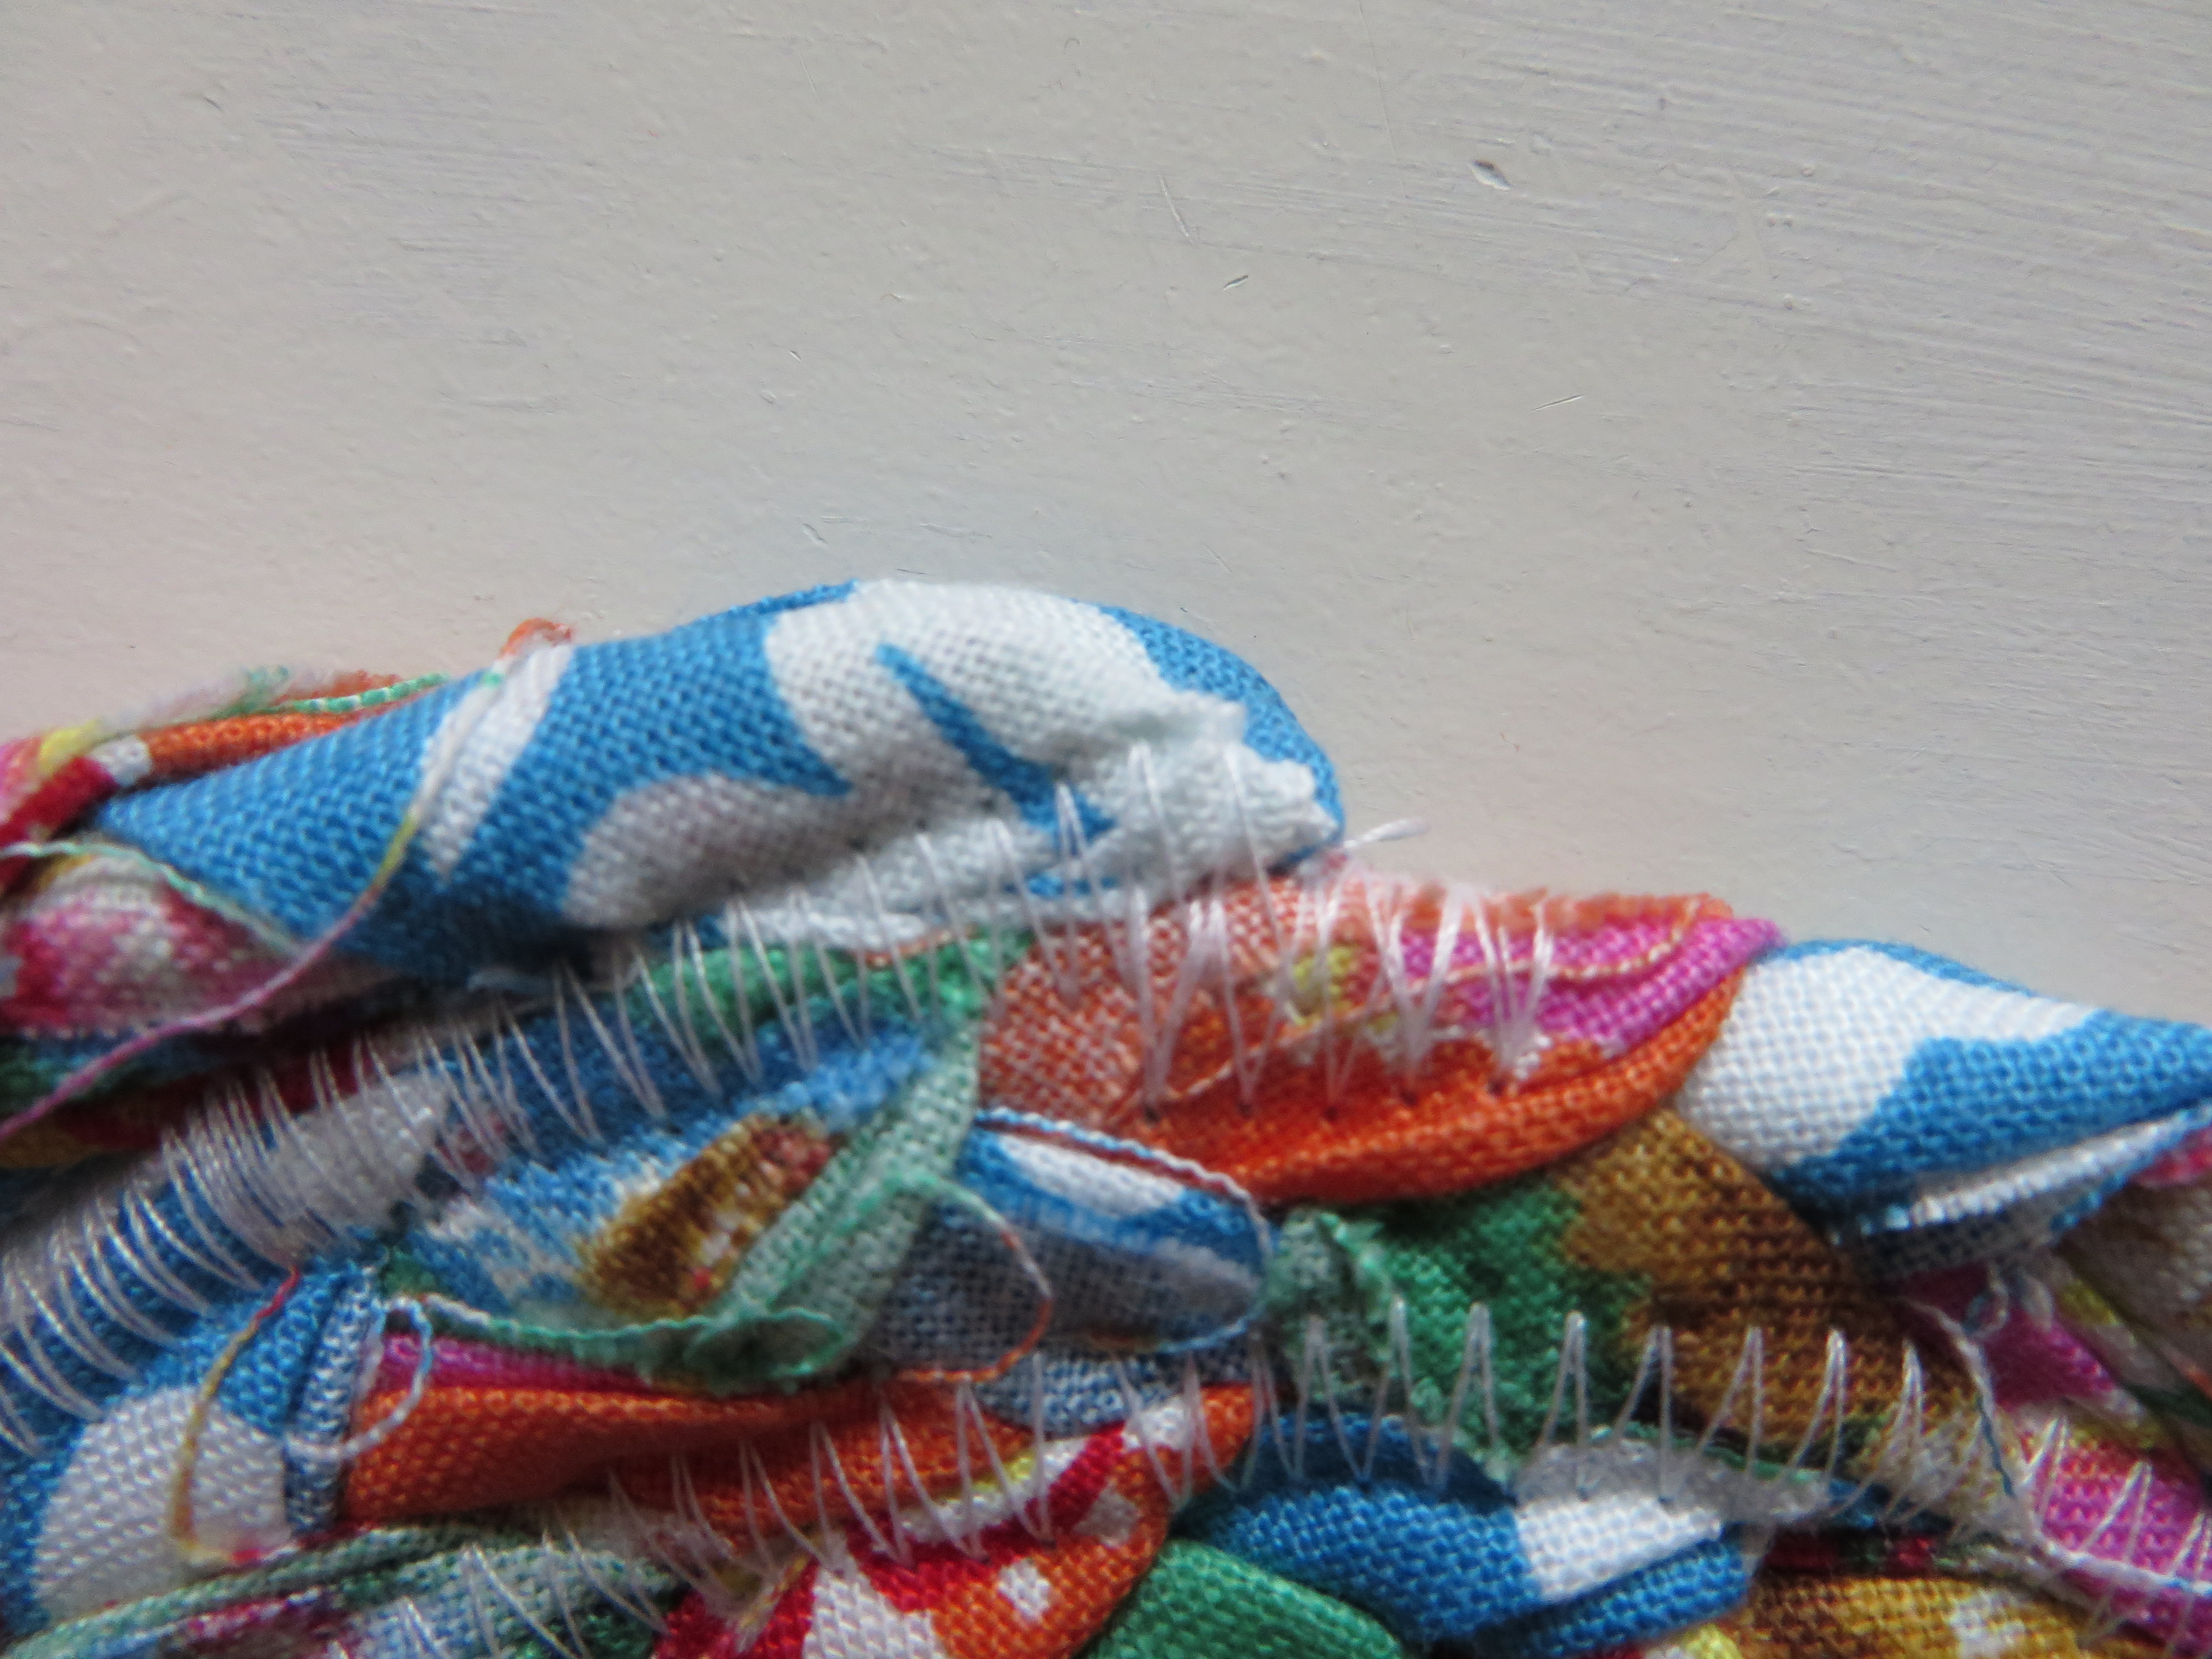
And I’ll end by sharing this nightmare:

IMG_1225

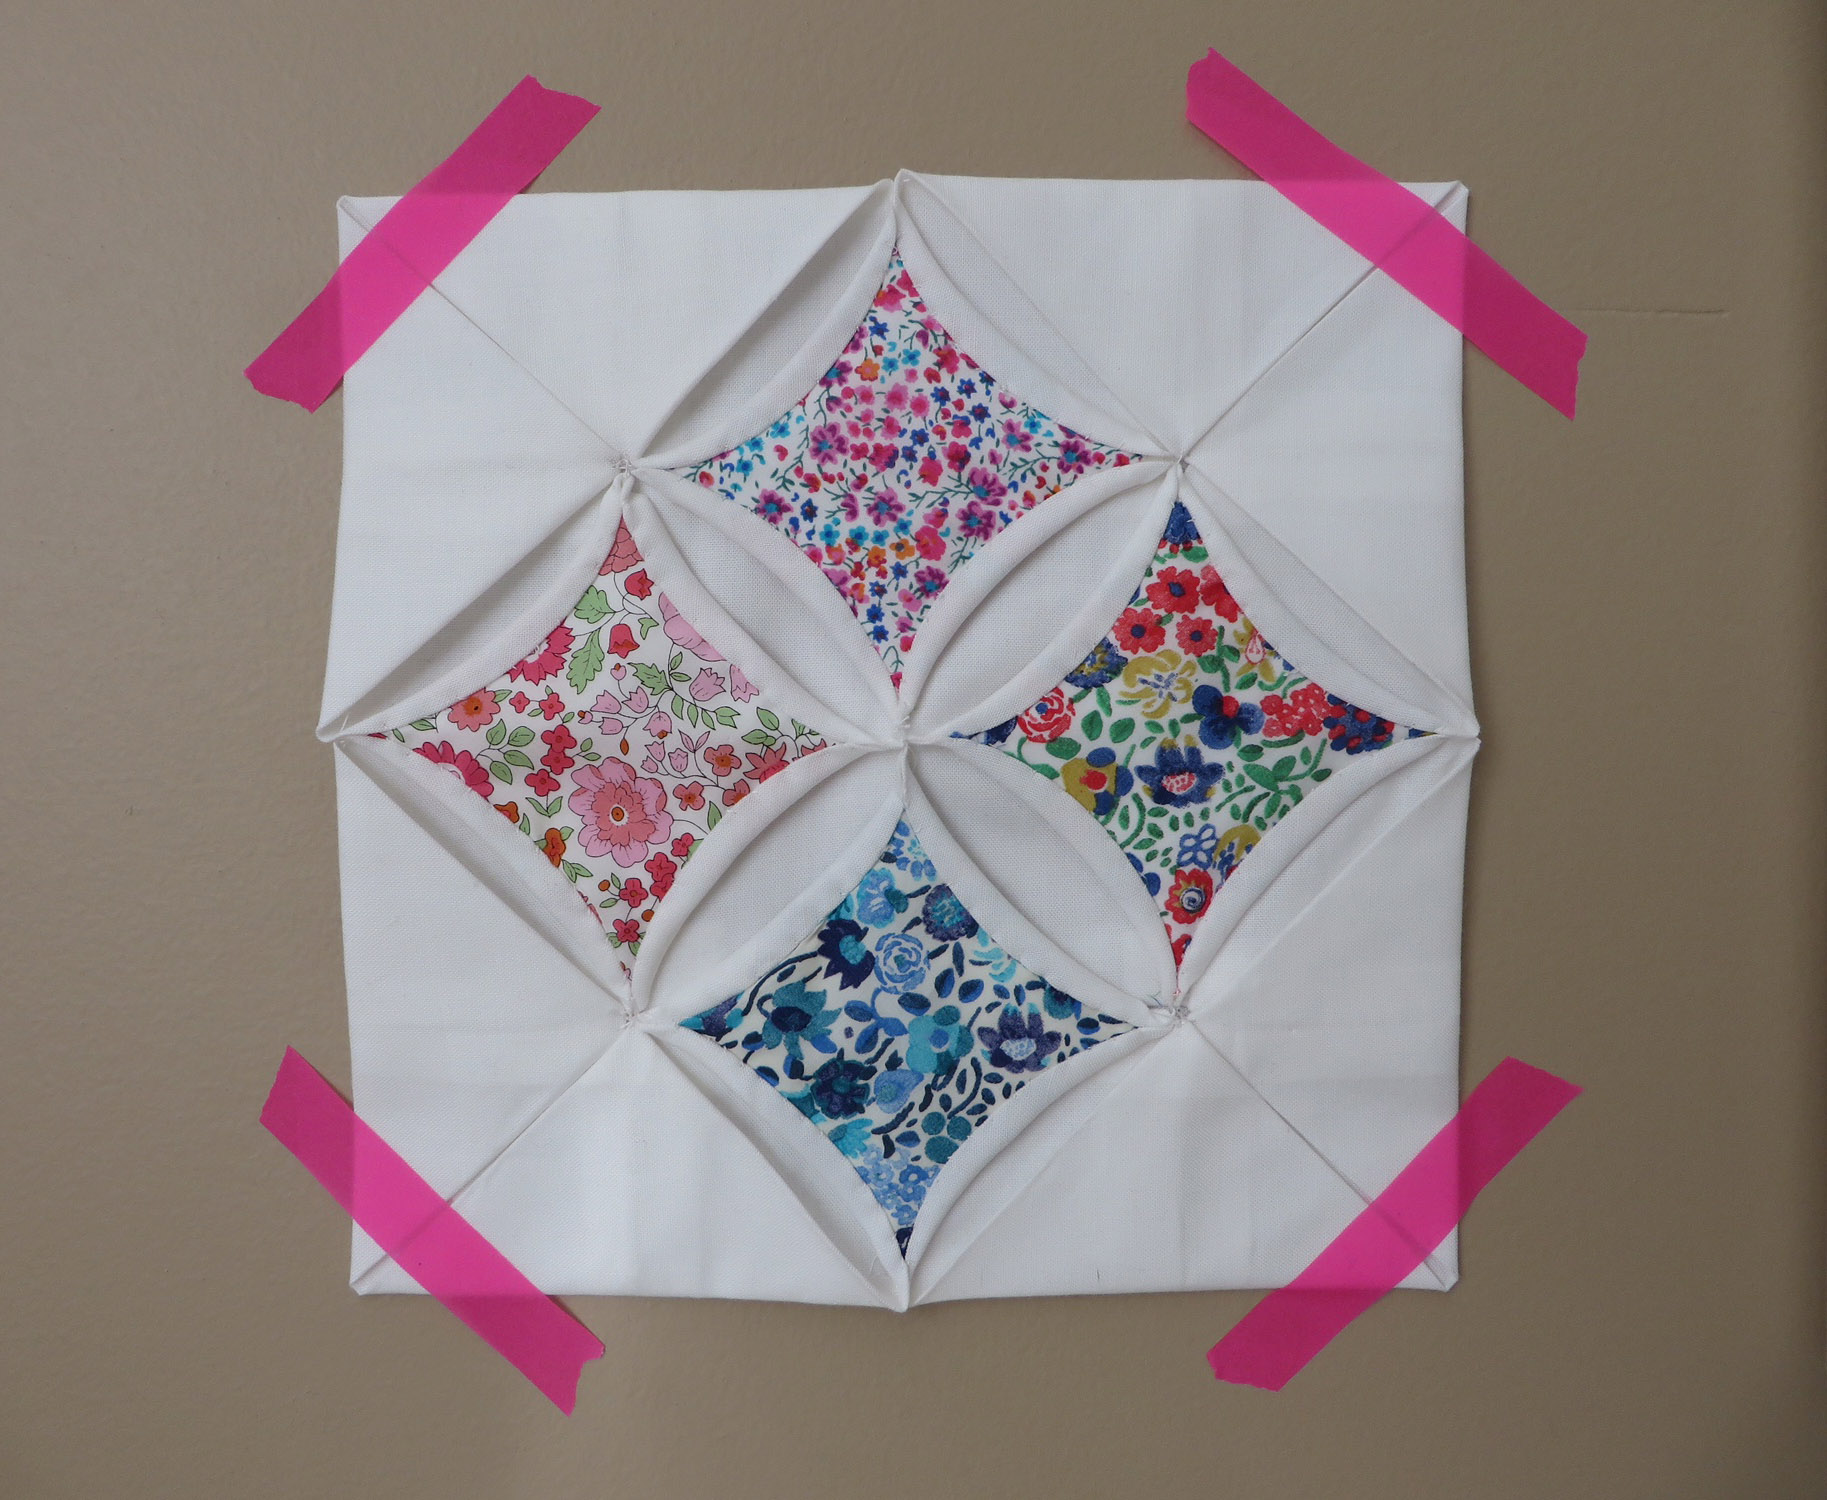
If you follow me on Instagram you know I hated this process. I am SO glad I didn’t pre-cut a bunch of fabrics before attempting Cathedral Windows.  Pain.In.The.Ass.  That’s all I have to say about that.

Here I come 2015 with my plan to tackle you.  I will…

Grow Creatively by:

  • Using the Long Arm more – even just to practice on whole cloth
  • Won’t be afraid to try different FMQ patterns, even if I don’t think I’ll like them
  • Finish the To-Quilt list
  • Work on the To-Make list
  • Don’t add to these lists
  • No new projects until the above lists are halfway done
  • Fabric Diet – to use more of what I have
  • Keeping my space clean, I work better this way
  • Stay minimal on swaps this year
  • More selfish sewing so I can explore without being nervous
  • Weekly Zentangle
  • Trying what makes me uncomfortable (cathedral windows, zentangle, sewing curves, etc.)

So…  that’s about it.   Writing this post is another thing I can scratch off my to-do list!  I’m looking forward to 2015 and making it a year of finishes.

Happy New Year to you!


siggy


December 23rd, 2014

Christmas Stockings

by Julie Hirt

After seeing Sarah’s gorgeous stockings on Instagram, I knew I had to make my own.

IMG_1156

You have to see her versions – they are amazing.  I love her style and how she works black or navy into projects.

I had a vague idea of how she put them together, but the binding was puzzling me.  Luckily she put together a tutorial and it’s super helpful. I think the binding gives an old fashioned feel to new fabrics.

IMG_1153

I used a Moda charm pack and some Kaufman linen in natural to make these for Tori and Liz.  Before this fabric is hard to find I’m going to pick up another charm pack and make a pair for Paul and myself.

Did you get all of your holiday sewing projects finished?


siggy


December 18th, 2014

Christmas Mini Quilt

by Julie Hirt

Isn’t it cute?!

IMG_1074

As soon as I saw the free pattern from Bunny Hill Designs I knew I had to make it.   I used the same line of Moda fabrics Bunny Hill used, which is 25th & Pine by Moda.

This is a great base pattern – I’d like to try it with a different center motif and other fabrics so I can look at it all year.

IMG_1076

I did change up the deer shape a little but used the same style of quilting for the center.  In hindsight, I would add the deer AFTER quilting.  That was a lot of starting, stopping and tying off.

IMG_1075

Going outside my comfort zone I tried something new with quilting around the charms.  I’m really proud of myself! Since it’s on the small side I used my regular machine for the quilting.

IMG_1080

This was really fun to put together and it’s surprisingly quick. I think it took me 11-12 hours from beginning to end, including the binding.   If you’re out of time to make one this year, save it for next!


siggy


October 10th, 2014

How To: Braided Rag Rug Coaster

by Julie Hirt


ragrugtutorial


I’ve been wanting to make these for a while so I thought I’d put together a little tutorial.  It’s Jelly Roll friendly if you have any leftover strips lying around.   The final result is a 5″ wide, thick, absorbent coaster.

Fabric Options – 4 Coaster Set

  • 1 yard of fabric (cut into [12] 2.5″ strips)
  • or  1/3 yard each of 3 different fabrics (cut each into [4] 2.5″ strips)
  • or  12 Jelly Roll Strips


VIDEO BELOW!

Grab 3 Strips

IMG_0674

Start braiding with medium pressure, you don’t want it too tight or too loose.  To hold mine in place I pinned one end to the design wall.

IMG_0675

Take one end and push the end pieces up against the sides to start your coil.

IMG_0677

Set your machine to a wide zig zag stitch and tack a few stitches to start.

IMG_0679
Keep stitching around and keep your braid laid flat.  Try to have the coil on the left and the braid on the right meet in the middle. This way the zig zag stitch will catch both sides.

IMG_0681

IMG_0682

When you near the end, trim two of your pieces so they are a little shorter than the 3rd.

IMG_0712

Wrap the longer piece around the other two.

IMG_0713

Fold the fabric end up and push it between the coil and remaining braid.

IMG_0714

No raw edges on the end.

IMG_0718

IMG_0729


Here’s a quick little video:

embedded by Embedded Video

YouTube Direkt


Here are a few examples of other fabric choices:

IMG_0688

IMG_0728

The plaid shirting is the same on both sides, so I didn’t have to worry about too much ‘wrong side’ showing on the braids.

IMG_0689   IMG_0727

I really like these because they are thick, super absorbent, and fast to make.

IMG_0720


I have a few sets available for sale in my Etsy shop here, here and here!


siggy


October 3rd, 2014

Free Split Hatchet Paper Piecing Pattern

by Julie Hirt

Last month I was featured in Online Quilting Magazine with a new paper piecing tutorial.  I call it Split Hatchet.

SplitHatchet

I was asked to provide detailed instructions for people that are new to paper piecing, so I wanted a simple block that still holds some interest.

At the time I was working on my Gypsy Wife quilt and had just finished a hatchet block. So there’s where the idea came from.


12c_indianhatchet_med image source – susan dague quilts


Here is a hatchet quilt that I’m totally in love with. Vintage perfection. It shows how changing the direction of the blocks creates an entirely different look.

You could do O’s (like I did), XO alternating, all one direction like above, every group of 4 a different direction, or even play with a zig zag look.


split hatchet 2


The templates come in sizes 3″, 4″, 5″ and 6″.  Mine is using the 5″ version.  The smaller template sizes really help eat up some of those tiny fabric scraps.

Download the Paper Piecing instructions, there are a lot of photos for guidance.

Download the templates here or here.


If you aren’t familiar with Online Quilt Magazine, you should sign up! It’s a free publication that is emailed to you each month.

Have a wonderful weekend –


siggy


September 29th, 2014

Crochet Edged Pillowcases

by Julie Hirt

I’ve been wanting to make some crochet trimmed pillowcases for a long time and I must say, it is totally satisfying.

crochet pillowcase 627handworks (7)

The vintage crochet trimmed pillowcases are nice but they tend to have the finer crochet thread and most are just too frilly for me.  What I consider to be modern spin offs (here, here and here are some great examples) are so bright and colorful; I had to make some.

crochet pillowcase 627handworks (6)

The fabric I chose is MY FAVORITE FABRIC IN ALL THE LAND.   Seriously.  The print was one of the first fat quarters of fabric I purchased back in 2010.  I was on a mission to find more and posted about it here.  Miracle of miracles, Leslie in Wisconsin (I love you, Leslie) had 2 yards of this glorious fabric and was willing to do a fabric and chocolate exchange for it.  Umm… yes!  I feel like I got the better end of this deal.   When the sweetness arrived I was very much:

myprecious

I’ve been sitting on the fabric for a few months trying to decide the *perfect* use for it. I didn’t want to use it as backing and I wanted to be able to see, touch and pet it at whim.   When I remembered the crochet pillowcases it was a ding! ding!  moment.   I have king size pillows so I squeezed the most out of the 2 yards and was able to make 2 pillowcases.  Not even a trim of fabric was left.

crochet pillowcase 627handworks (1)

There are several tutorials out there but I did use some white Kona to create my pillowcase flap.  It holds the pillow in place and just cleans up the look.  I love the look of the contrast fabric but didn’t want to take away from the exterior.

crochet pillowcase 627handworks (8)

The one thing I did change from the tutorials I’ve seen is the exterior blanket stitch.  I’ll try using it on some other pillowcases – yes, I’m definitely making more.

To get away from using the blanket stitch I marked every half  inch and used a basic back stitch within the seam:

crochet pillowcase 627handworks (3)

crochet pillowcase 627handworks (4)

crochet pillowcase 627handworks (2)

Well, there you have it.  I know this is a very lengthy post for some pillowcases but I can’t help it. I love this fabric.

crochet pillowcase 627handworks (5)

I’m lucky my husband could care less about our bedding.  I’m tempted to crochet trim the top sheet!  Or is that too much?


siggy

Related Posts Plugin for WordPress, Blogger...