February 25th, 2013

Game Boy Costume

by Julie Hirt

Time for a little back-blogging.

Made this Game Boy costume for a friend of mine for Halloween. She had spied something similar on Pinterest and it was SUPER easy to make.  Get some stretchy material and make a simple tube dress.  Then cut out the felt pieces and sew them on!

gameboy

Don’t have a picture of the night she wore it, but luckily we snapped this one when she was trying it on. I think we still had a couple of adjustments, but it turned out pretty cute.

Share
February 19th, 2013

Weekender Bag Fabric Choices

by Julie Hirt

It’s taken me a while but I’ve figured out (and ordered!) my Weekender Bag fabrics.  I’m SO totally excited!  I saw Pink Chalk Studio’s bag and I about died from a love overdose on the fabrics.  Aren’t they perfect?  They Echino plane and Melody Miller phone…  *sigh*

I don’t fully trust myself to patch piece anything I’d truly love, so I decided to go with solids and mix up a few fabrics (and stealing some choices from Pink Chalk).  Since I LOVE all of these I figure I can’t go wrong.

AF-4116-B4_MED

RK-13501-9_MED

AF-5979-W_MED

RK-13503-24_MED

RK-9864-69Midnight_MED


  • Lizzy House Pearl Bracelet in Cosmonaut – Top, sides and side pockets
  • Carolyn Friedlander Architextures Text in Navy – Main side panels
  • Lizzy House Supernova in Purple – Large side pockets
  • Carolyn Friedlander Architextures Hatch in Plum – lining and exterior pocket linings
  • Robert Kaufman Quilter’s Linen in Midnight – Piping and handles

At first I was going to use some fat quarters from my Tina Givens Opal Owl bundle, but I wasn’t totally into it.  And for me to attempt this bag, I need to be.  Can’t wait for my fabric to arrive!

Share
February 18th, 2013

Crochet Edged Superstar Quilt

by Julie Hirt

WARNING – Picture heavy post!

star3

For some reason I just had no desire to finish this thing up.  I got this idea in my head that I really wanted to crochet a border for a quilt.  When we were on vacation in Florida the home we stayed in had a beautiful quilt with a crocheted edging, so I just had to make one.

star5


I’ll tell you what, trying to figure it out frustrated me to death.  First I bought an awl, then after playing with scraps realized my fingers would fall off before I punched all the way around a quilt (3 layers, ya know!).  I knew I didn’t want to blanket stitch all the way around. So I kept playing around with scraps and finally came up with something I was happy with, and wasn’t totally time consuming.

star6

star8

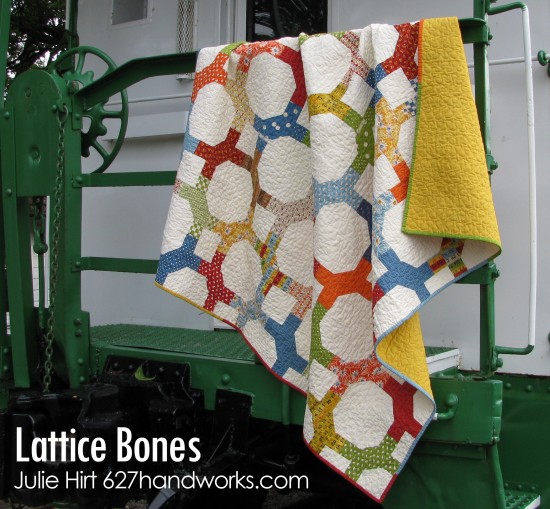
Recently I posted my pattern for my Superstar quilt and wanted to try something for the quilting. Following Oh, Fransson’s orange peel tutorial, I found it was relatively easy.  Now, don’t look too closely!  It was definitely a practice but I really like how it turned out.  Off kilter circles and all.

star2   star4

This quilt had a series of firsts for me:

  • Coming up with a pattern for the star with a single charm pack
  • FMQ the orange peel
  • Round quilt corners (just traced a cup and cut!)
  • Mitered corners on the border
  • Crochet border / binding

The crochet quilt edging definitely did not save time from traditional binding, but I love the look of it and it’s worth the effort.  Although, I’m not sure I’ll try it on a large quilt!  star7

To make the crochet edging I assembled the quilt a little differently.

  • I made a sandwich by stacking batting, backing (pretty side up) and quilt top (pretty side down). Sewed 1/4″ all  the way around leaving a 6″ gap for turning.
  • After turning I hand stitched the gap closed.
  • Then I stitched 1/4″ all the way around (after finishing, I realize this step can be omitted).
  • Then I pulled out my overcast M foot – pretty handy! I don’t really make clothing and such so I’ve never used it. Over-lock stitch all the way around the border.  (This is why the last step was unnecessary) This creates a nice little zig zag with thread overlaying the outer edge. I suggest using  a matching thread.

Now the tricky part.  Pull out a small metal crochet hook (I used 3.25mm) and thin yarn. Red Heart Baby Sheen was a nice size for me, it’s a fine yarn.

Between each overlock stitch there is a thread on the outside of the quilt, on the very edge.  Put your hook between under that thread and single crochet.  At first it seems really strange until you get going. I noticed where the thread makes a “V” on the blanket is directly below where I wanted my crochet hook.  This step takes a little time but you can do it.

After Single Crocheting (sc) all the way around, pick your design!  I chose a simple scallop pattern:  *5 DC, skip a stitch, slip stitch, skip a stitch and repeat from *.  When you get to the end you may have an extra stitch or two but just slip stitch to your beginning DC and tie off.

star10

star9

I just love the texture this created. If you know of a better method for adding a crochet border, let me know!  I did NOT want to blanket stitch all the way around, it just looks kind of messy to me.

Share
February 6th, 2013

Waldorf Star Variations

by Julie Hirt

For the holidays I went a *little* crazy with paper stars.  I made some Waldorf Window stars, German paper stars and even some fabric versions and a bunting.

Here are a few versions of the Waldorf stars that really brightened up our windows. After you understand the initial concept (see my original post) it’s so fun to play around with color and shapes.

starready

The ONLY supplies you need is the colored kite paper, some type of glue (I like rubber cement) and your fingers :)

3stars

Now that I’m seeing these again I want to make more and put some up. Are they ok to have up year ’round?

bluestar

They easily adhered to the windows with a little rubber cement. When you take them down the rubber wipes off like a breeze. I am storing them in a round hat box for safe keeping.

rainbowstar

The wax dipped German 3D stars and fabric stars are a completely different style and I’ll do a separate blog on those tomorrow.  They are all SO addicting and fun!


Share
February 5th, 2013

Weekender Bag Pattern

by Julie Hirt

Gack!  The pattern arrived in the mail today.  I’m actually terrified of making this bag after reading reviews about the pattern all these years.  This pattern is what first got me interested in sewing a couple of years ago.  I’ve decided it’s go time and nothing can hold me back. Right? Eeek.


butler


I still have NO CLUE what fabric to use, I think that’s my biggest hold up at this point.  I’m going to use Oh, Frannson’s patchwork panels to avoid some of the interfacing. I’ve been reading so many tips and tricks and have my little list ready. Still pretty daunting… wish me luck!


Share
February 2nd, 2013

Florida & the Vintage Sheet Beach Blanket

by Julie Hirt

Last summer we spent a gorgeous week in SW Florida.  I really wanted a nice beach blanket for us to lay our towels and bags on without them getting all sandy. Sorry, but laying towels in the sand just doesn’t work for me! Having just purchased a bunch of vintage sheets I decided to cut some up and and back it with an old cotton matelasse coverlet.  I hand tied it on all the corners of the blocks for a more vintage feel.

blanket

Fortunately I caught a few images of beach blanket with our vacation pics.  We used it every day and it was easy to pack up and carry around with two sewn in, wrap around velcro straps.

IMG_1572

IMG_1595
The house we stayed in had a gorgeous quilt that had an awesome crochet border.  I totally forgot about that!  I’m going to try to figure out how to do it on a baby blanket. I hogged this to myself every evening!  Does anyone know how to add crochet to a blanket?  I remember it did not have a regular binding and was hand quilted. Almost like the crochet edging came out from the layers, although I know it was done after it sewed together. (it wasn’t sandwiched in)

IMG_1641

Every morning Paul and I were a lucky, lucky couple and wake up to THIS.  Ahh… I wanna go back. It’s miserably cold here right now.  Beautiful room and pretty sunrises every morning. I actually woke up early to see them (I’m typically a late sleeper) and had my coffee on the beach.

beach house

IMG_1536

IMG_1532

I’ll leave you with a few more warm memories. I think I need to get busy on planning this years trip and do some wishful thinking!

IMG_1535

IMG_1588

IMG_1589

IMG_1666

Oh…. see this right here?  On low tide we planted an umbrella super deep and all day we floated around it!  We stayed in a small town and had the beach to ourselves, so it was nice and quiet. Just what a vacation should be.

IMG_1679

IMG_1740


Related Posts Plugin for WordPress, Blogger...
Share